Elastic Volumes in Cloud7 provide scalable and persistent block storage for instances. Customers can create, manage, and attach volumes to instances, allowing for flexible storage expansion as per business requirements. This guide covers listing, adding, editing, and deleting Elastic Volumes within the customer interface of Cloud7.
Elastic Volumes offer robust and flexible storage management for instances. Customers can seamlessly provision, modify, and manage their storage resources based on their business needs while taking advantage of Cloud7’s unified billing and reporting features.
List Elastic Volumes #
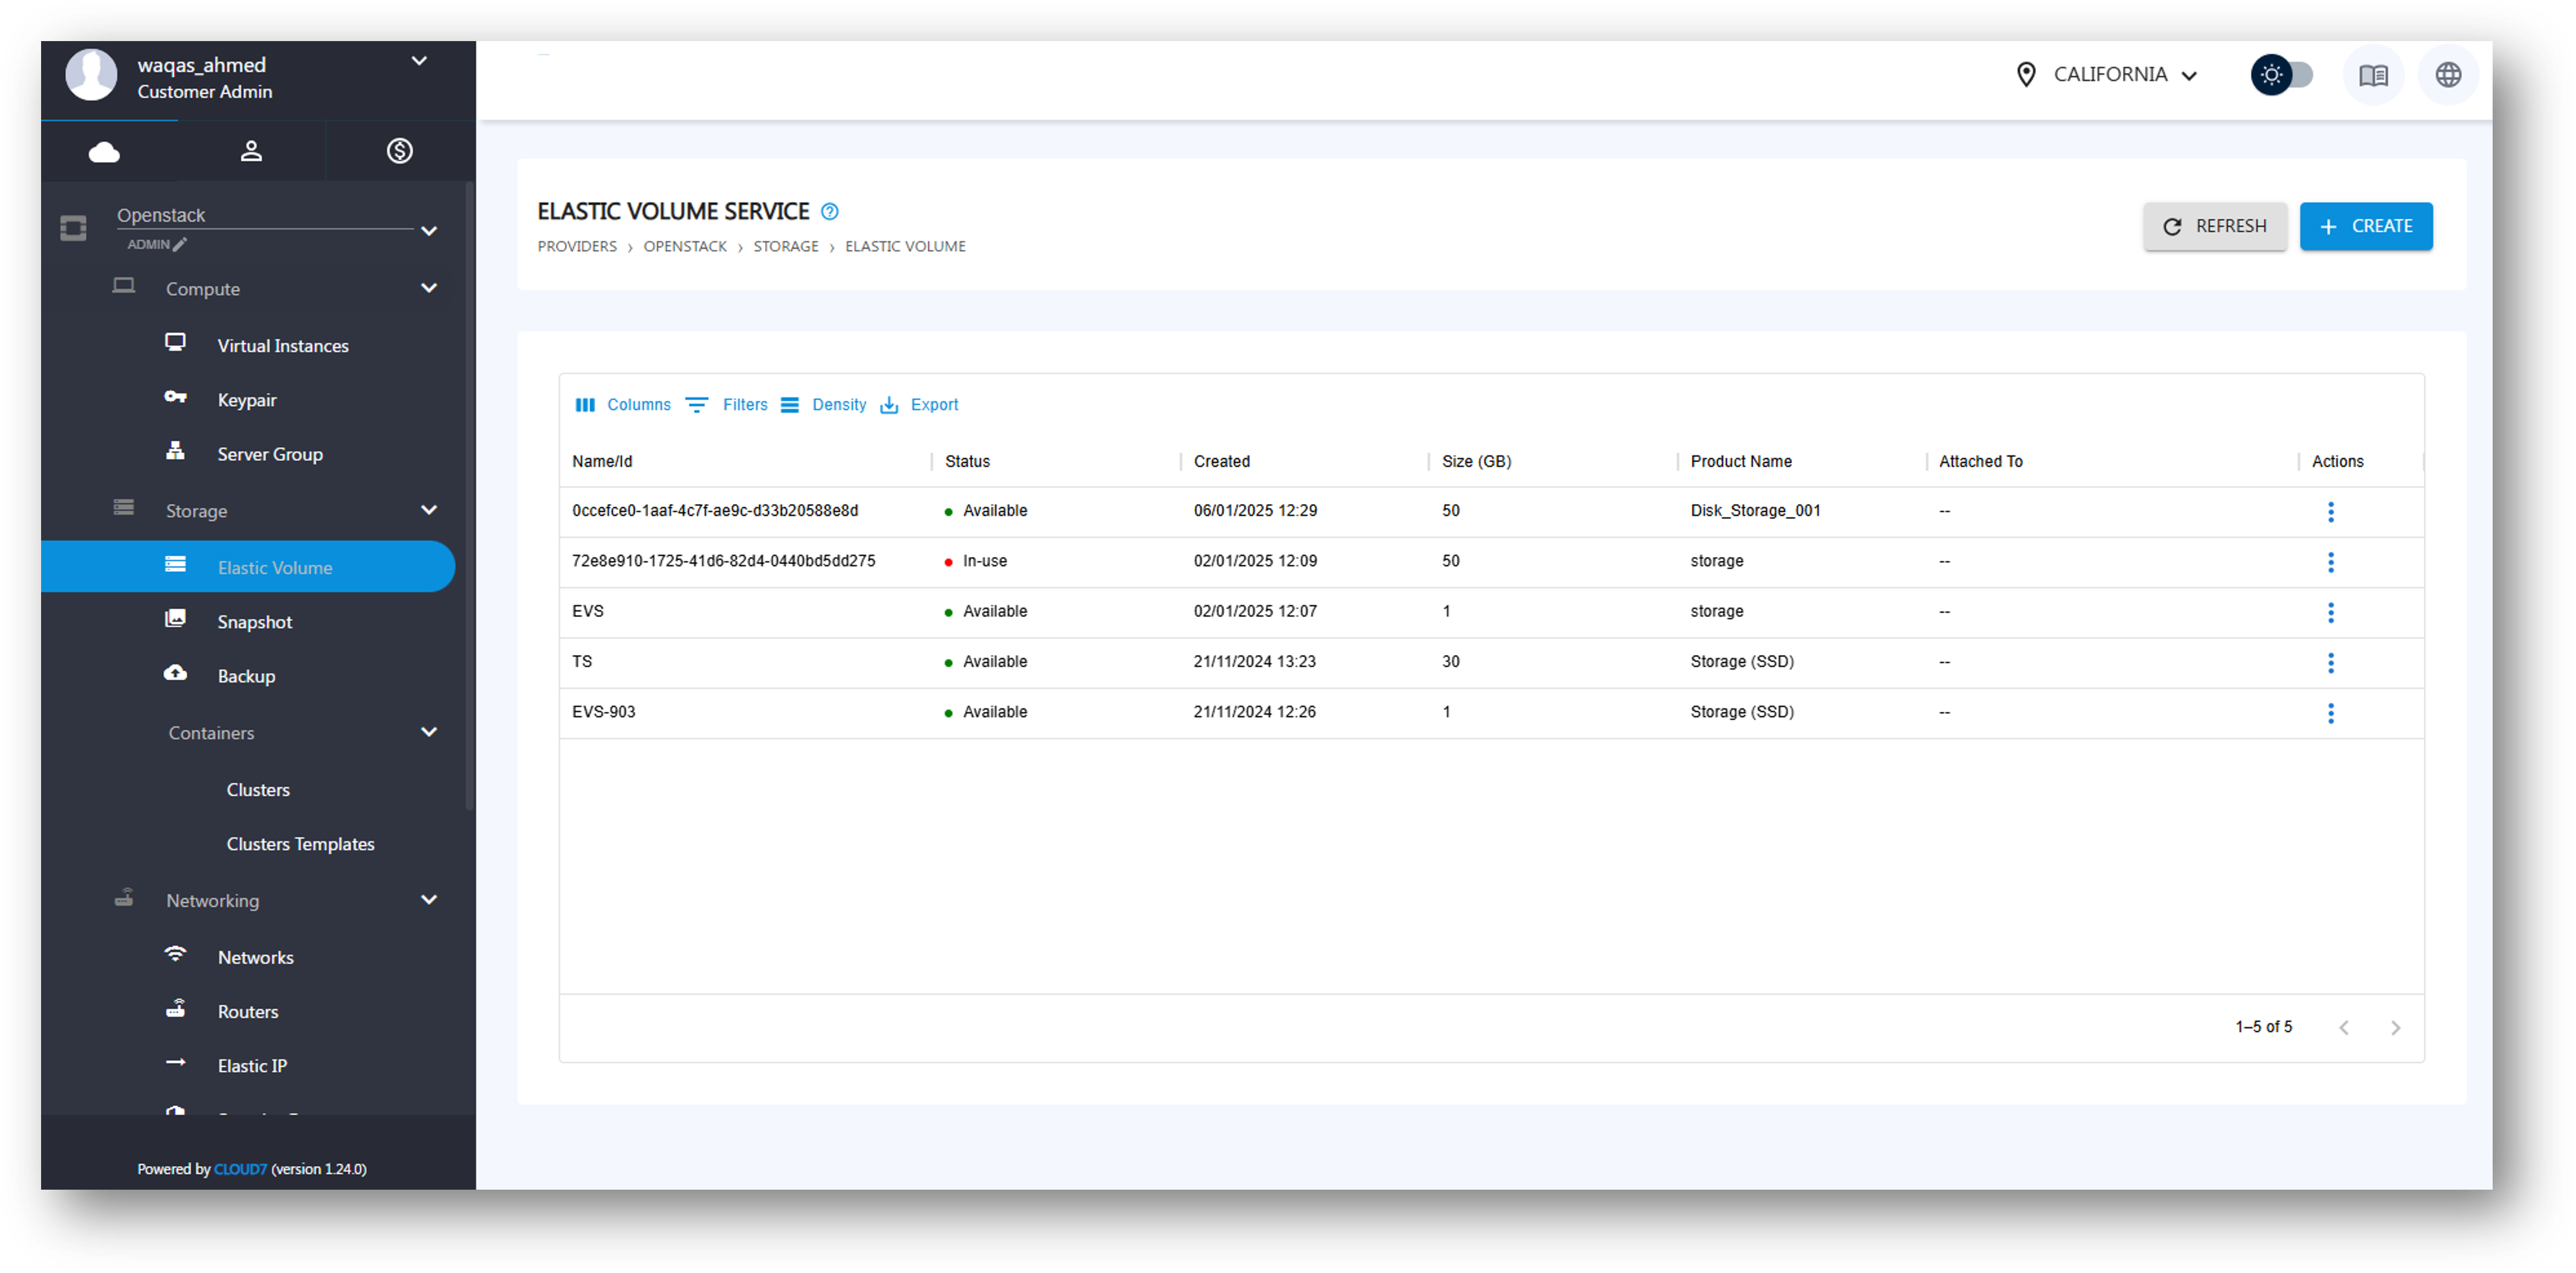
To access the Elastic Volumes section:
- Log in to the Cloud7 Customer Interface.
- Navigate to Providers >> OpenStack >> Storage >> Elastic Volumes.
- The Elastic Volumes listing page will display the following columns:
- Name/ID: The unique identifier for the volume.
- Status: The current state of the volume (e.g., Available, In-use, Error).
- Created: Timestamp of when the volume was created.
- Size (GB): The total storage size allocated to the volume.
- Product Name: The specific storage type selected during creation.
- Attached To: Shows the instance(s) to which the volume is attached.
- Actions: Various management options available for each volume.
Add Elastic Volume #
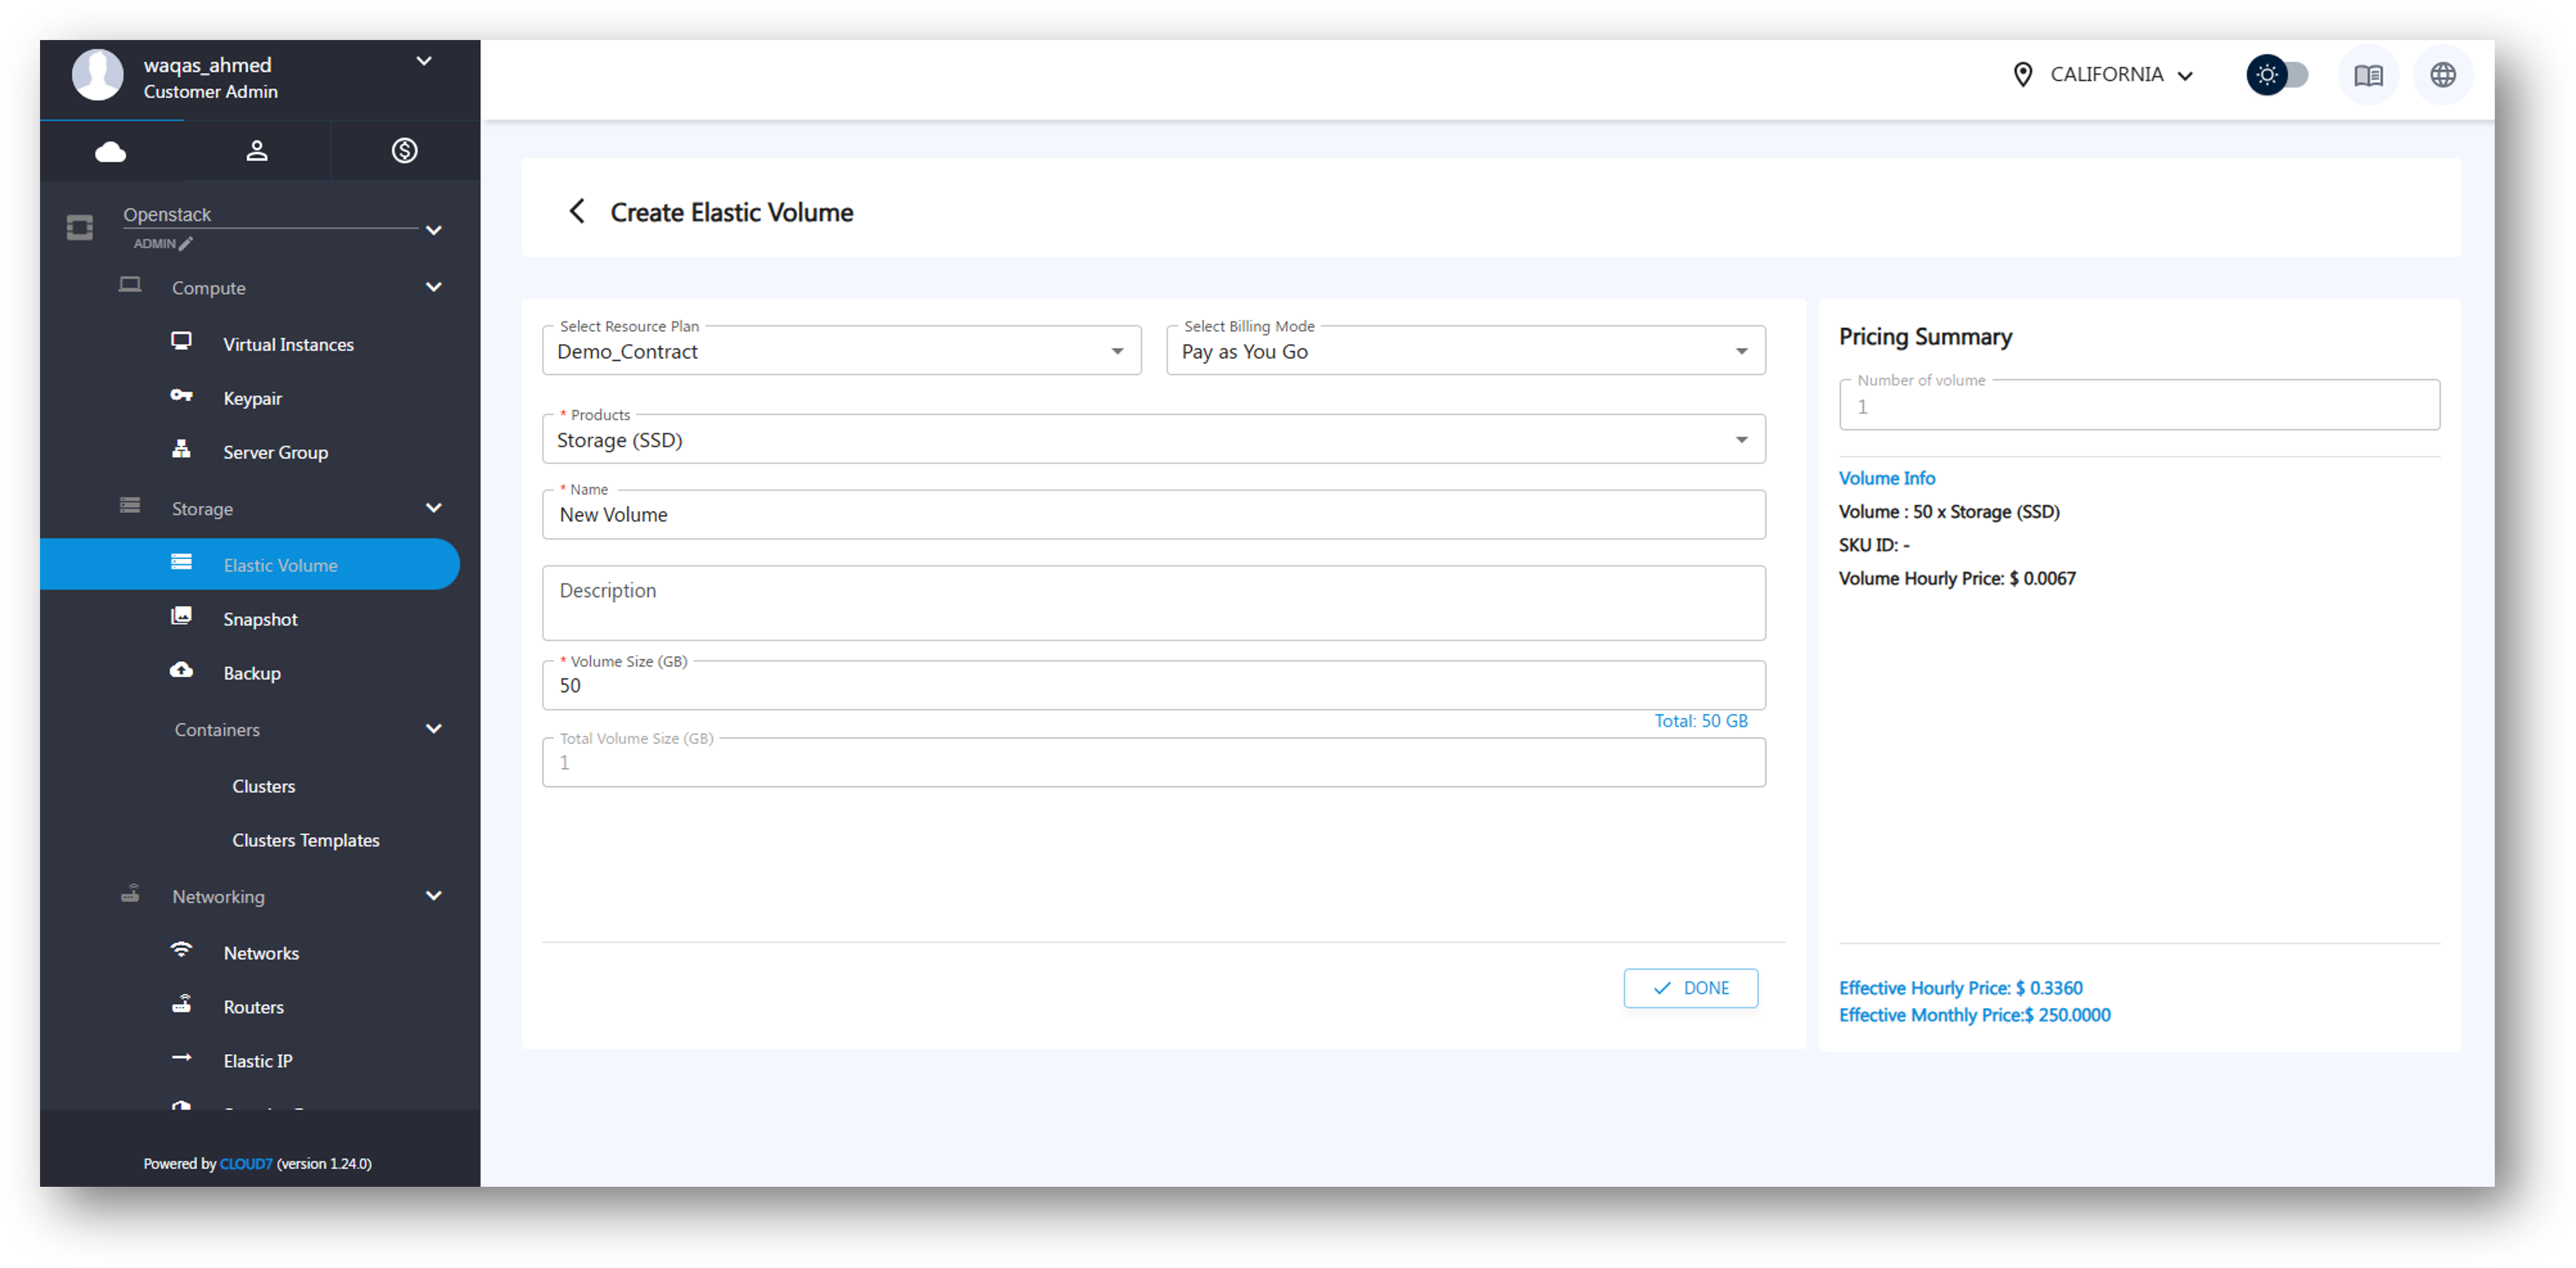
To create a new Elastic Volume, follow these steps:
- Click on the Add Volume button.
- Fill in the required details:
- Select Resource Plan: Choose the appropriate plan for volume allocation.
- Select Billing Mode: Choose from:
- PAYG (Pay-As-You-Go): Charged based on usage.
- Bundle: Predefined storage and pricing package.
- Reservation: Dedicated storage with long-term commitment.
- Select Products: Choose the storage type (e.g., SSD, HDD, NVMe, etc.).
- Name: Assign a unique name to the volume.
- Description: (Optional) Provide additional details about the volume.
- Volume Size (GB): Specify the required storage capacity.
- On the right side, view the Pricing Summary based on the selected options.
- Click Create Volume to provision the storage.
Edit Elastic Volume #
To modify volume details:
- Navigate to the Elastic Volumes listing page.
- Locate the volume and click Edit Volume under the Actions menu.
- Update the Name or Description as required.
- Click Save Changes to apply the updates.
Delete Elastic Volume #
To remove an Elastic Volume:
- Navigate to the Elastic Volumes listing page.
- Locate the volume you wish to delete.
- Click Delete under the Actions menu.
- Confirm the deletion prompt.
- Note: A volume cannot be deleted if it is currently attached to an instance.
Actions Available for Elastic Volumes #
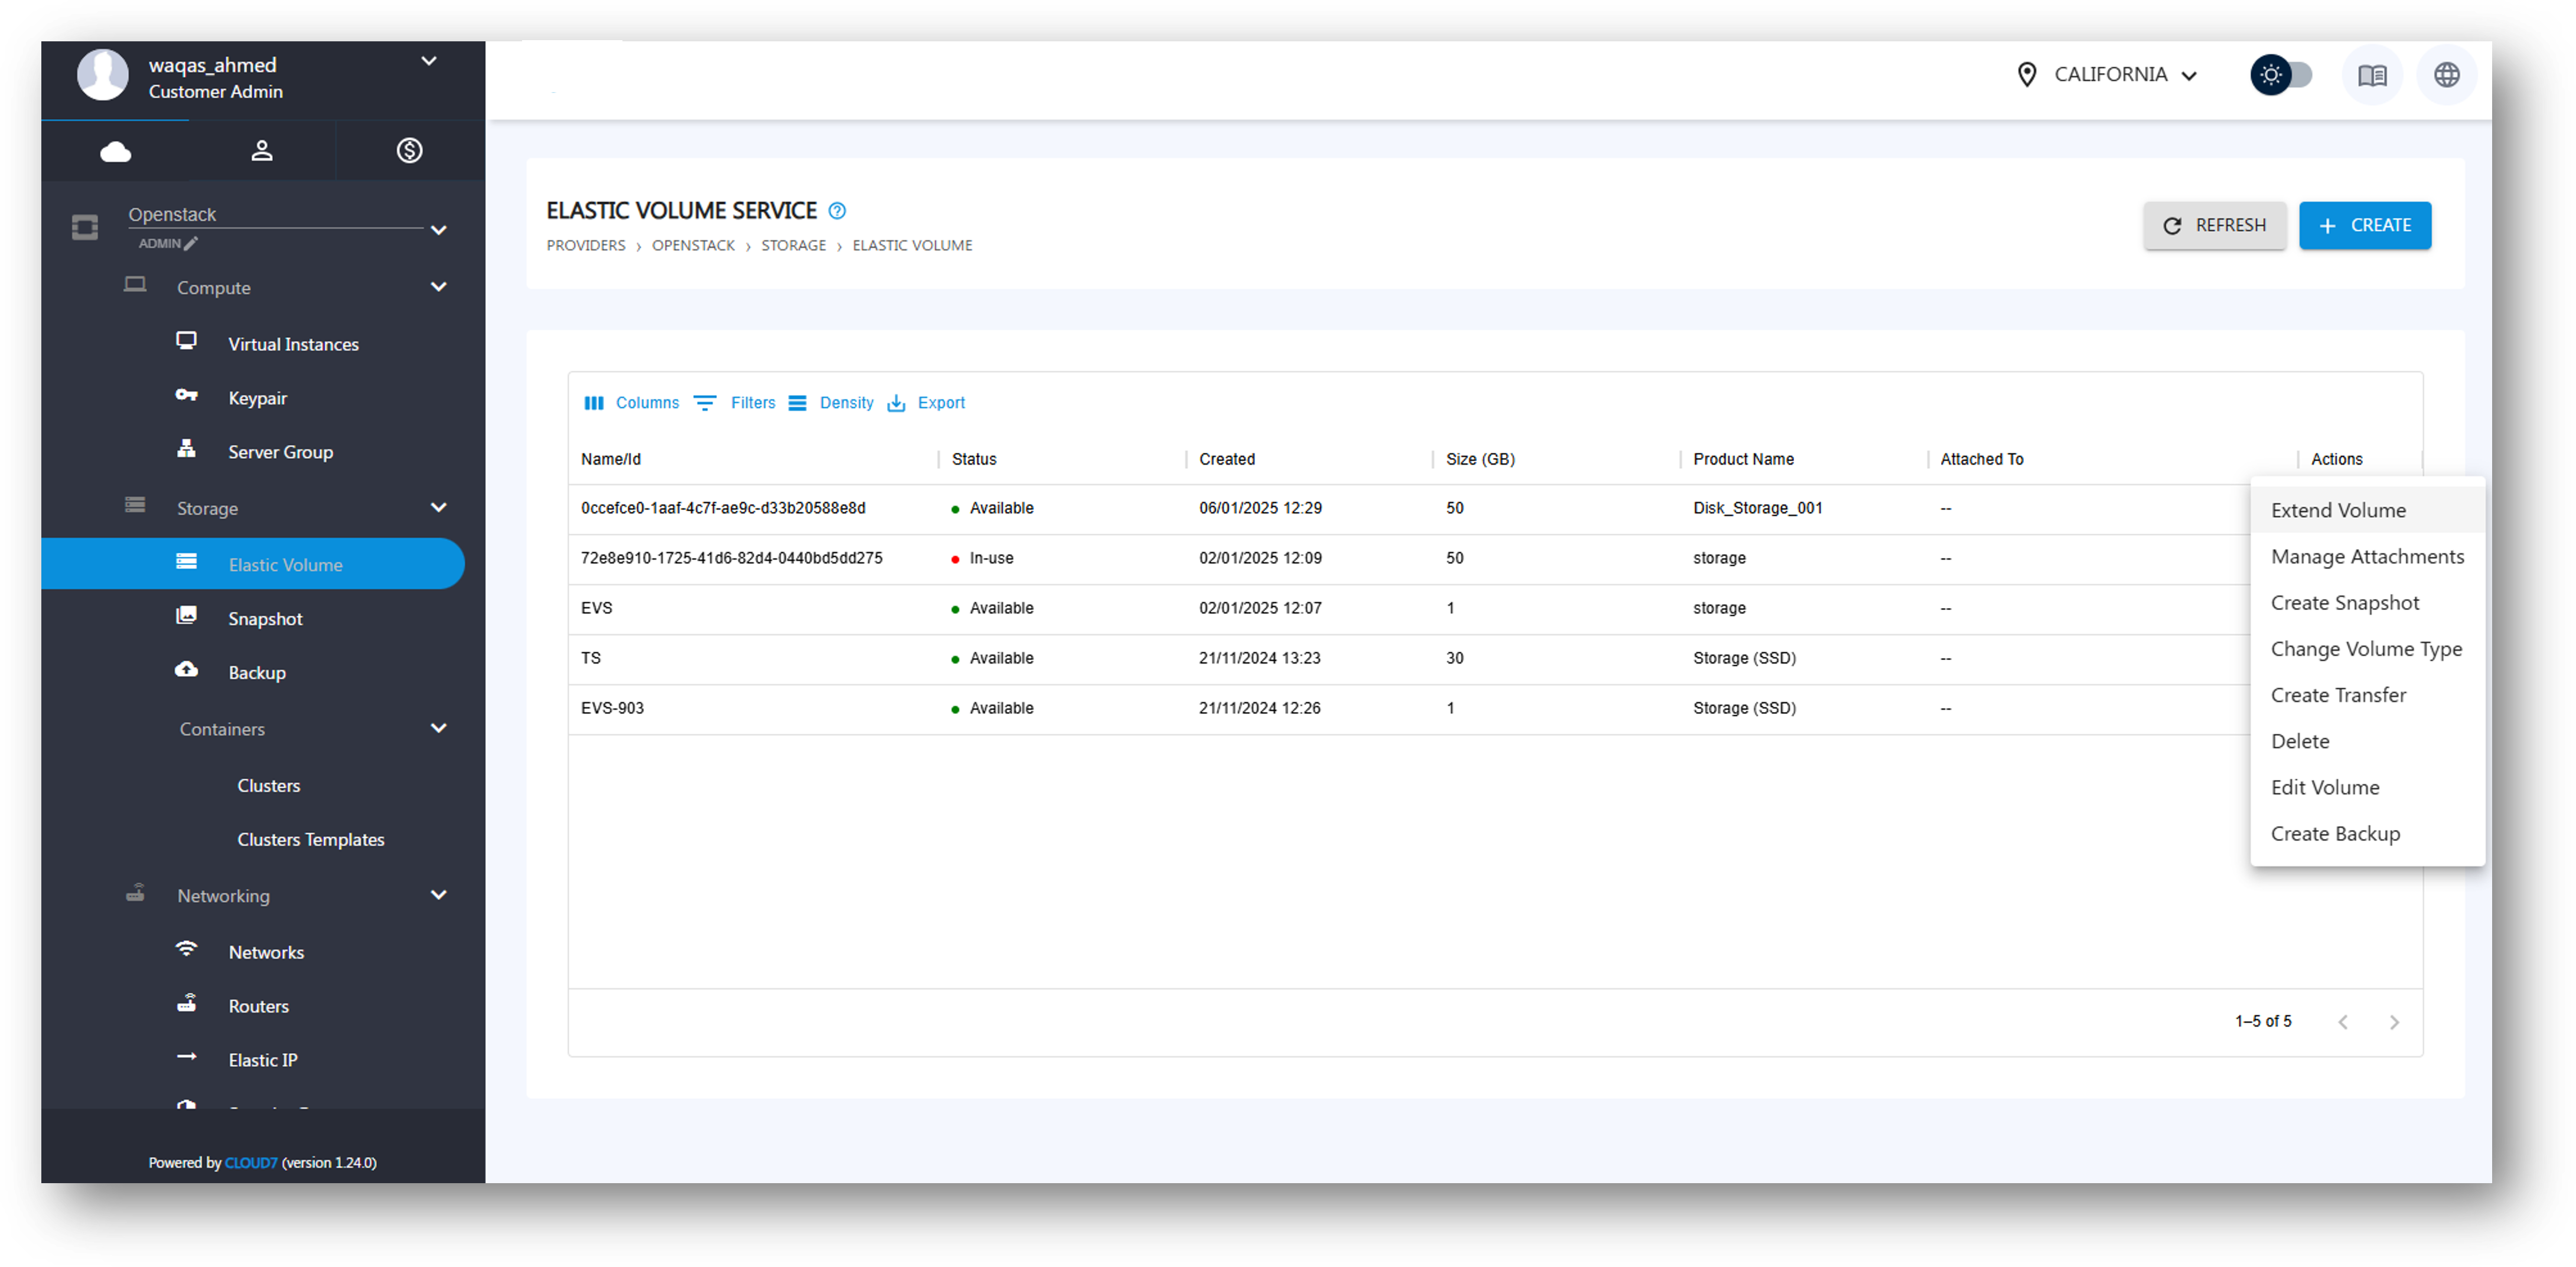
The Actions menu provides various management options:
- Extend Volume: Increase the volume size if additional storage is needed.
- Manage Attachments: Attach or detach the volume to/from an instance.
- Create Snapshot: Generate a point-in-time backup of the volume.
- Change Volume Type: Modify the storage tier (e.g., from HDD to SSD).
- Create Transfer: Move ownership of the volume to another user.
- Delete: Permanently remove the volume.
- Edit Volume: Modify the name or description.
- Create Backup: Generate a full backup of the volume.