Service Mapper #
Once Cloud7 is connected to an OpenStack environment, it automatically detects all available OpenStack services (projects0 and updates the “Providers” menu accordingly through its “Service Mapper” module. This ensures that Cloud7 maintains a functional and relevant menu, displaying only the services that are available and deployed in the OpenStack backend.
The key features of the Service Mapper module are:
- Automatic Detection: Cloud7 automatically identifies and lists all OpenStack services (projects) upon establishing a connection. This automation streamlines the integration process and ensures that all available services are promptly reflected in the Cloud7 interface.
- Menu and Service Management: The Service Mapper module helps maintain a clean and functional menu by excluding any unavailable services. This prevents users from seeing or attempting to access services that are not deployed in the OpenStack environment.
- Endpoint URL Detection and Editing: The module automatically detects the endpoint URLs for each OpenStack project after connectivity is established. Additionally, you have the option to manually edit these URLs if needed, providing flexibility and control over your service configurations.
- Service Deactivation: Even if a service project is detected in OpenStack and available in Cloud7, you can deactivate and hide it from the menu and catalog completely. This allows you to customize the visible services based on your operational requirements and preferences.
By leveraging the Service Mapper module, Cloud7 ensures an organized, efficient, and customizable interface, reflecting only the relevant OpenStack services. This enhances user experience by providing a streamlined and accurate representation of available services in the menu.
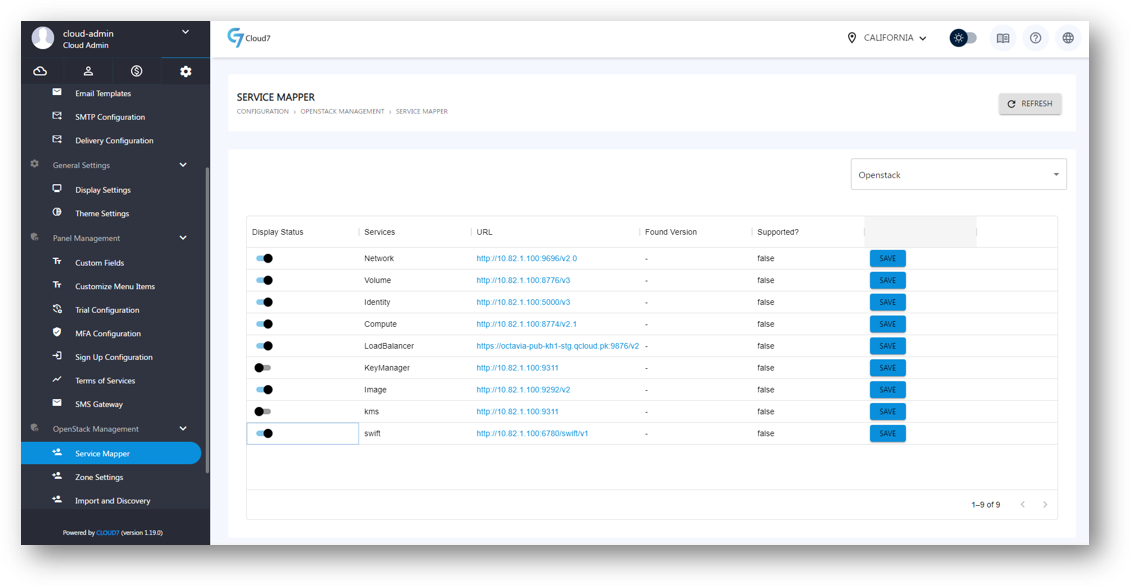
- To view the OpenStack Service Mapper section, login as Cloud-Admin (or a staff-member with required privileges) and navigate to the menu Configuration >> OpenStack Management >> Service Mapper.
- On this page, all the supported and integrated OpenStack services (projects) in Cloud7 will list.
- The services detected in the back-end connect OpenStack environment will have a URL detected and listed in front of the projects.
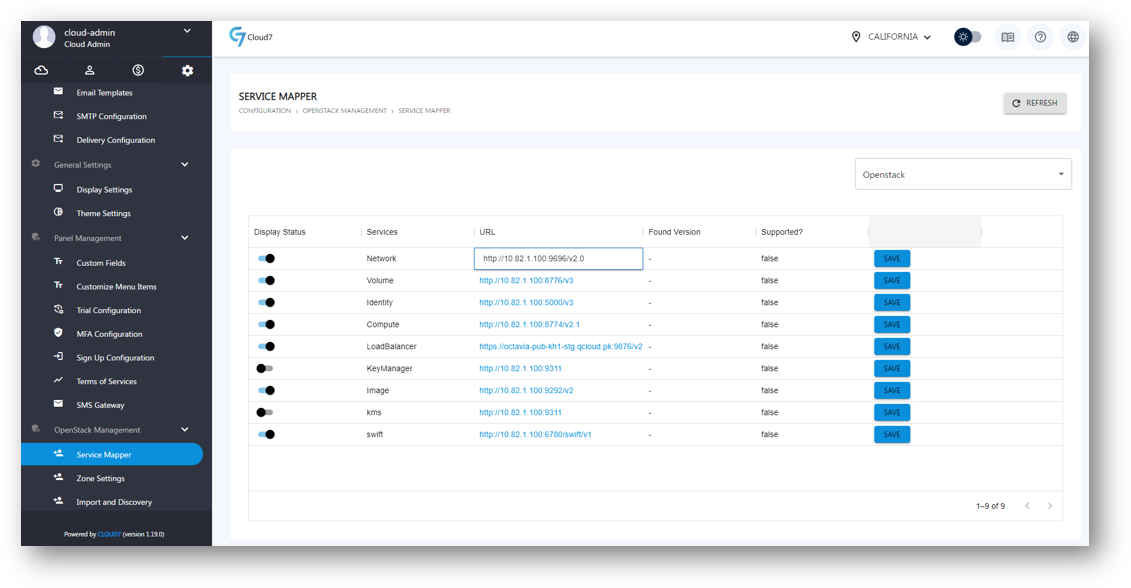
- You can edit the service end-point URL by double-clicking on the URL attribute (as shown in the below image).
Zone Settings #
Cloud7 provides a comprehensive view of all available OpenStack availability zones within the Zone Settings menu. This feature allows you to manage availability zones by enabling or disabling them, setting their display priority, and customizing their names as shown to customers.
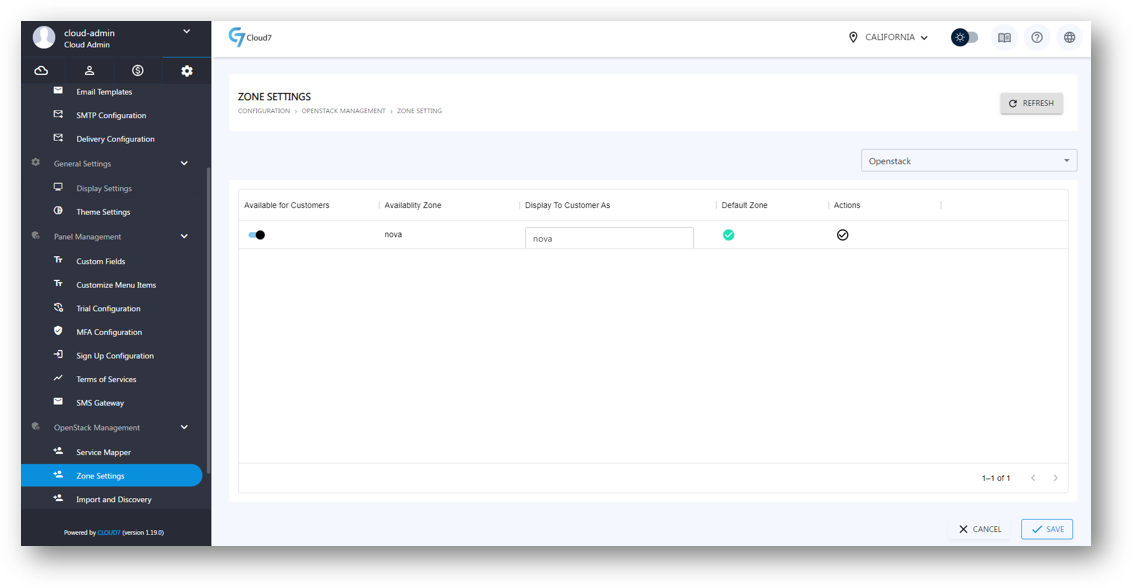
- To view the OpenStack Zone Settings feature, login as Cloud-Admin (or a staff-member with required privileges) and navigate to the menu Configuration >> OpenStack Management >> Zone Settings.
- On this page, all the AZs available in OpenStack will be listed.
- Toggle “Available for Customers” attribute to list or delist any of the AZs in customer interface during the creation of resources.
- Provide a display name in the “Display To Customer As” attribute. This will be the name that will be shown to the customers for the AZ at the time of resource provisioning.
- Under “Actions” option, select the default AZ that will be pre-selected in customer interface at the time of resource provisioning.
- Click on “Save” button in Cloud7 footer to save the settings.
Import & Discovery #
Cloud7’s versatility extends beyond new deployments to encompass existing environments, known as brownfield deployments. This capability is facilitated through the “Import & Discovery” module, designed specifically to seamlessly integrate pre-existing OpenStack data into the Cloud7 ecosystem.
The key features of Cloud7 import & discovery are:
- Map & Import OpenStack Projects: Within the Import & Discovery module, you can map existing OpenStack projects (commonly referred to as tenants) directly to new or existing customer organizations within Cloud7. This mapping ensures a structured alignment of existing resources with Cloud7’s organizational hierarchy, facilitating efficient resource management and visibility.
- Syncing Resources: Once mapped, you (as Cloud-Admin) can utilize the “Sync” option to synchronize the existing resources of imported OpenStack projects with Cloud7’s comprehensive Service Catalogue module. This synchronization process is crucial as it links each resource in OpenStack to corresponding products or services offered within Cloud7.
- Billing Streamlining: By mapping resources to Cloud7’s Service Catalogue, the platform ensures that the billing and invoicing processes align seamlessly with the configured services. This integration enhances operational efficiency by centralizing billing and resource management.
The benefits of Cloud7’s Import & Discovery module extend beyond integration flexibility and billing accuracy. It supports various migration scenarios where organizations seek to transition existing infrastructure into a managed cloud environment seamlessly. Moreover, it facilitates service expansion initiatives by allowing enterprises to broaden their service offerings without disrupting ongoing operations.
In essence, Cloud7’s Import & Discovery module empowers organizations to unify and optimize their cloud management strategy. By bridging the gap between legacy systems and modern cloud infrastructure, Cloud7 enables businesses to leverage existing investments while embracing the advantages of a managed cloud environment.
Import OpenStack Projects #
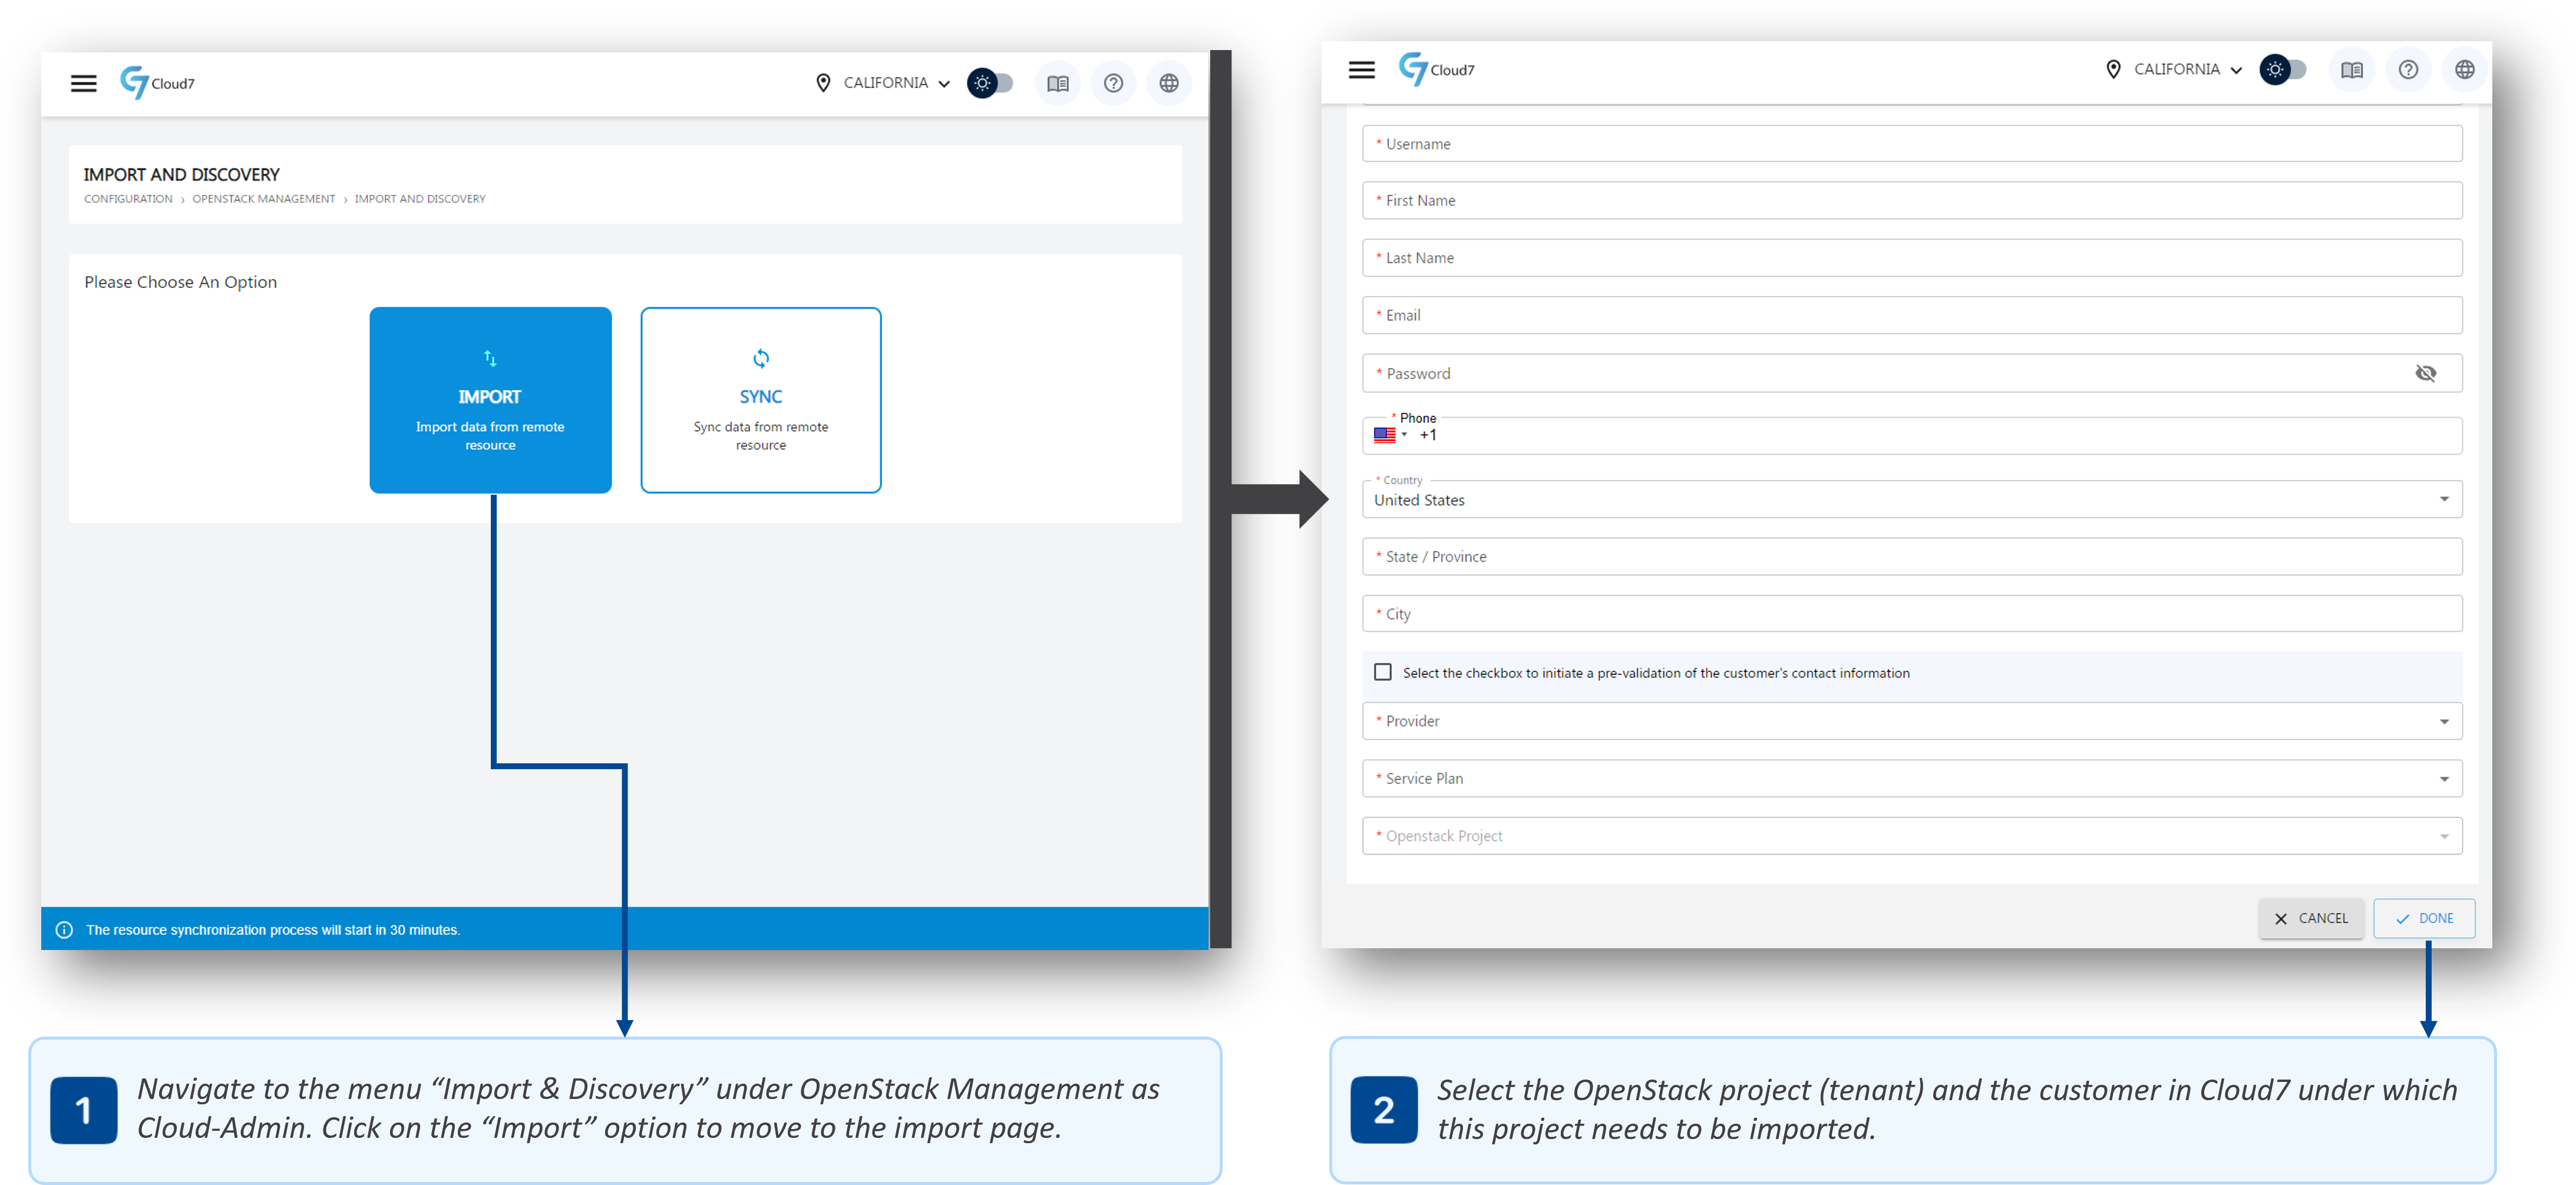
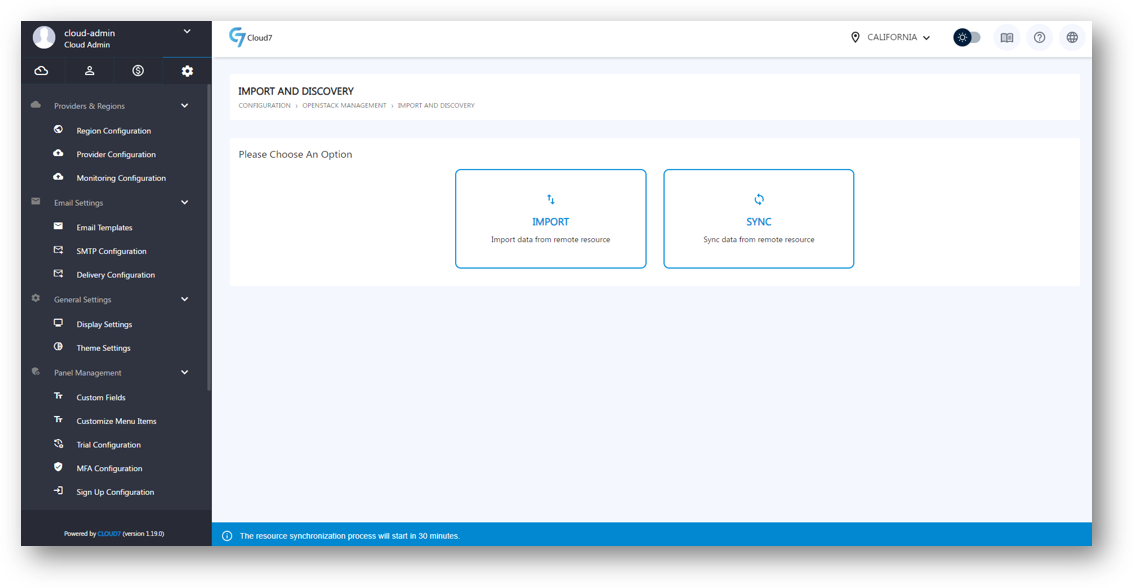
- To import an OpenStack project (tenant) in Cloud7, login as Cloud-Admin (or a staff-member with required privileges) and navigate to the menu Configuration >> OpenStack Management >> Import & Discovery.
- Click on “Import” option to open the project import form.
- In order to import an existing OpenStack project, you have to specify the customer under which the project has to be imported and then select the project to be imported. Cloud7 will map the project against the selected customer organization.
- To specify the customer organization:
- In “Import Type” drop down list, select either “For New User” or “For Existing User”. If you select “For New User, Cloud7 will let you create a new customer organization under which the OpenStack existing project will be imported. However, if you select “For Existing User”, Cloud7 will show the list of already created customer organizations in C7 for you select.
- With “For New User” selected, provide organization name in “Organization” field.
- In “Username” field, provide the unique username for the primary contact (primary user) of the customer.
- In “Password” field, specify the password for the primary contact.
- In the “First Name” field, provide the first name of the primary contact.
- In the “Last Name” field, provide the last name of the primary contact.
- In the “Email Address” field, specify the email address that will be used by Cloud7 to send all the emails and alerts to the primary contact.
- In “Phone” field, provide the contact number for the primary contact.
- In the “Country” field, specify the location of the primary contact.
- In the “State/Province” field, specify the state or the province of the primary contact.
- In the “City” field, specify the city where the primary contact is residing.
- Check “Select the checkbox to initiate a pre-validation of the customer’s contact information” option if you want the customer primary contact (primary user) to validate its email address and contact number upon first login.
- To specify the existing OpenStack project:
- Select the required OpenStack deployment (if you have connect Cloud7 with multiple OpenStack environments) where the project to be imported resides.
- Select the resource plan to be allocated to the customer in “Service Plan” drop down list.
- Select the required project to be imported from the “OpenStack Project” list.
- Specify the start and end date for the Resource Subscription.
- Define whether this subscription is to be pre-paid or post-paid using the “Advance Payment” option.
- Click on “Done” button in Cloud7 footer to submit and import the project in Cloud7.
Sync OpenStack Resources #

- To view the OpenStack Sync page in Cloud7, login as Cloud-Admin (or a staff-member with required privileges) and navigate to the menu Configuration >> OpenStack Management >> Import & Discovery.
- Click on “Sync” option to open the customer organization list of Cloud7 having OpenStack Resource Subscriptions.
- On this page, you will see the option to enable auto-sync between Cloud7 and OpenStack. If you enable “Resource Sync” option, you can use OpenStack UI (Horizon), CLI or any third party interface in parallel with Cloud7 for resource provisioning. If you create a resource outside of Cloud7 for any project (tenant) that already exists in Cloud7, it will automatically get detected and can also be mapped with an existing product from the Service Catalogue for billing purpose at the time of sync.
- Cloud7 also provides status updates on whether the tenant is in complete sync with OpenStack, or there are resources which are currently outside of Cloud7 management for the projects (tenants) that are already being managed through Cloud7.
- If the Sync Status attribute is showing Red cross, you can view the products that are not synced by clicking on the organization name. Cloud7 will list all the resources that are detected by are not synced. You can either trigger the sync manually, or if Cloud7 is not able to map the products from the Service Catalogue list then you (Cloud-Admin) can map it manually for billing purpose.