DNS (Domain Name System) Zones in Cloud7 allow customers to manage their domain configurations effectively. A DNS zone is a segment of the DNS namespace that is managed by a specific organization or administrator. Customers can create, edit, and delete DNS zones, as well as manage DNS records within each zone.
DNS Zone management provides a user-friendly way for customers to configure and control their domain settings. Customers can:
- Create Primary or Secondary DNS Zones.
- Add, edit, and delete DNS records.
- Maintain administrative control over domain configurations.
By effectively managing DNS Zones, customers can ensure reliable domain resolution and efficient network performance.
List DNS Zones #
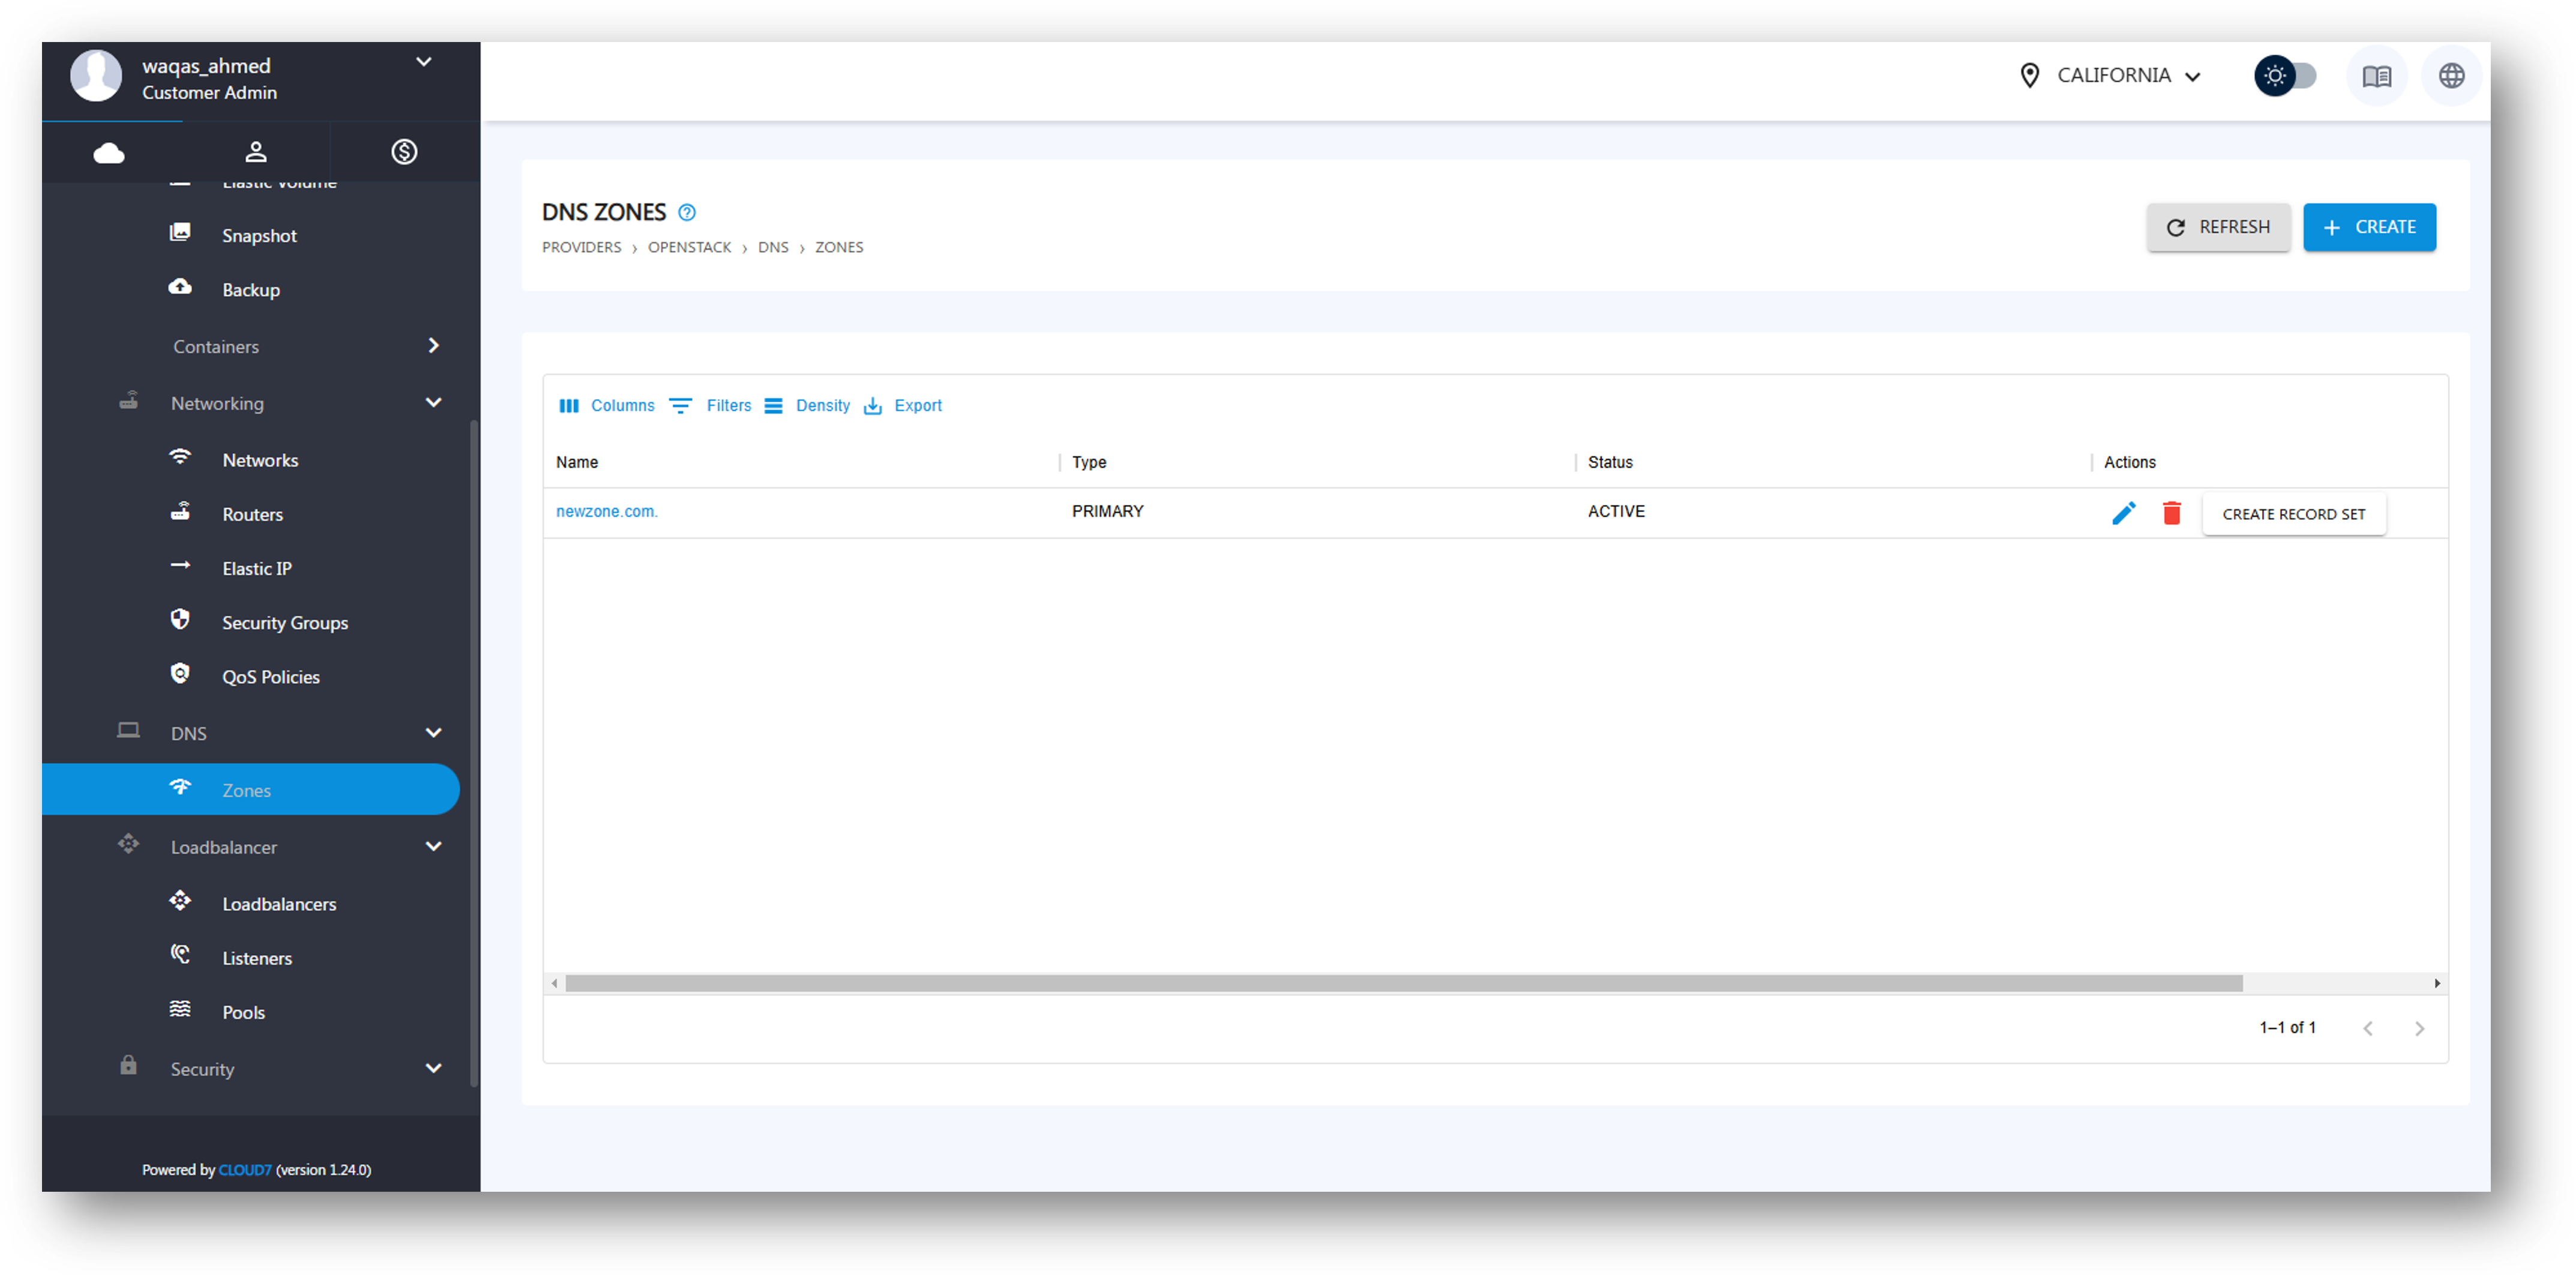
To manage DNS Zones, follow these steps:
- Login to Cloud7.
- Navigate to Providers >> <Provider Name> >> DNS >> Zones.
The listing page provides an overview of all existing DNS zones. The columns displayed include:
- Name – The name of the DNS Zone.
- Type – Specifies whether the zone is Primary or Secondary.
- Status – Indicates whether the DNS Zone is active.
- Actions – Provides options to manage, edit, or delete the DNS Zone.
Create DNS Zone #
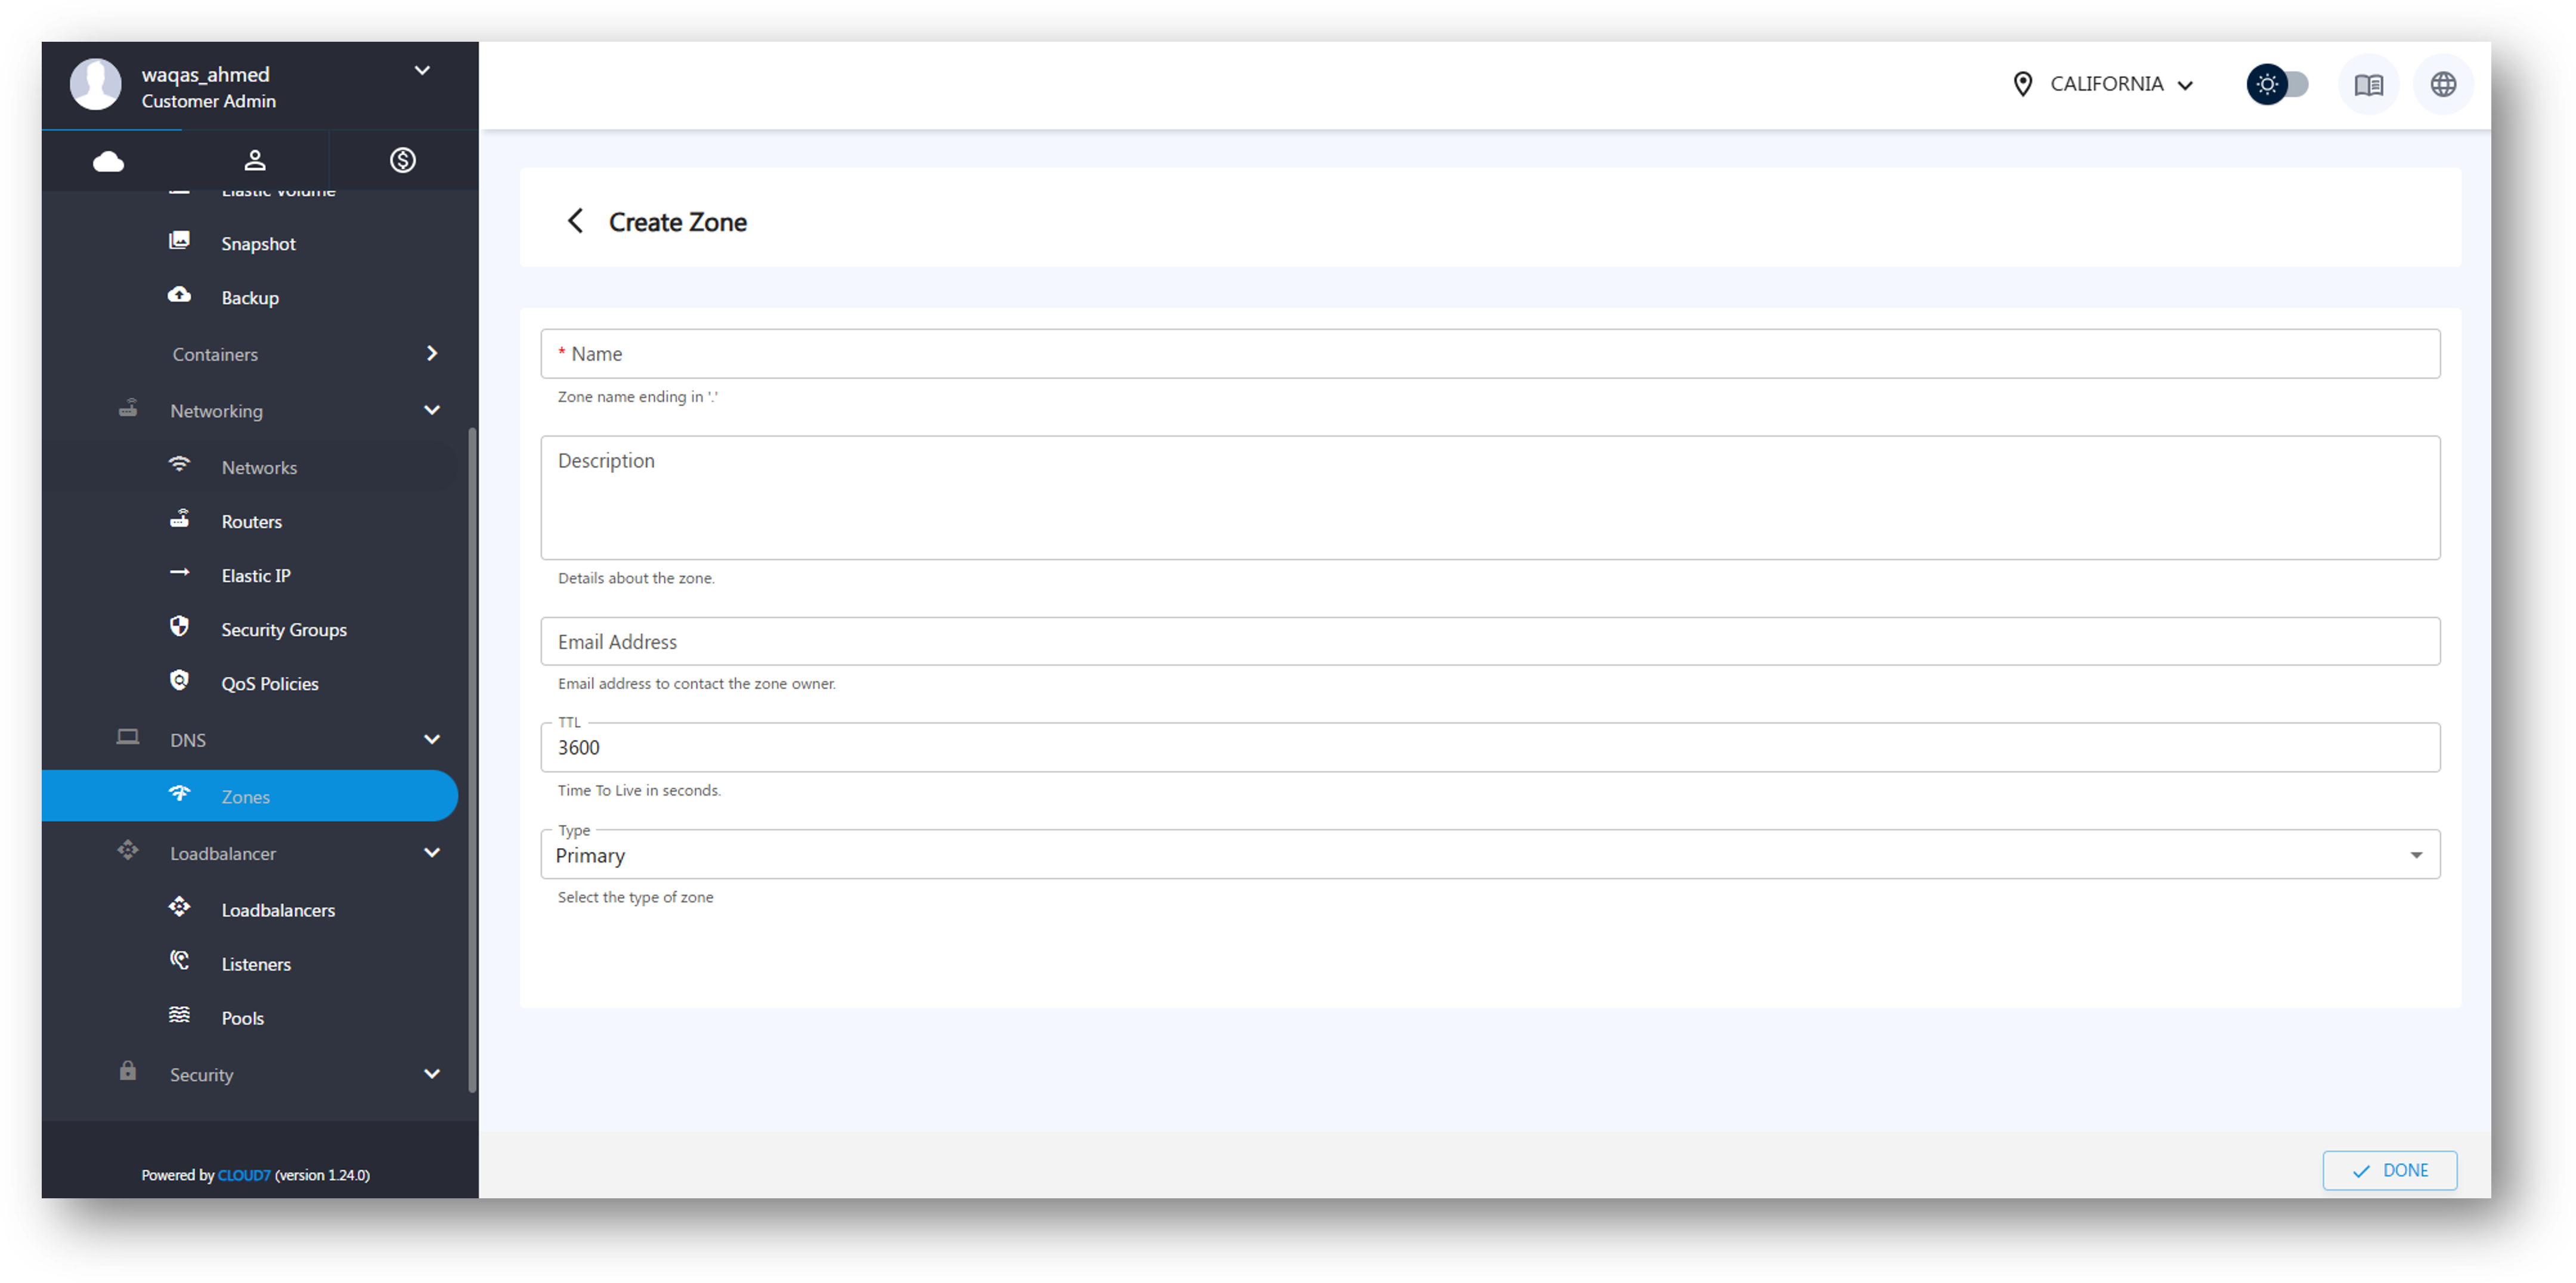
To create a new DNS Zone:
- Click the Create button in the header.
- Fill in the required details:
- Name – Enter the name of the DNS Zone.
- Description – (Optional) Add a description for the zone.
- Email Address – Enter the administrator’s email address.
- TTL (Time-To-Live) – Specify the TTL value (default expiration time for DNS records).
- Type – Choose between:
- Primary – The main authoritative DNS zone.
- Secondary – A backup zone that syncs from a primary DNS.
- Click Create to save the new DNS Zone.
View DNS Zone Details #
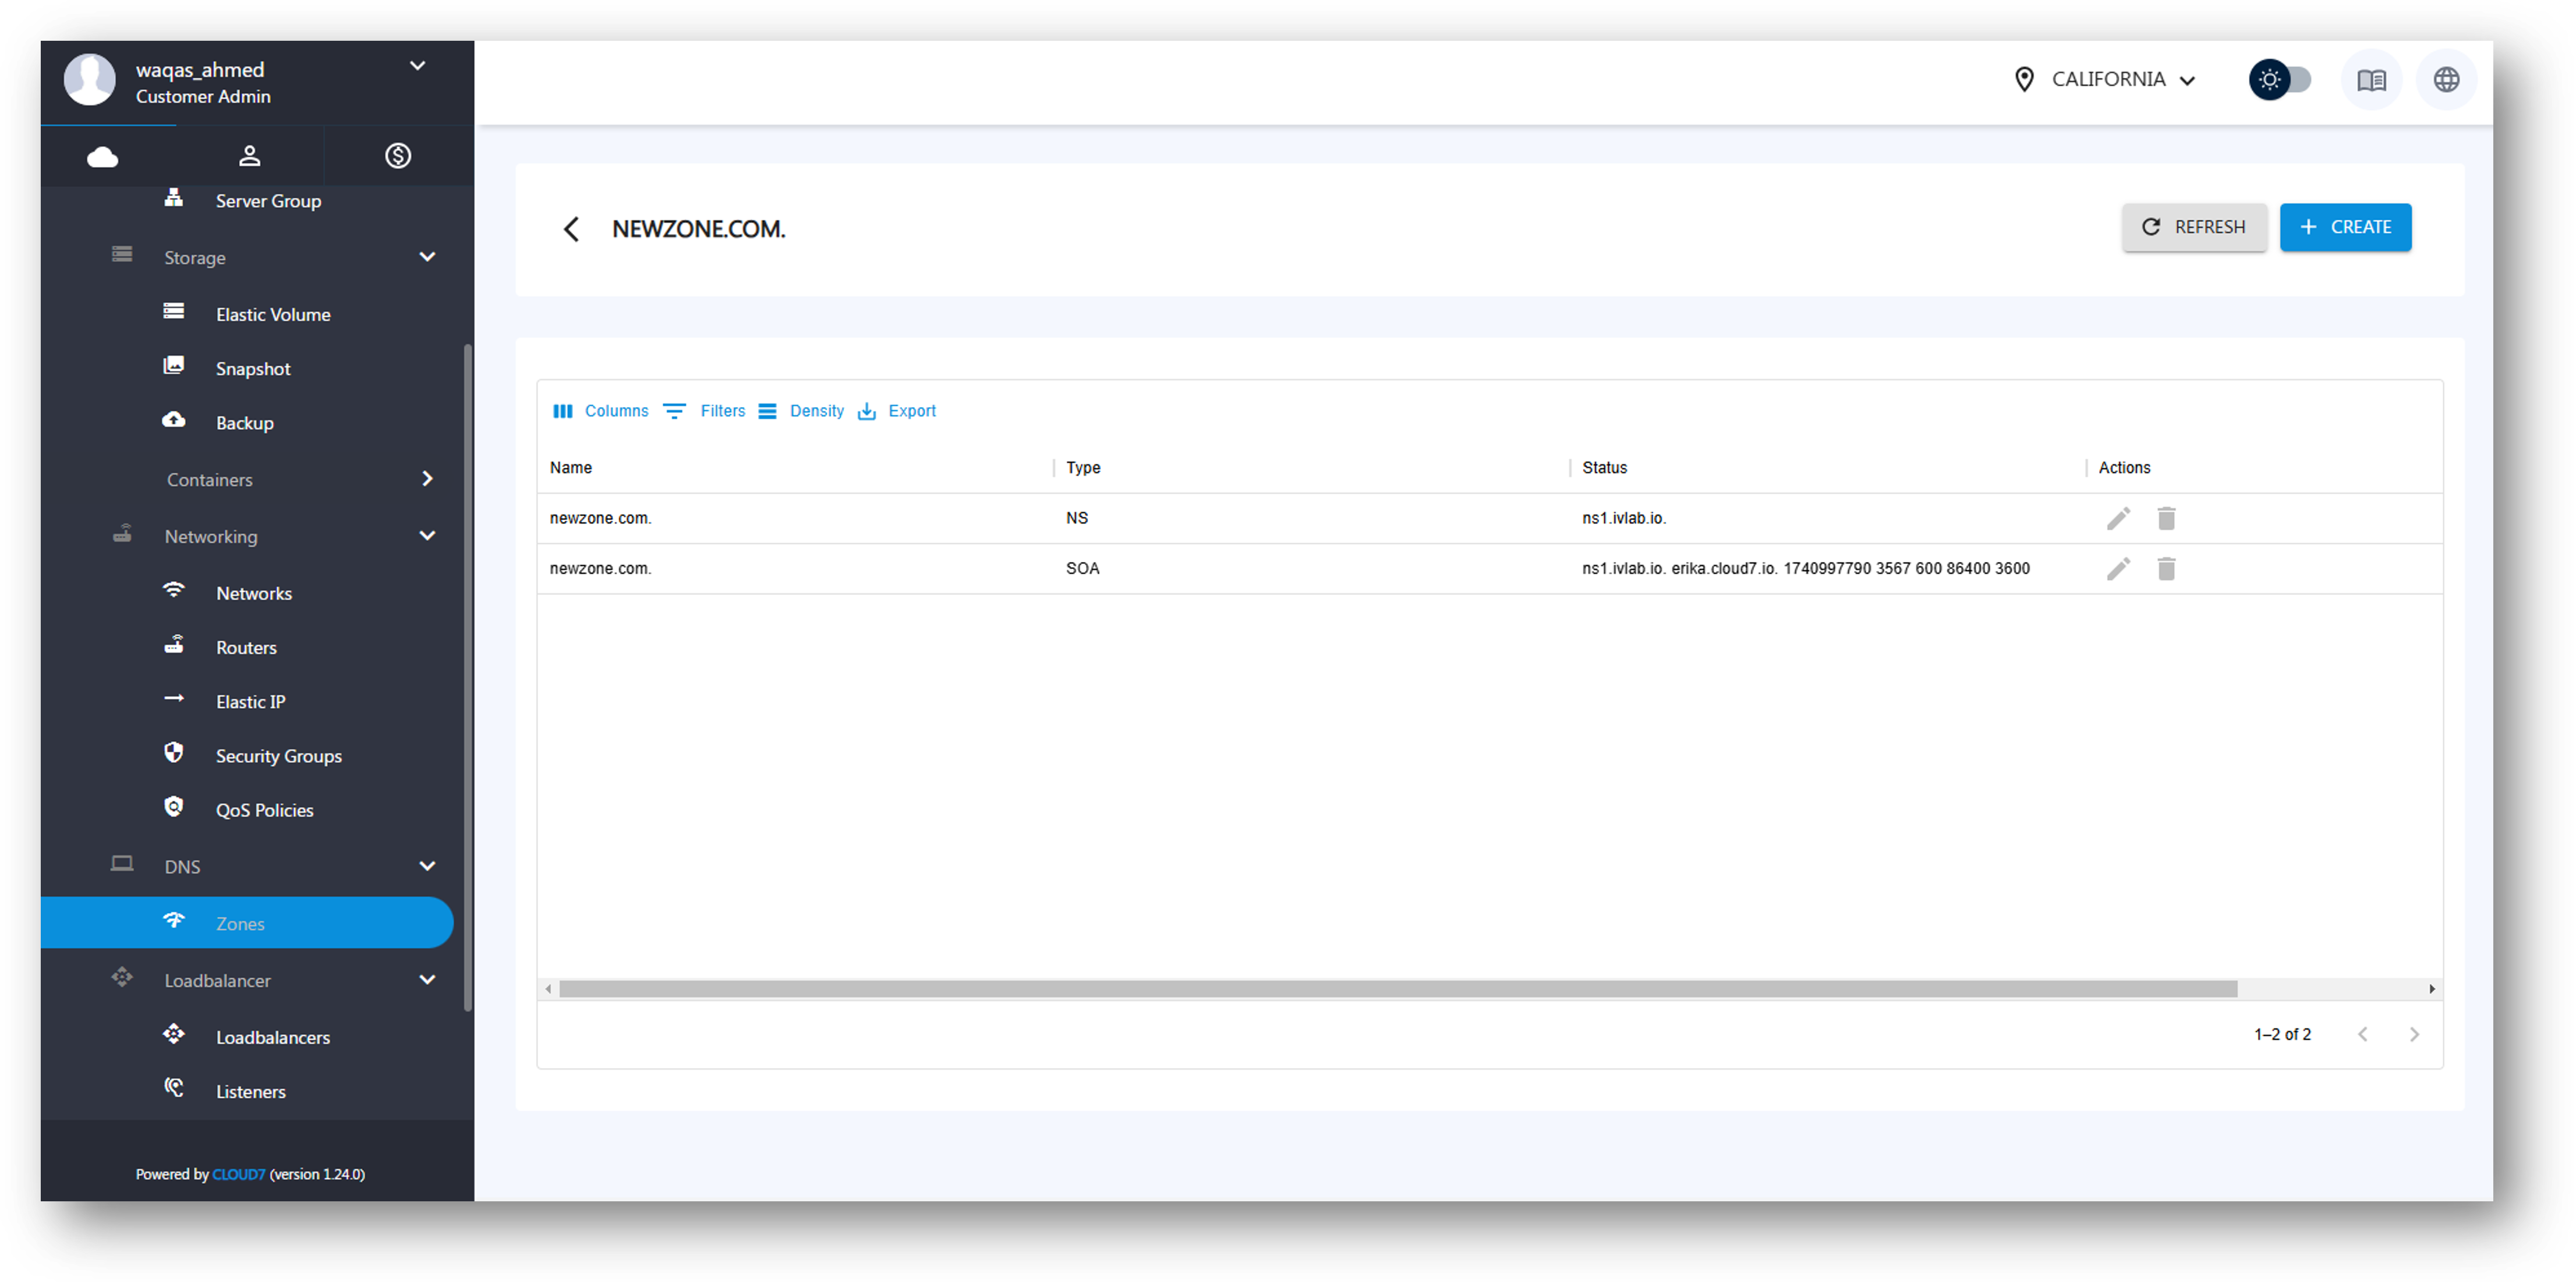
Once a DNS Zone is created, customers can view its details:
- Click on the Zone Name in the listing page.
- The DNS Records for the zone will be displayed.
- Customers can manage records or add new ones as needed.
Add DNS Records #
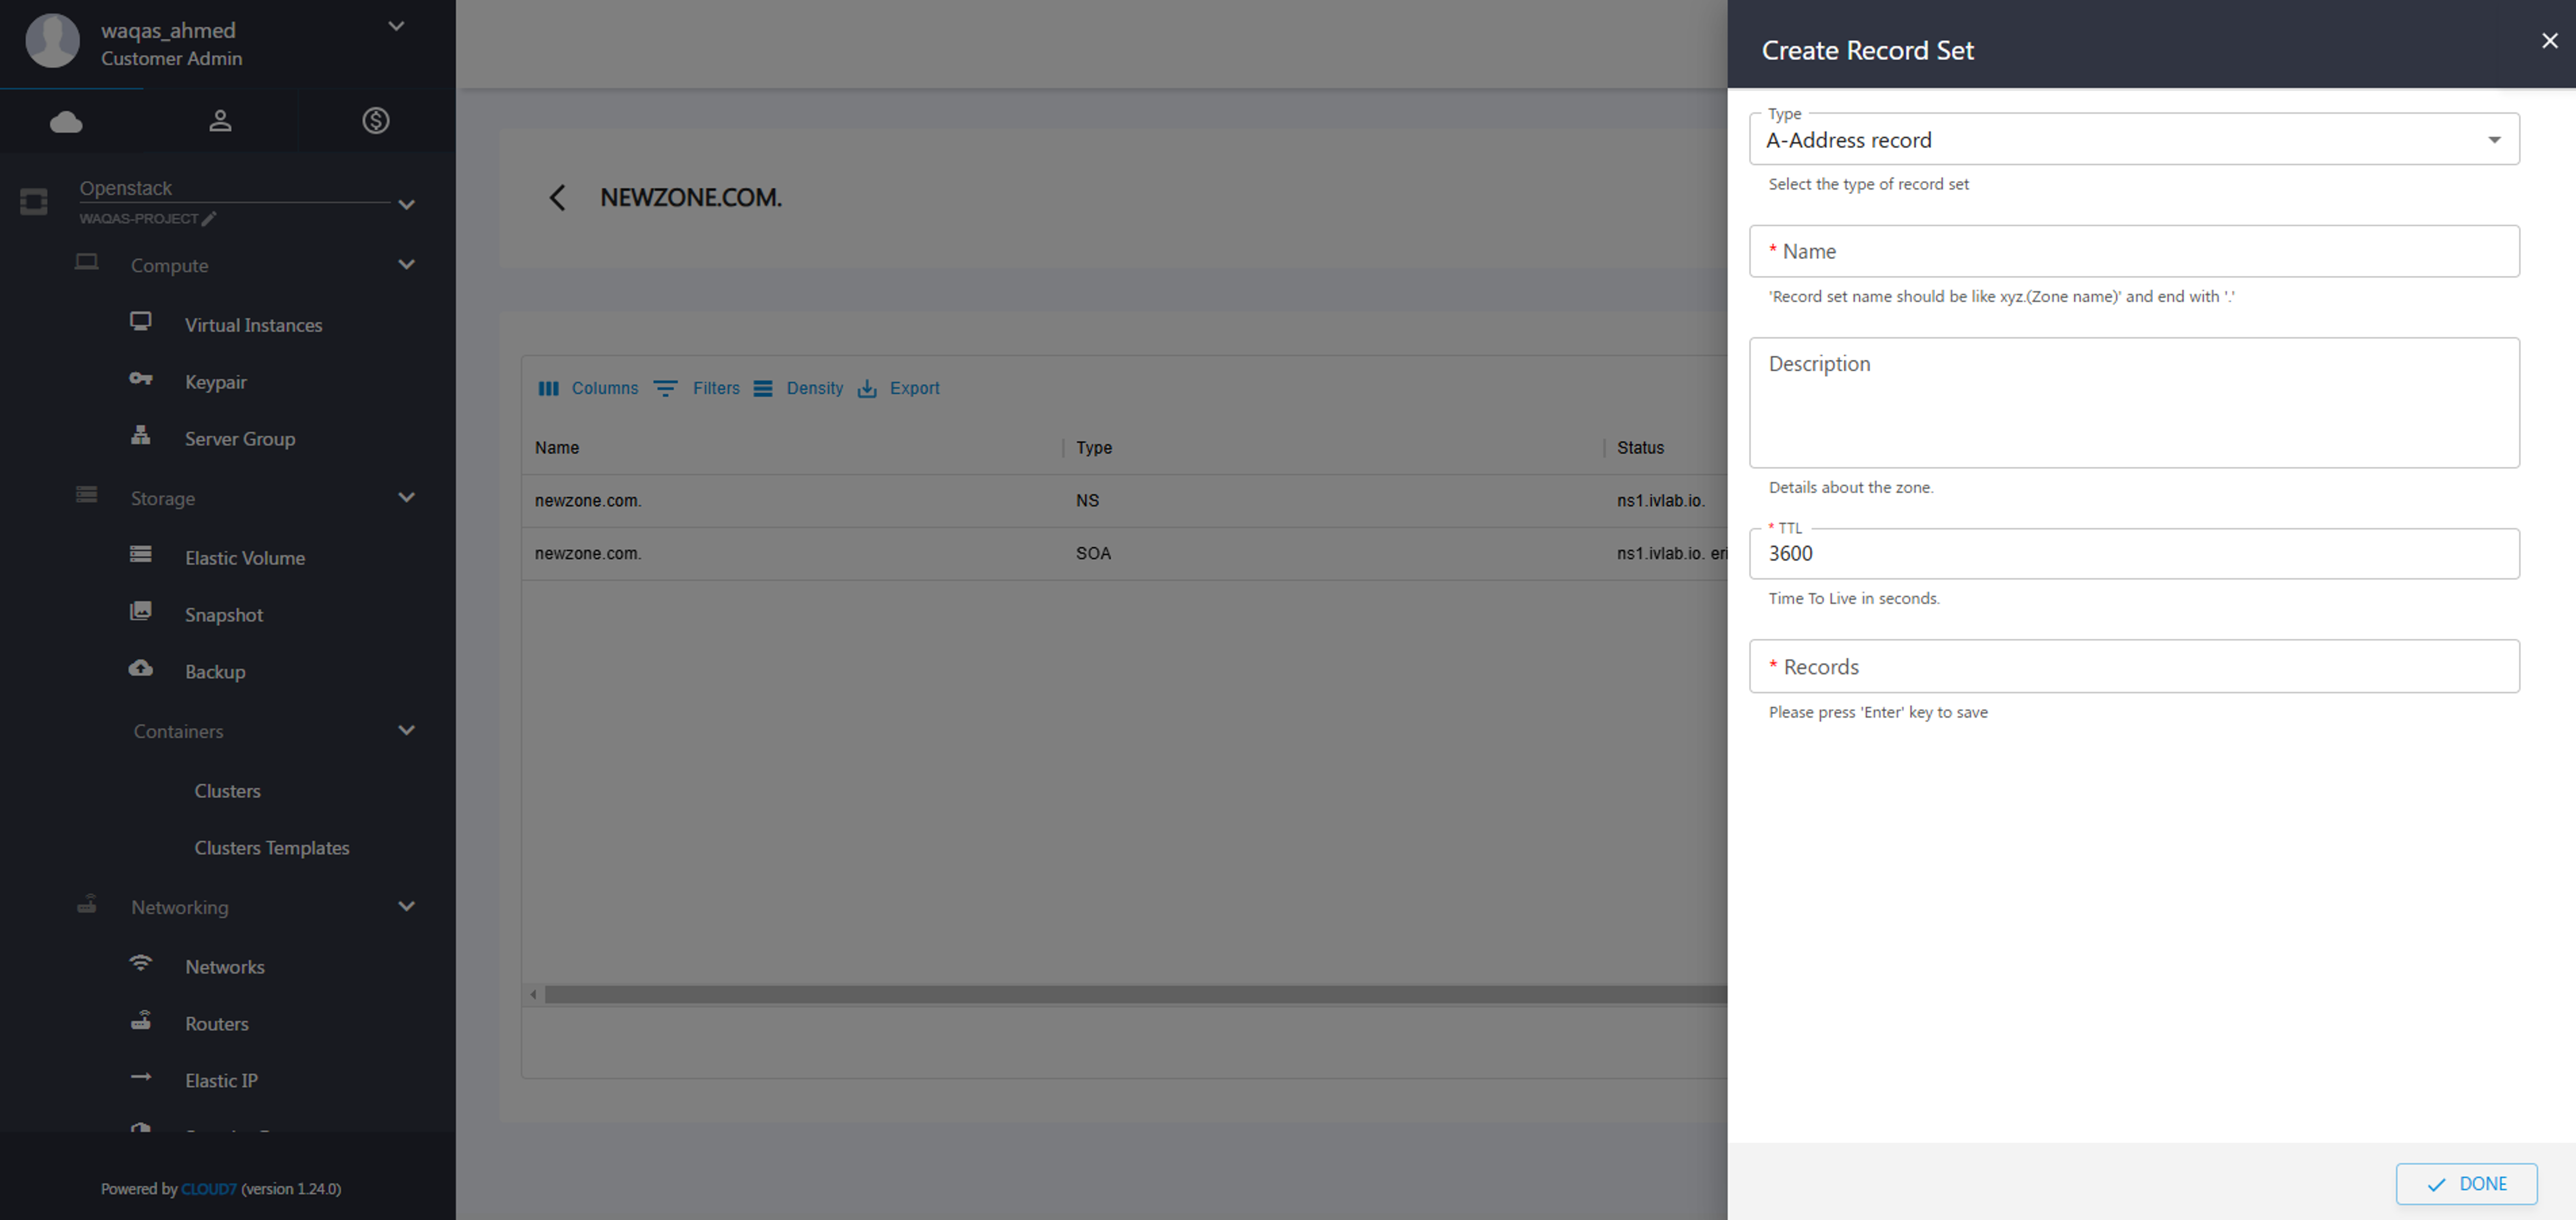
To add a new DNS record within a zone:
- Navigate to the Zone Details Page.
- Click the Create button in the header.
- A drawer will open with the following fields:
- Type – Select the type of DNS record (A, AAAA, CNAME, MX, TXT, etc.).
- Name – Enter the record name.
- Description – (Optional) Provide details about the record.
- TTL – Set the TTL for this specific record.
- Records – Define the record values (IP address, domain, or other relevant data).
- Click Create to save the DNS record.
Edit DNS Zone #
To update an existing DNS Zone:
- Navigate to Providers >> <Provider Name> >> DNS >> Zones.
- Click the Edit (pencil) icon under the Actions column for the desired zone.
- Modify the necessary fields (Name, Description, Email, TTL, or Type).
- Click Save to apply the changes.
Delete DNS Zone #
To remove a DNS Zone:
- Navigate to Providers >> <Provider Name> >> DNS >> Zones.
- Click the Delete (trash) icon under the Actions column for the selected zone.
- Confirm the deletion when prompted.
