The Networks feature in Cloud7 enables customers to create, manage, and configure network resources within OpenStack. This includes defining networks, subnets, and ports, ensuring seamless connectivity for cloud-based workloads. This guide covers listing, creating, editing, and deleting networks, as well as managing subnets and ports.
Cloud7’s Networking feature provides a robust interface for creating, managing, and configuring networks, subnets, and ports within OpenStack environments. By following this guide, customers can efficiently set up and control their networking infrastructure for seamless cloud operations.
List Networks #

- Login to the Cloud7 customer portal.
- Navigate to Providers >> OpenStack >> Networking >> Networks.
- The listing page displays all networks with the following details:
- Name – The name assigned to the network.
- Status – The current state of the network (e.g., Active, Down, or Error).
- Created At – The timestamp when the network was created.
- Subnets – The associated subnets within the network.
- External – Indicates whether the network is external-facing.
- Action – Available actions for managing the network.
Create Network #
To create a network in Cloud7, follow these steps:
- Click on the Create Network button on Cloud7 header.
- A stepper form opens up.
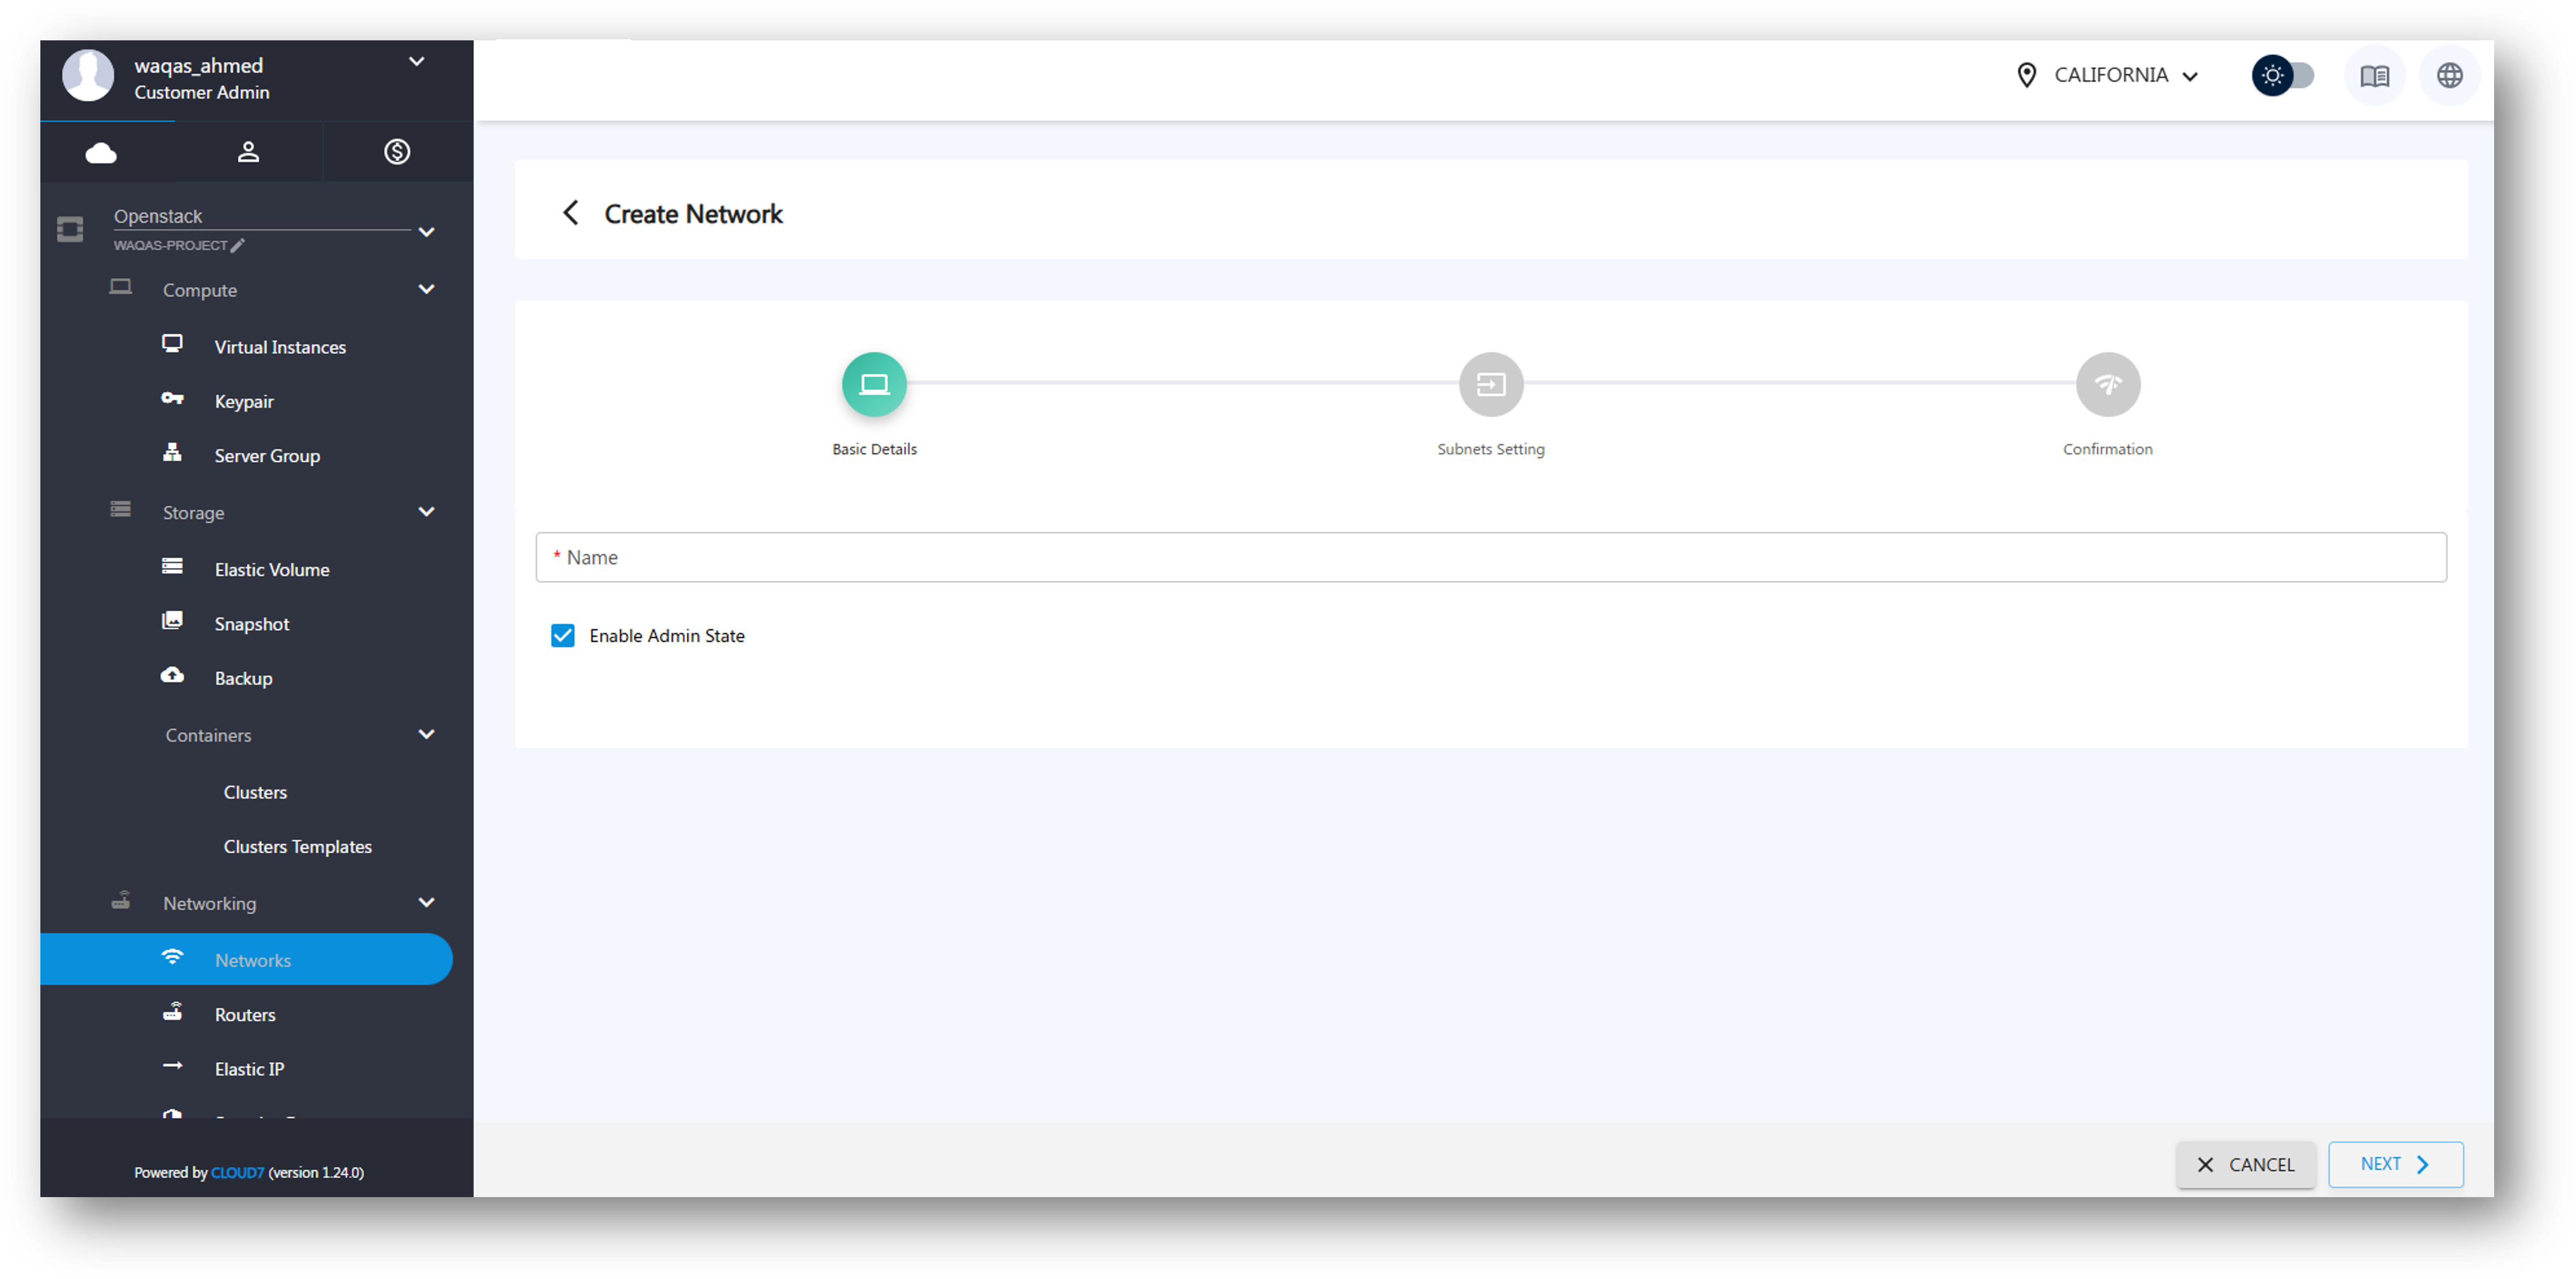
Step 1: Define Network Name #
- Name – Enter a name for the network.
- Enable Admin State (Checkbox) – Toggle to enable or disable administrative control.
- Click Next to proceed.
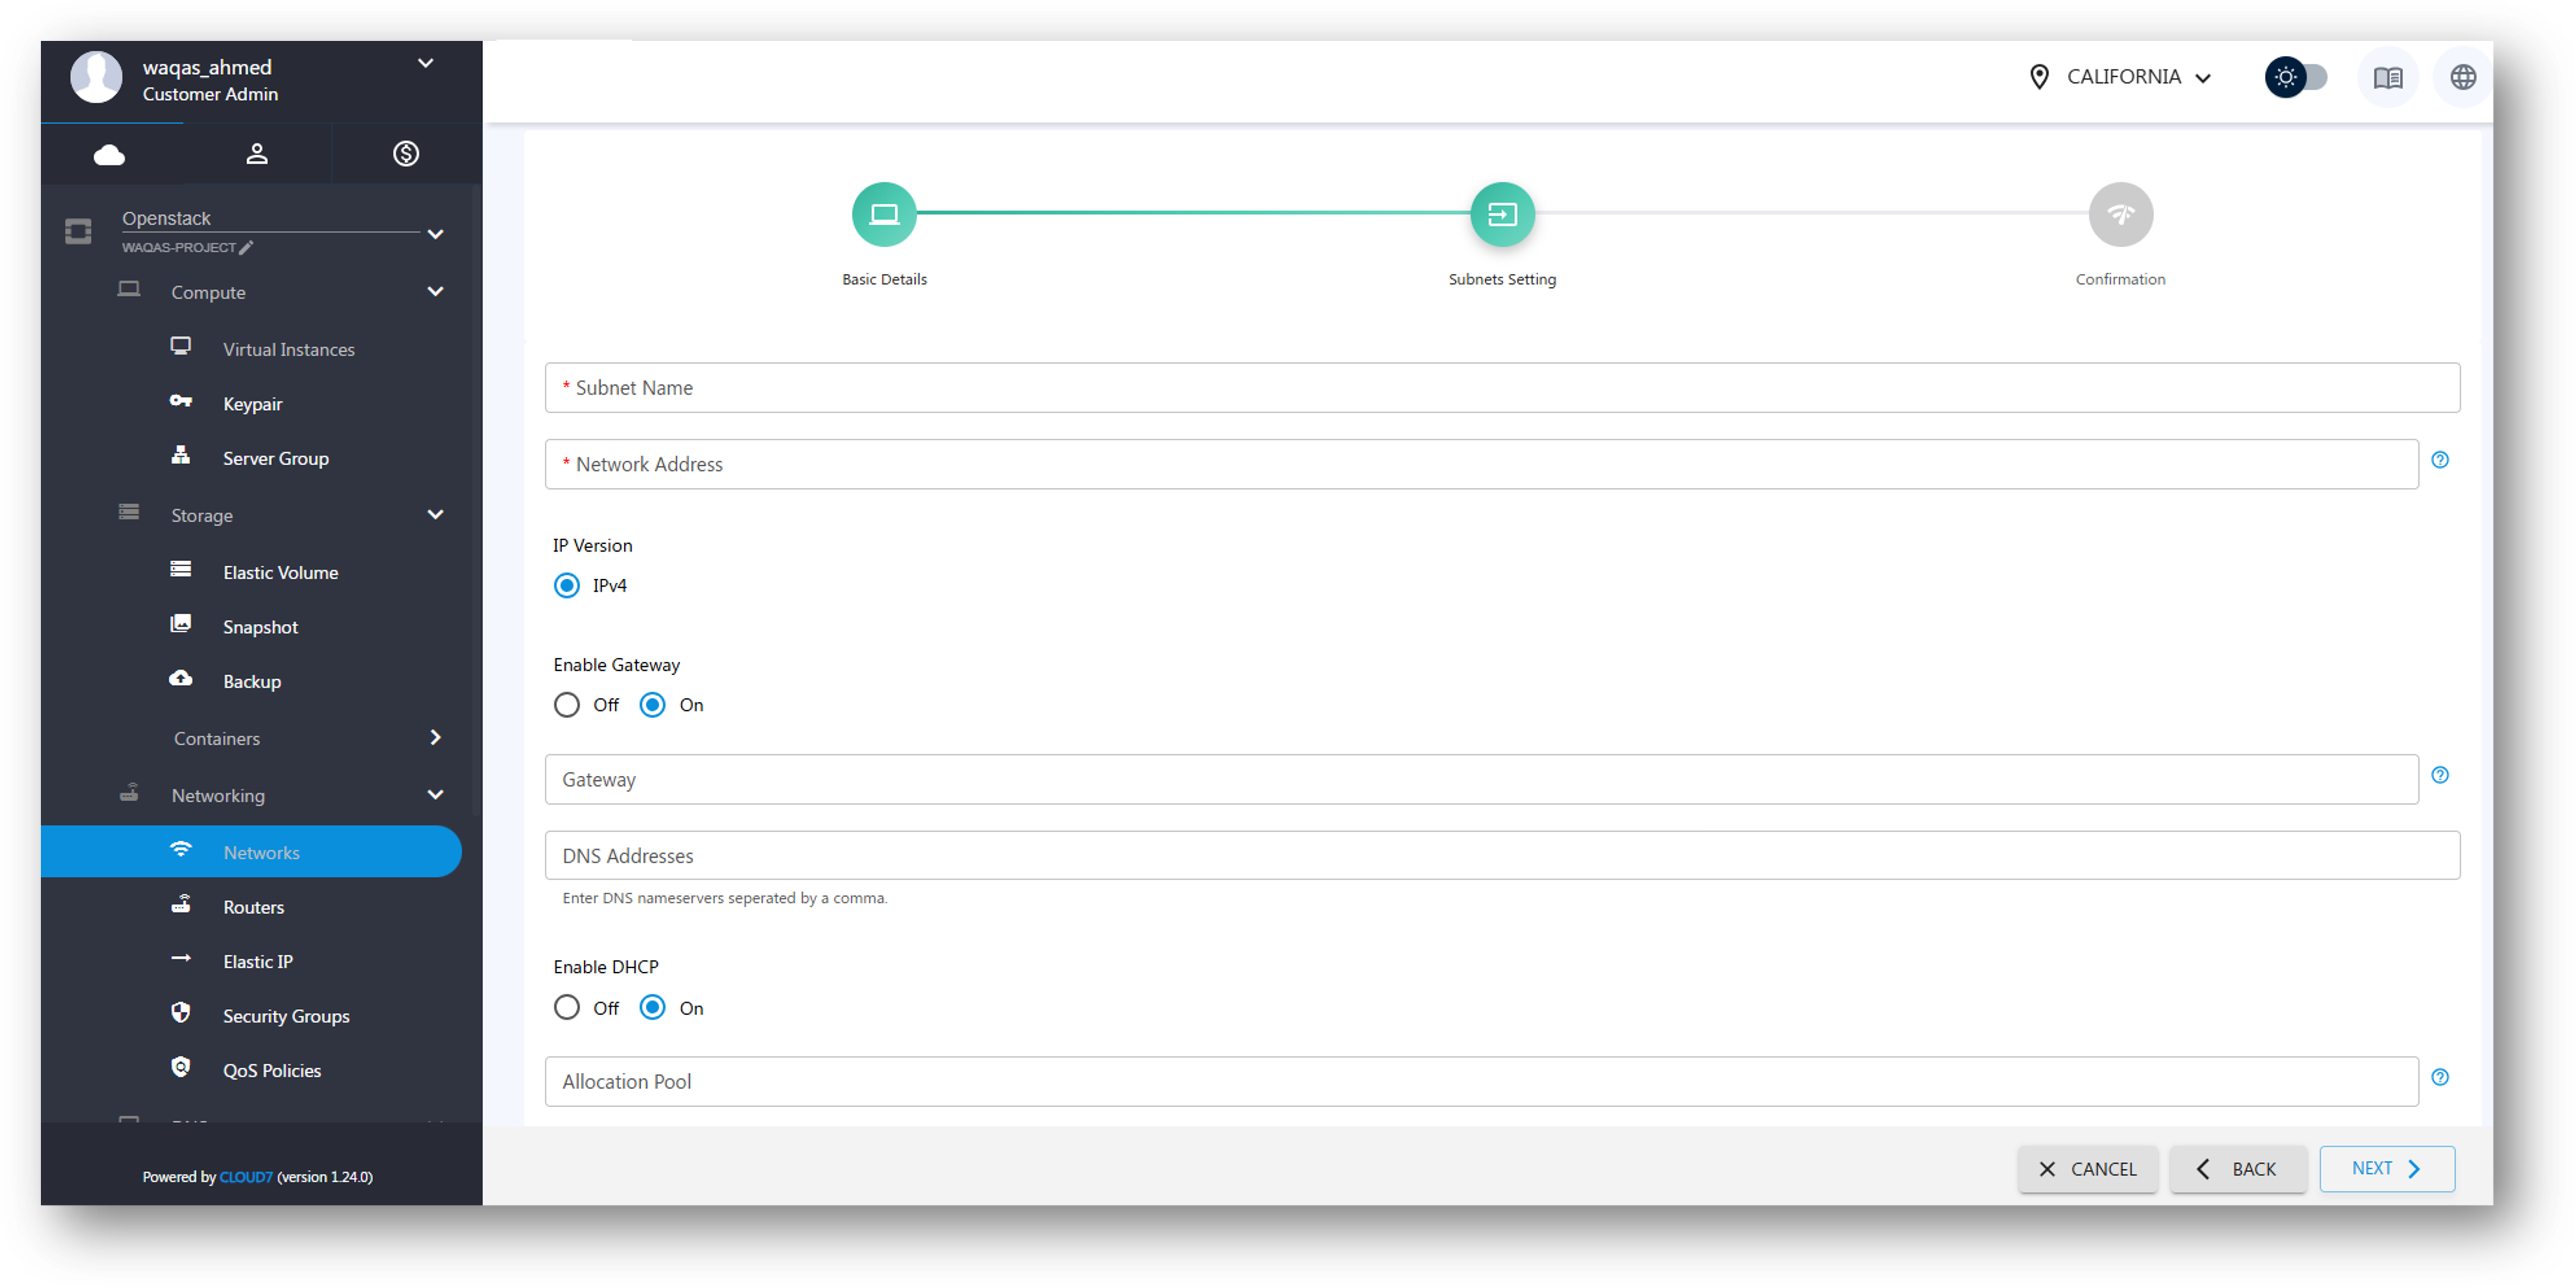
Step 2: Configure Subnet #
- Subnet Name – Assign a name to the subnet.
- Network Address – Define the CIDR block for the subnet (e.g., 192.168.1.0/24).
- IP Version – Choose IPv4 or IPv6.
- Enable Gateway (Toggle) – Option to enable or disable a network gateway.
- If enabled, enter the Gateway IP manually.
- DNS Addresses – Specify DNS servers for name resolution.
- Enable/Disable DHCP (Toggle) – Decide whether DHCP should be enabled.
- Click Next to proceed.
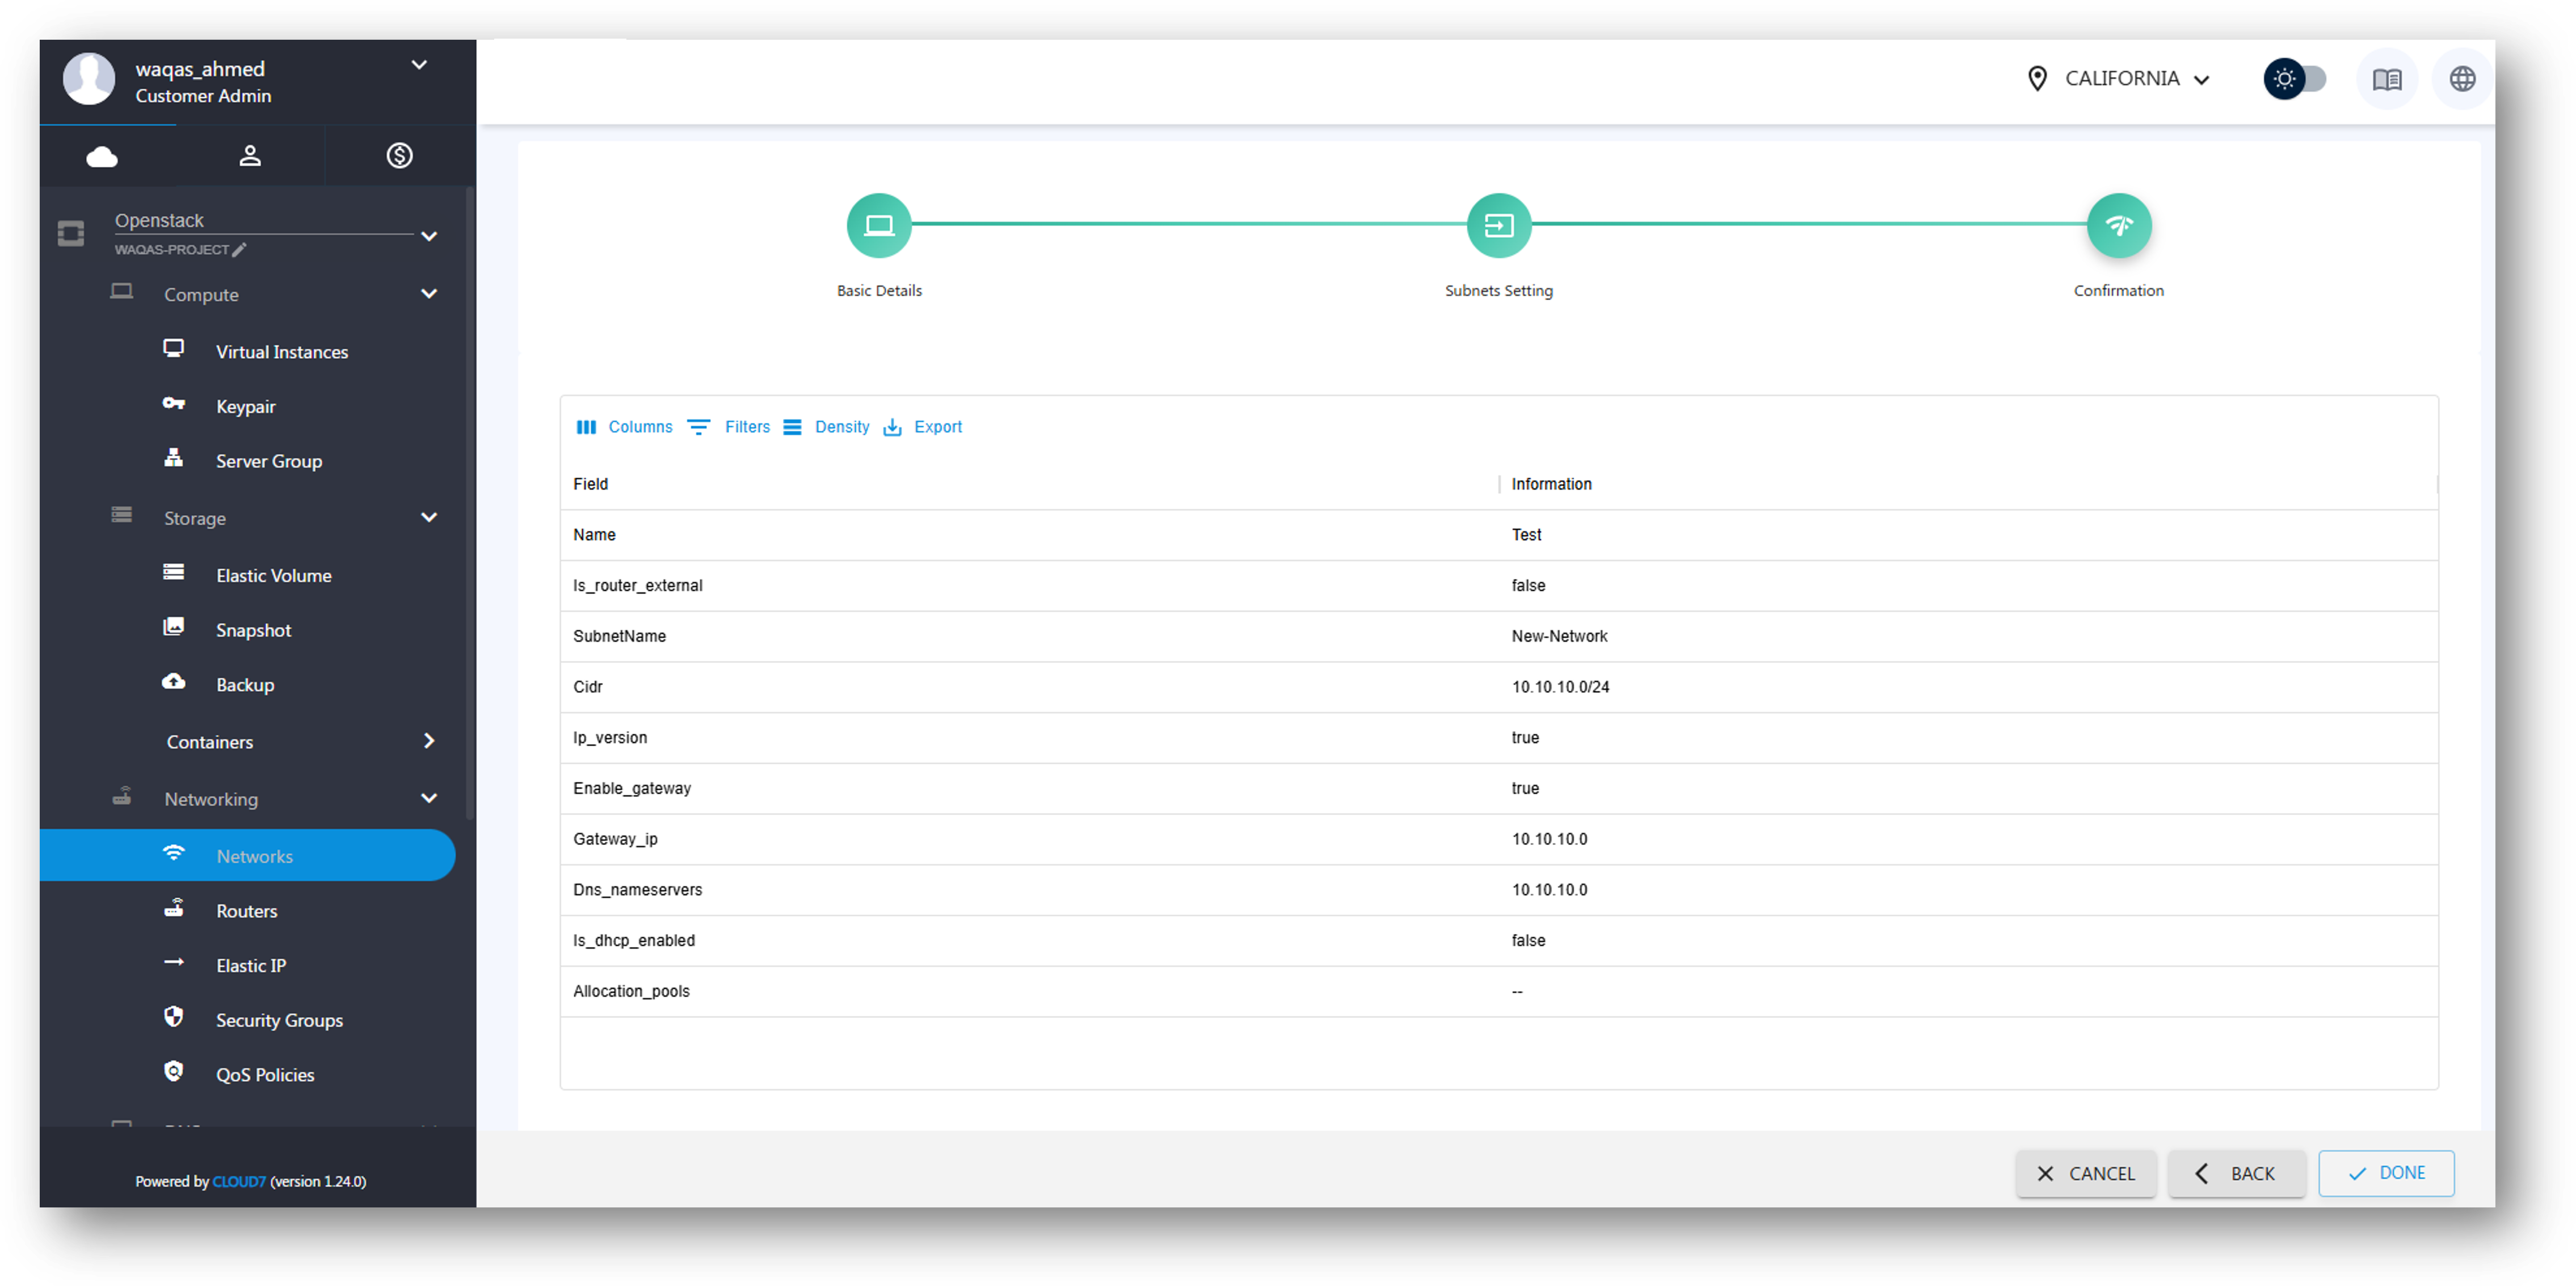
Step 3: Review & Confirm #
- Cloud7 will display a summary of the network configuration. Verify the details and click Done to create the network.
- A confirmation prompt will appear and the network will be created after a few seconds.

Edit Network #
- Navigate to Providers >> OpenStack >> Networking >> Networks.
- Click on the Actions menu beside the network.
- Select Edit to modify network details.
- Update the fields as required and click Save Changes.
Delete Network #
- Navigate to Providers >> OpenStack >> Networking >> Networks.
- Click on the Actions menu beside the network.
- Select Delete and confirm the deletion.

View Network Details #
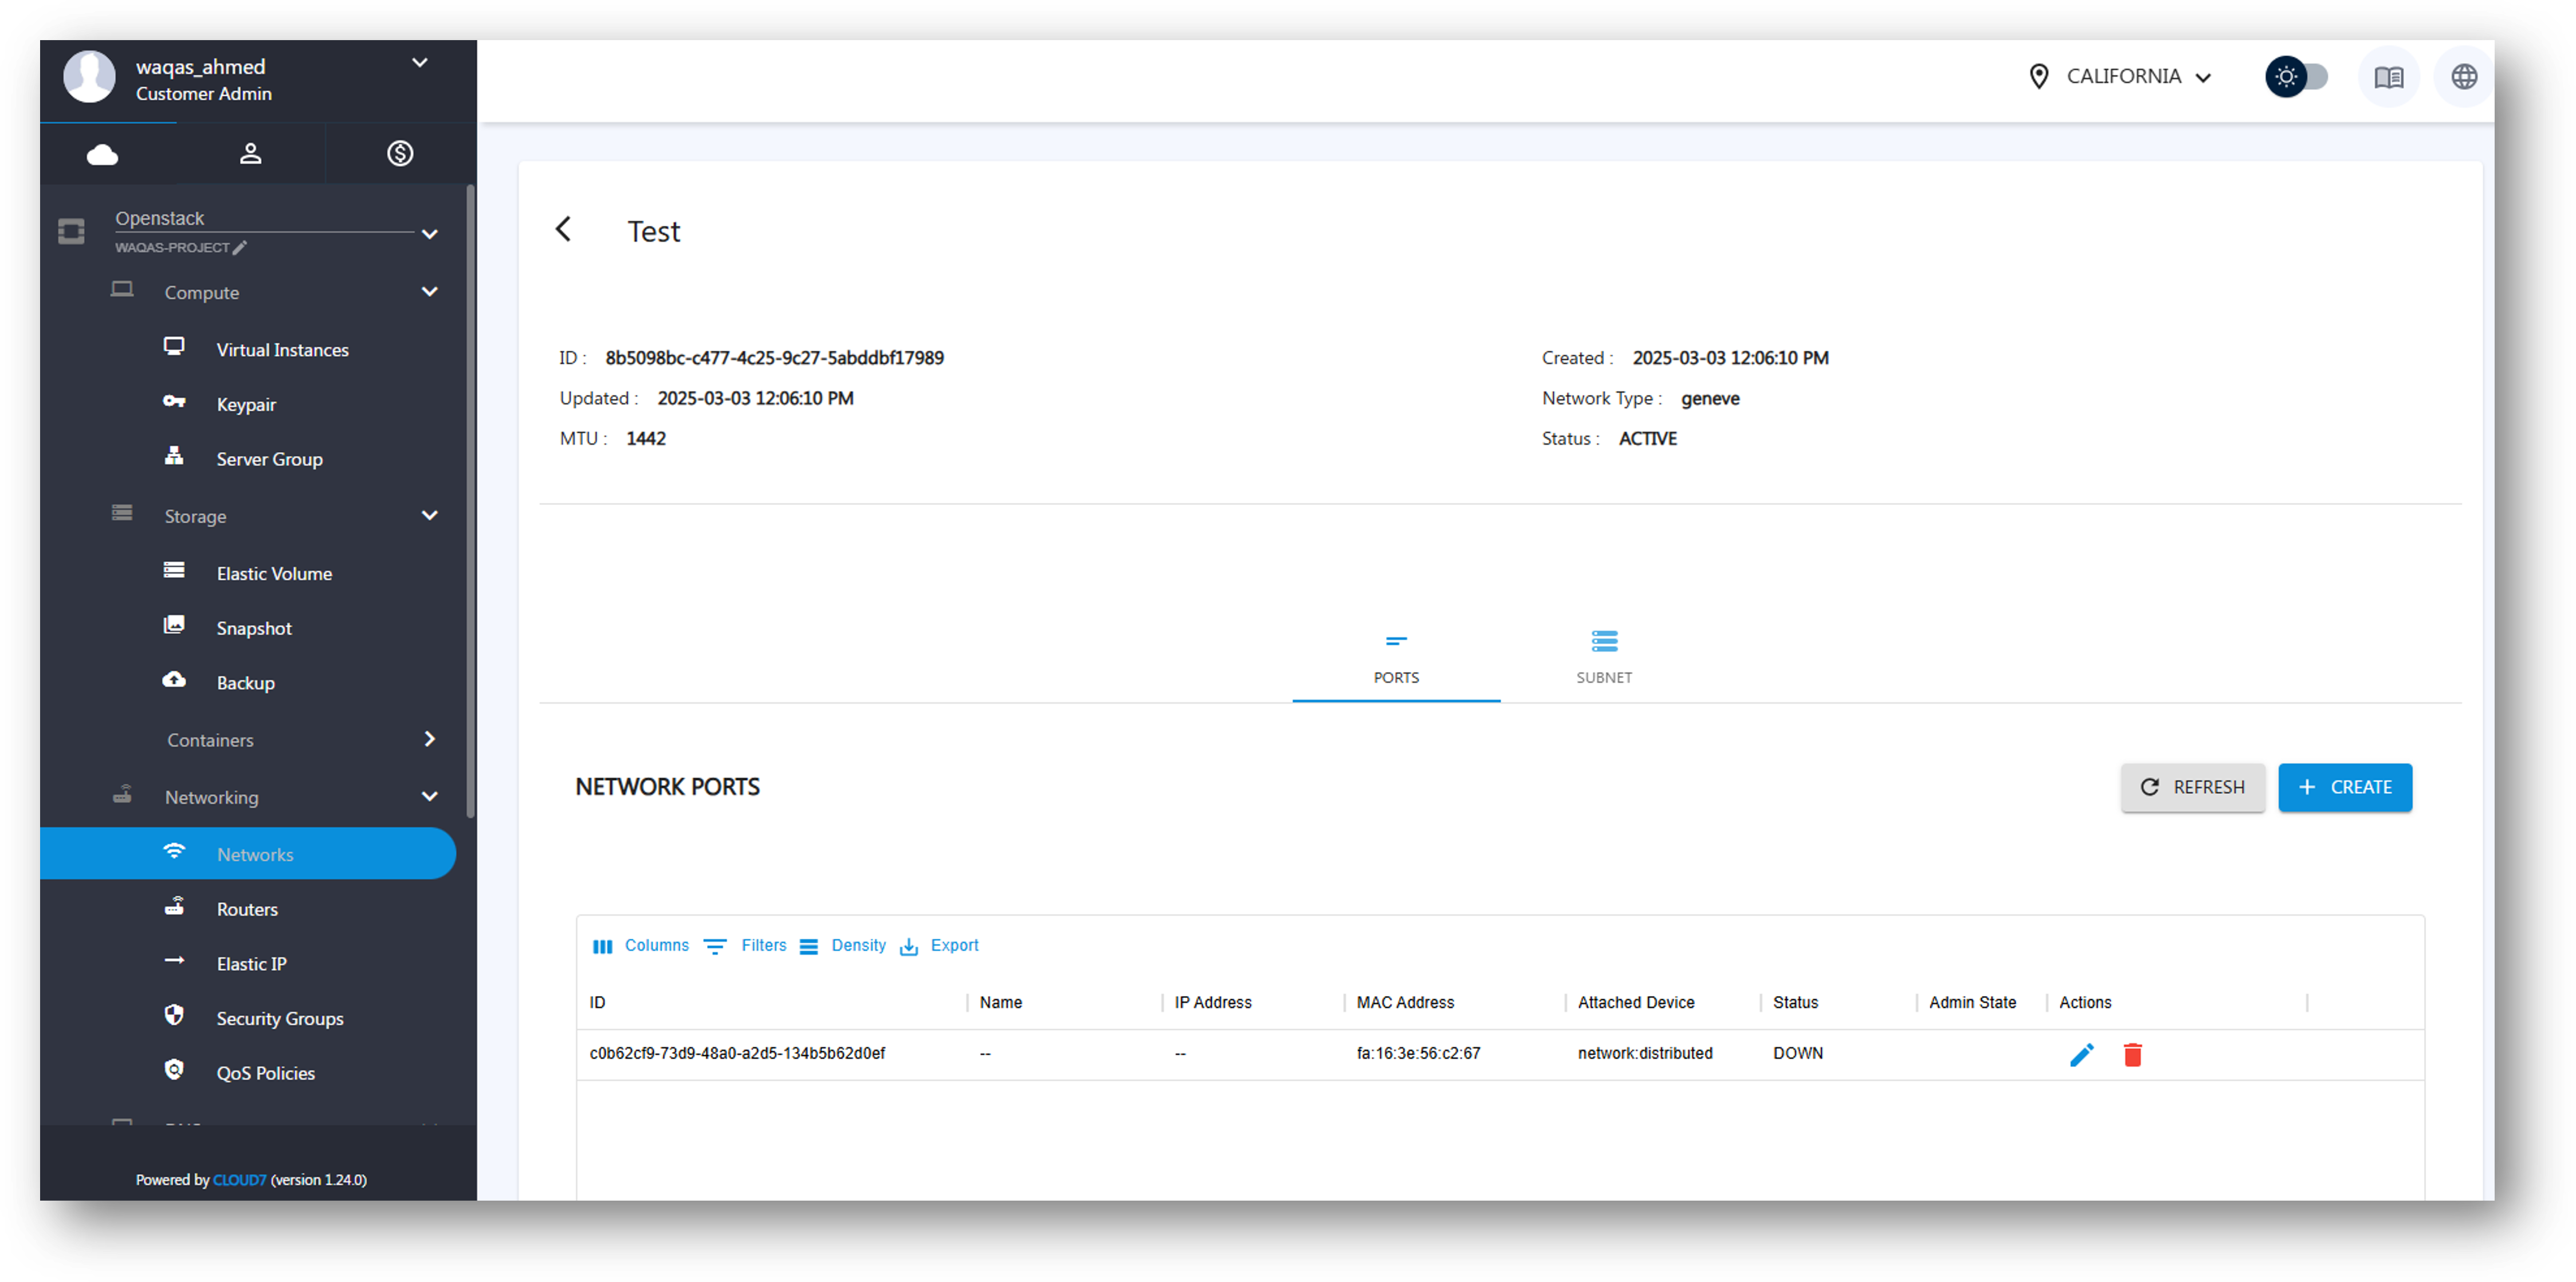
- On the Networks listing page, click on the Network Name.
- The Network Summary Page will display the following information:
- General Network Details (Name, Status, Created At, etc.)
- Associated Subnets
- List of Ports
- Actions for Managing the Network
From this page, users can List, Create, Edit, and Delete Ports and Subnets.
Manage Ports #
Ports facilitate communication between instances and networks.
Create Port #
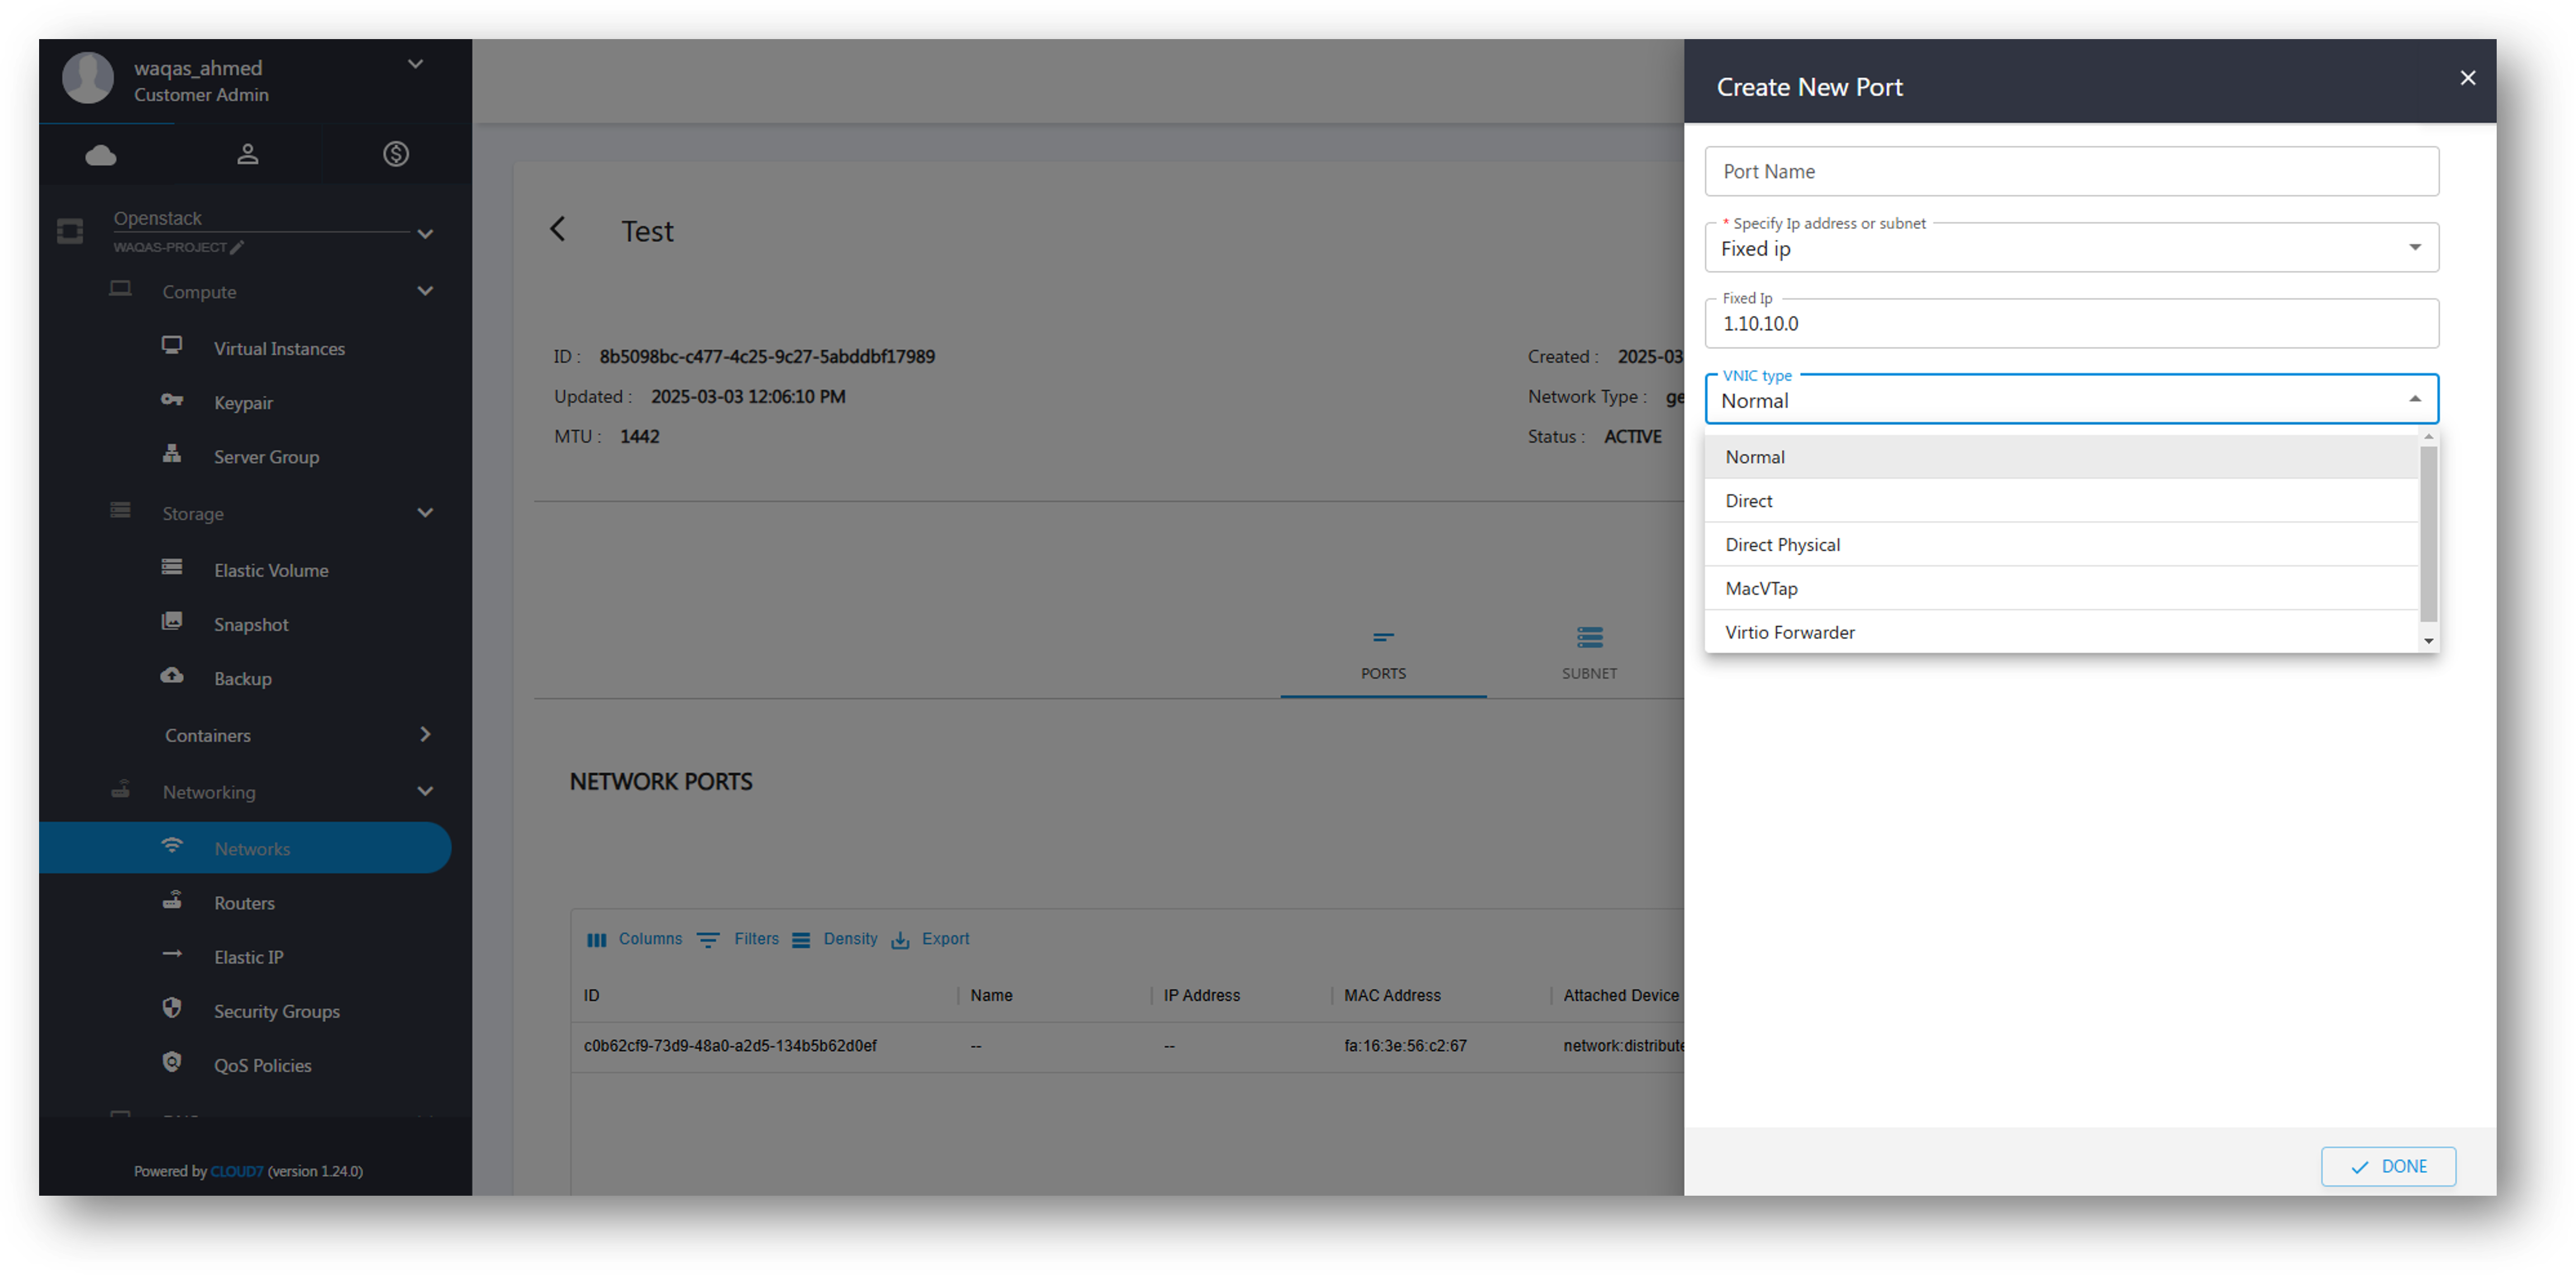
- On the Network Summary Page, navigate to Ports.
- Click Create Port.
- Enter the following details:
- Port Name – Assign a unique name.
- Specify IP Address or Subnet – Choose from:
- Fixed IP – Assign a specific IP address.
- Subnet – Select an existing subnet.
- VNIC Type – Select from:
- Normal – Standard virtual NIC.
- Direct – Direct access to hardware.
- Direct Physical – Physical direct NIC access.
- MACVTap – Ethernet tap for bridging.
- Virtio Forwarder – High-performance packet forwarding.
- Click Create to finalize the port.
Edit Port #
- Navigate to Ports under the Network Summary Page.
- Click Edit next to the desired port.
- Modify the required fields and save changes.
Delete Port #
- Navigate to Ports under the Network Summary Page.
- Click Delete next to the port and confirm.
Manage Subnets #
Subnets define IP address ranges within a network.
Create Subnet #
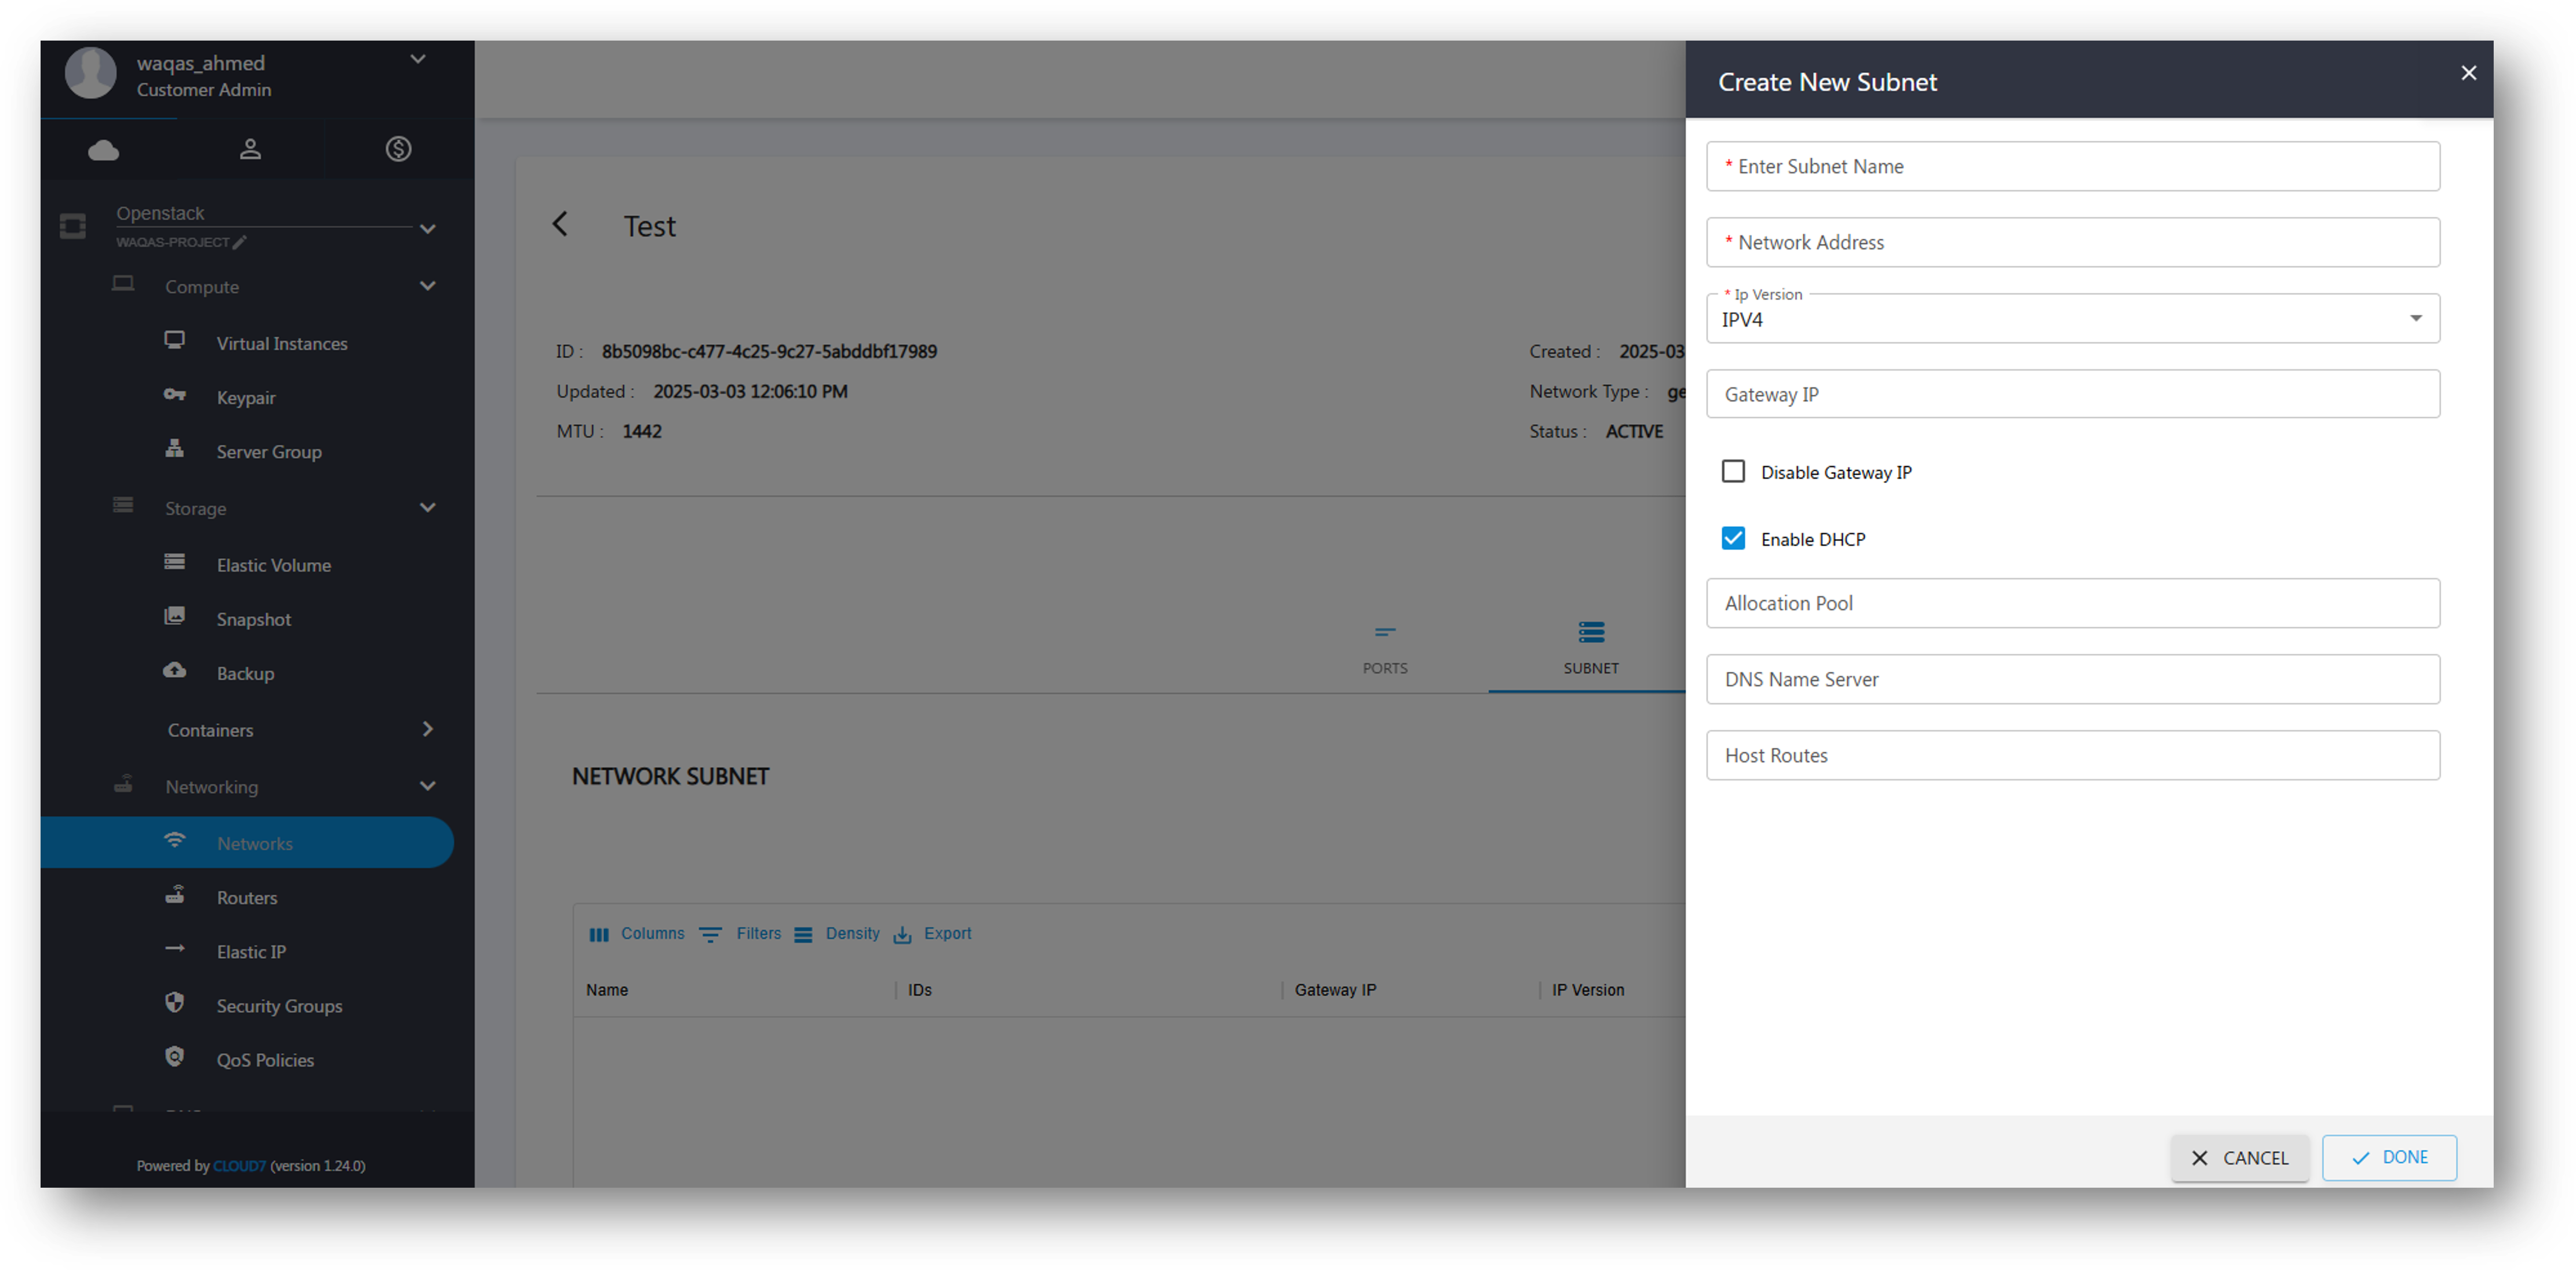
- On the Network Summary Page, navigate to the Subnets section.
- Click Create Subnet.
- Fill in the following fields:
- Subnet Name – Assign a subnet name.
- Network Address – Define the CIDR block (e.g., 10.0.0.0/24).
- IP Version – Choose between IPv4 and IPv6.
- Gateway IP – Enter a gateway IP (or check Disable Gateway if not required).
- Enable DHCP (Checkbox) – Enable or disable DHCP services.
- Allocation Pool – Define IP ranges for allocation.
- DNS Name Servers – Specify DNS server addresses.
- Host Routes – Add specific routing information.
- Click Create to finalize the subnet.
Edit Subnet #
- Go to the Network Summary Page.
- Click on the Subnets section.
- Select Edit next to the desired subnet.
- Update the fields and save the changes.
Delete Subnet #
- Navigate to Subnets on the Network Summary Page.
- Click Actions next to the subnet.
- Select Delete and confirm.