Overview #
Load balancing is essential for distributing incoming network traffic across multiple backend servers to ensure high availability, reliability, and performance. In Cloud7, the Load Balancers module consists of three key components:
- Load Balancers – The main entry point that distributes traffic.
- Listeners – Define how traffic is received on the load balancer.
- Pools – A group of backend servers that handle the requests.
A Pool is a collection of backend servers that process requests forwarded by the Listener. The Load Balancer distributes traffic to the servers in a Pool based on the configured Load Balancing Algorithm.
List Pools #
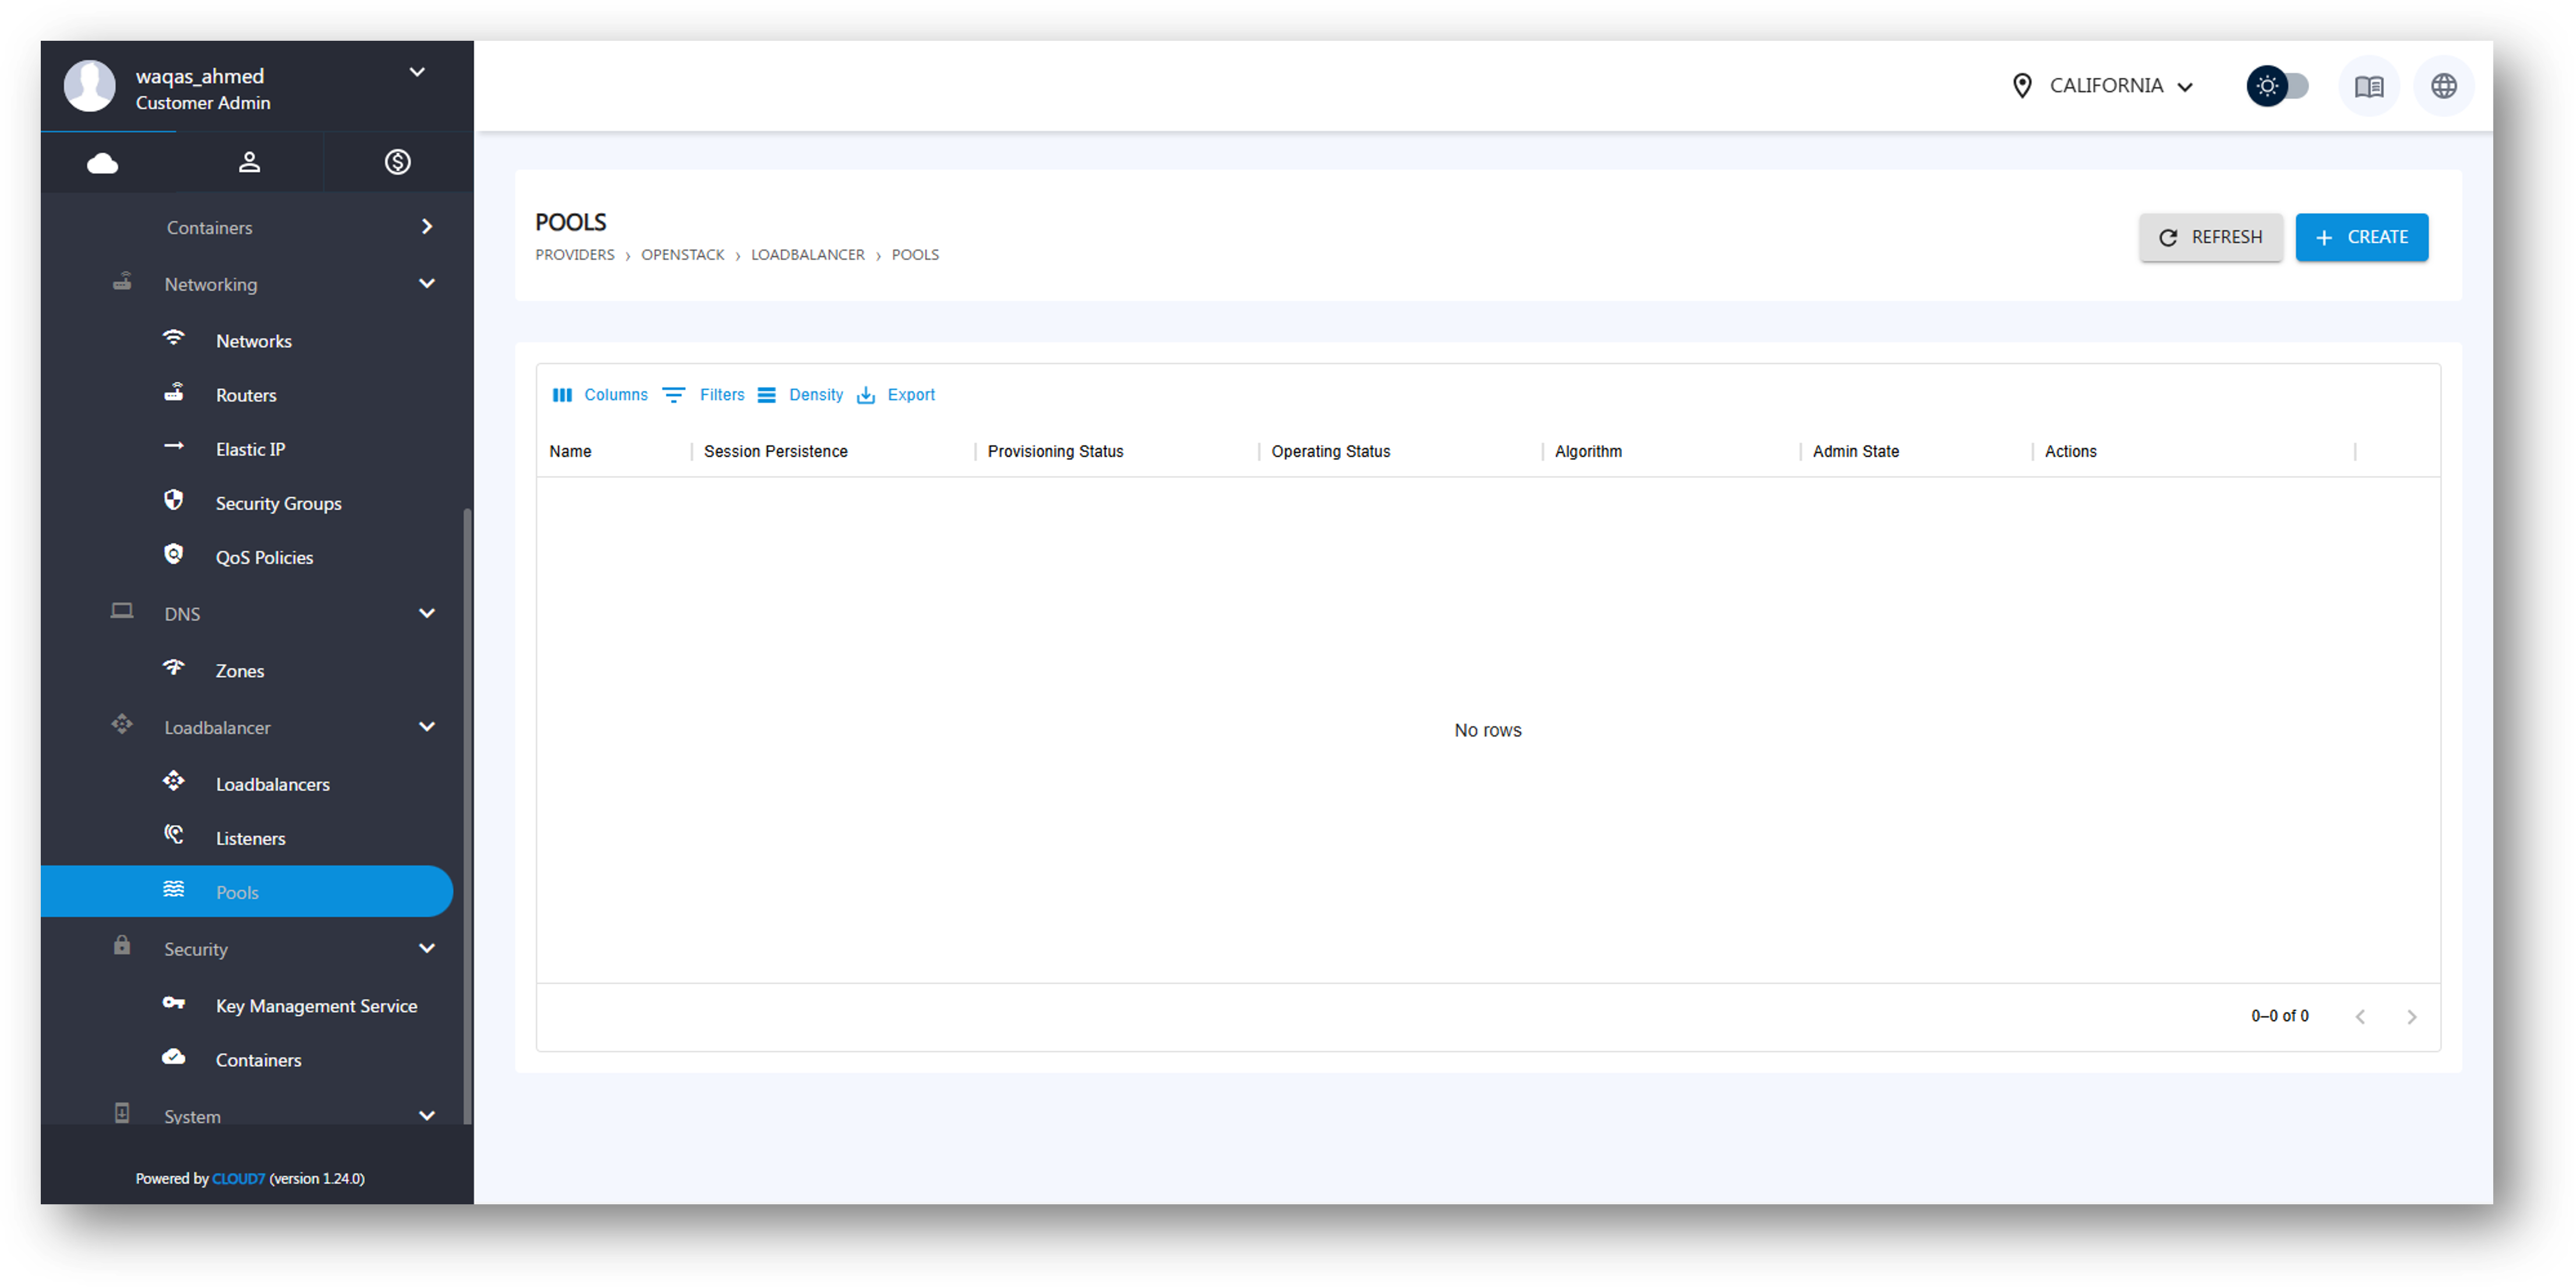
The Pools listing page includes:
- Login to Cloud7.
- Navigate to Providers >> <Provider Name> >> Networking >> Pools under customer menu and all the existing Pools will list with the following column attributes:
- Name – Identifies the Pool.
- Session Persistence – Determines if sessions remain with the same backend.
- Provisioning Status – Displays provisioning progress.
- Operating Status – Indicates whether the Pool is operational.
- Algorithm – Defines the load-balancing strategy.
- Admin State – Shows if the Pool is active.
- Actions – Options to manage or delete the Pool.
Create Pool #
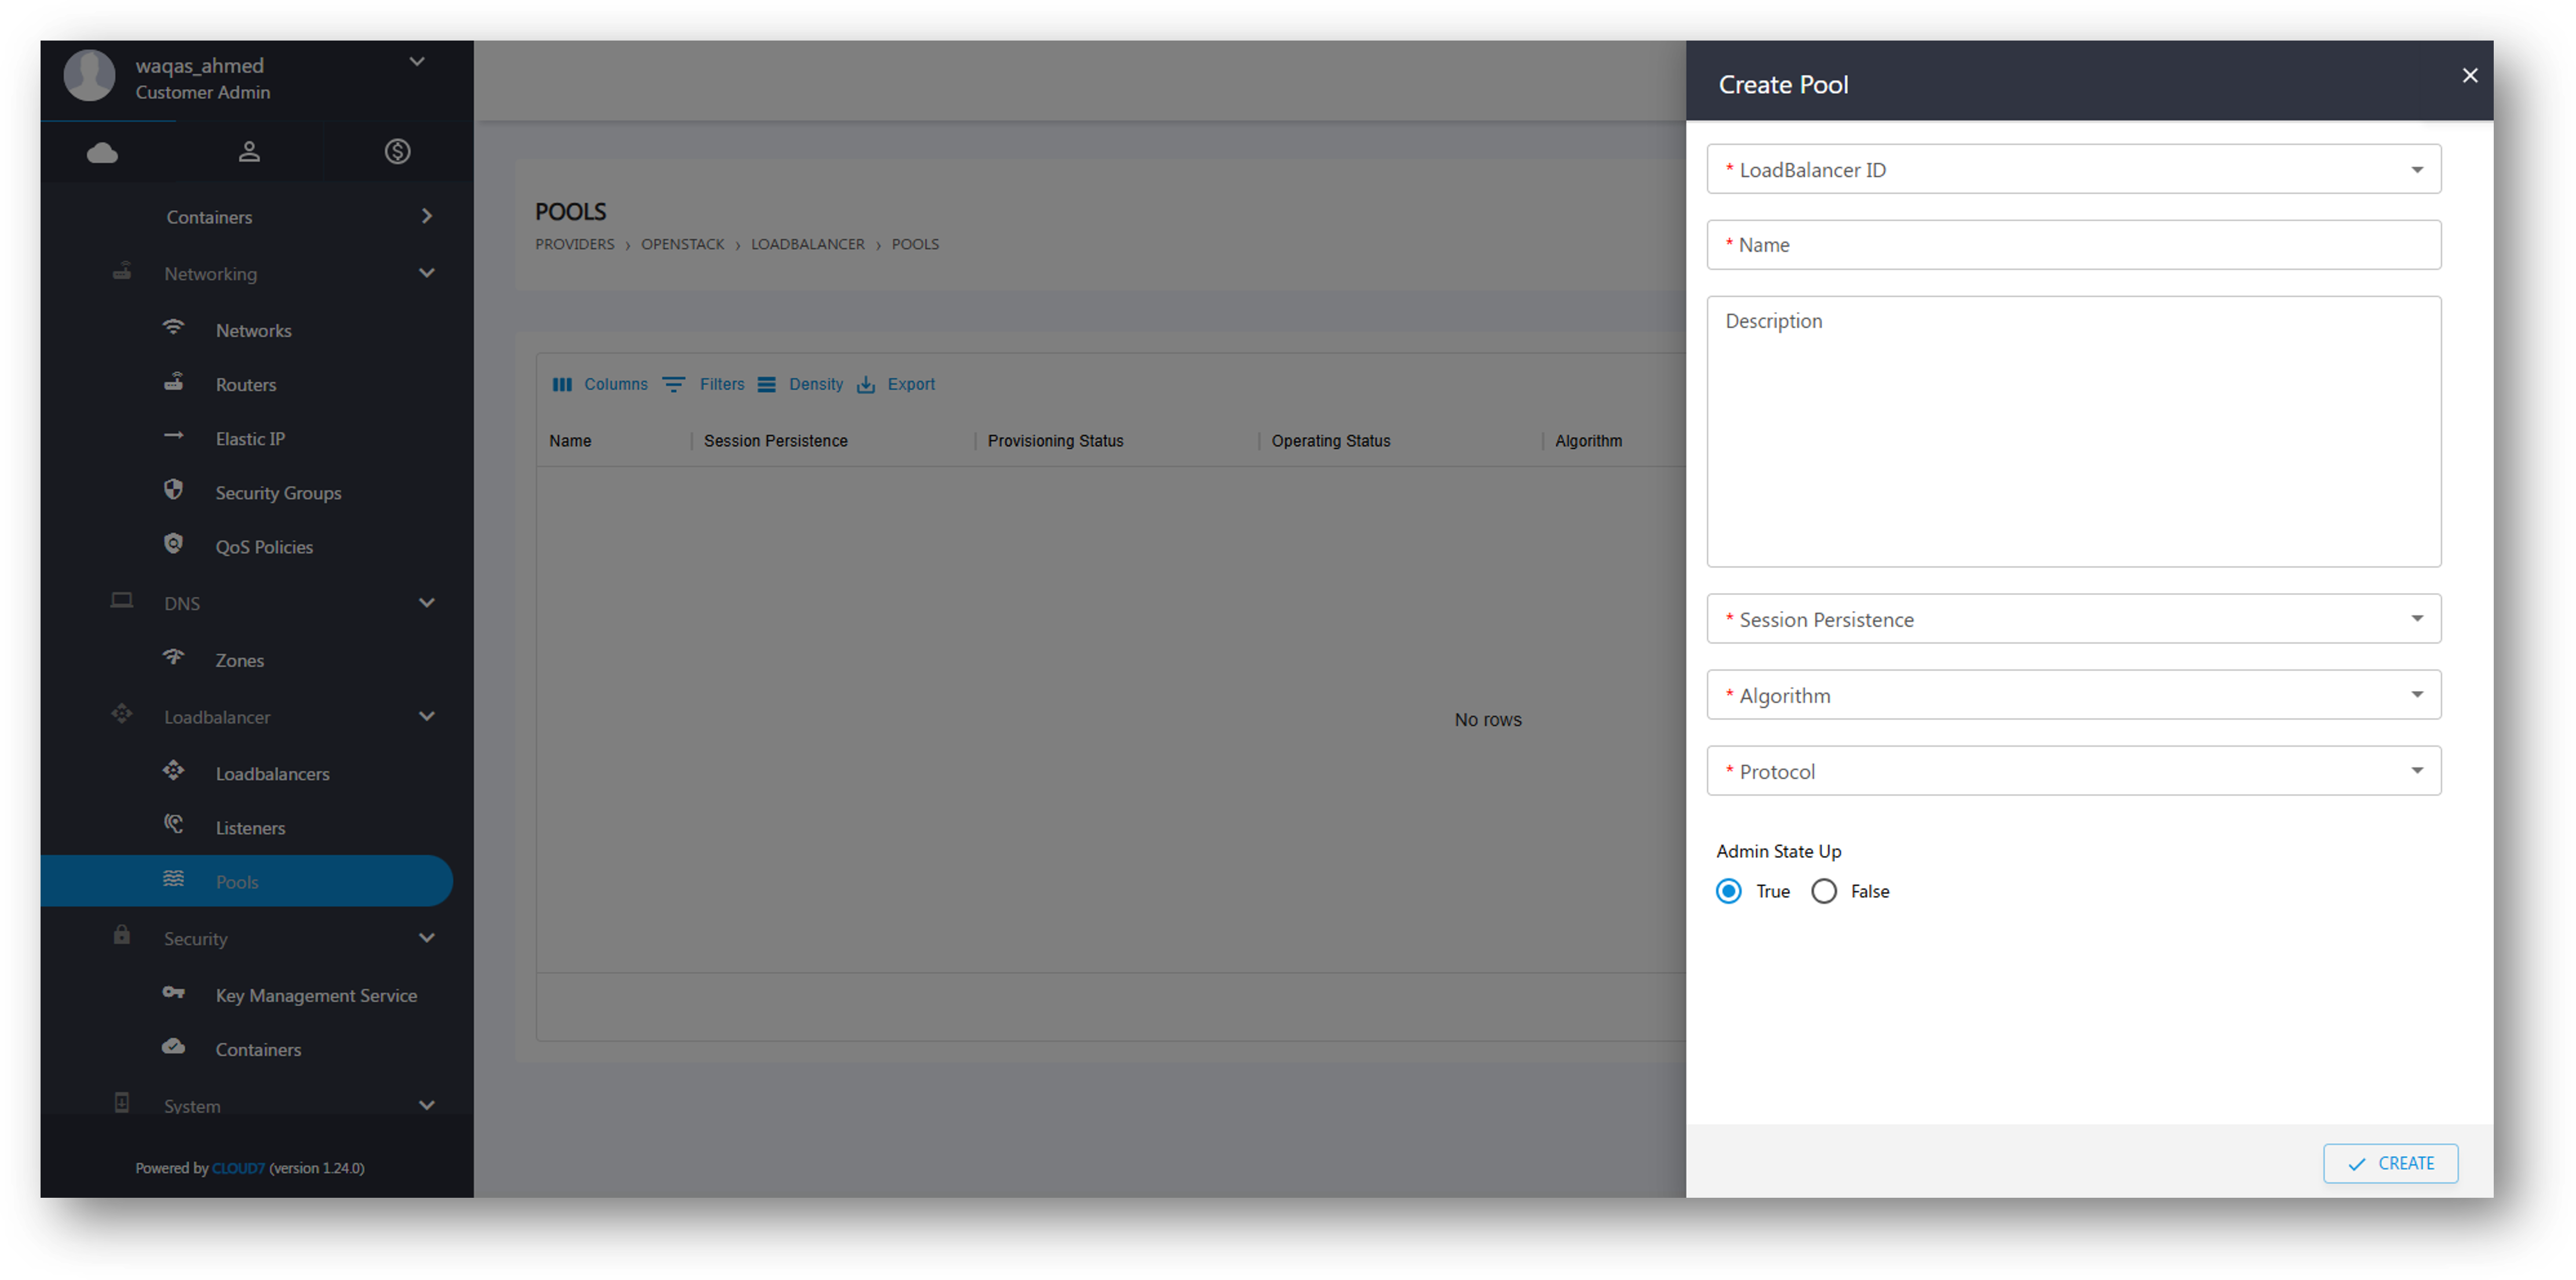
To create a new Pool:
- Click Create Pool.
- Provide the required details:
- Load Balancer ID – Select the Load Balancer for the Pool.
- Name – Assign a name to the Pool.
- Description – Add an optional description.
- Session Persistence – Choose a session persistence method.
- Algorithm – Select the load balancing algorithm:
- Round Robin – Distributes requests evenly.
- Least Connections – Sends traffic to the least busy server.
- Source IP – Ensures clients connect to the same backend.
- Protocol – Choose a network protocol (e.g., HTTP, HTTPS, TCP).
- Admin State Up – Toggle between True (Active) and False (Inactive).
- Click Create to provision the Pool.