Routers in Cloud7 enable network traffic routing between different subnets and external networks. They serve as essential components for managing communication between private and public networks. This guide provides detailed instructions on listing, creating, editing, deleting routers, and managing interfaces and routes.
Routers are critical for network connectivity, external communication, and traffic routing within OpenStack environments. By following this guide, users can efficiently create, manage, and configure routers, interfaces, and routes to build an optimized cloud network.
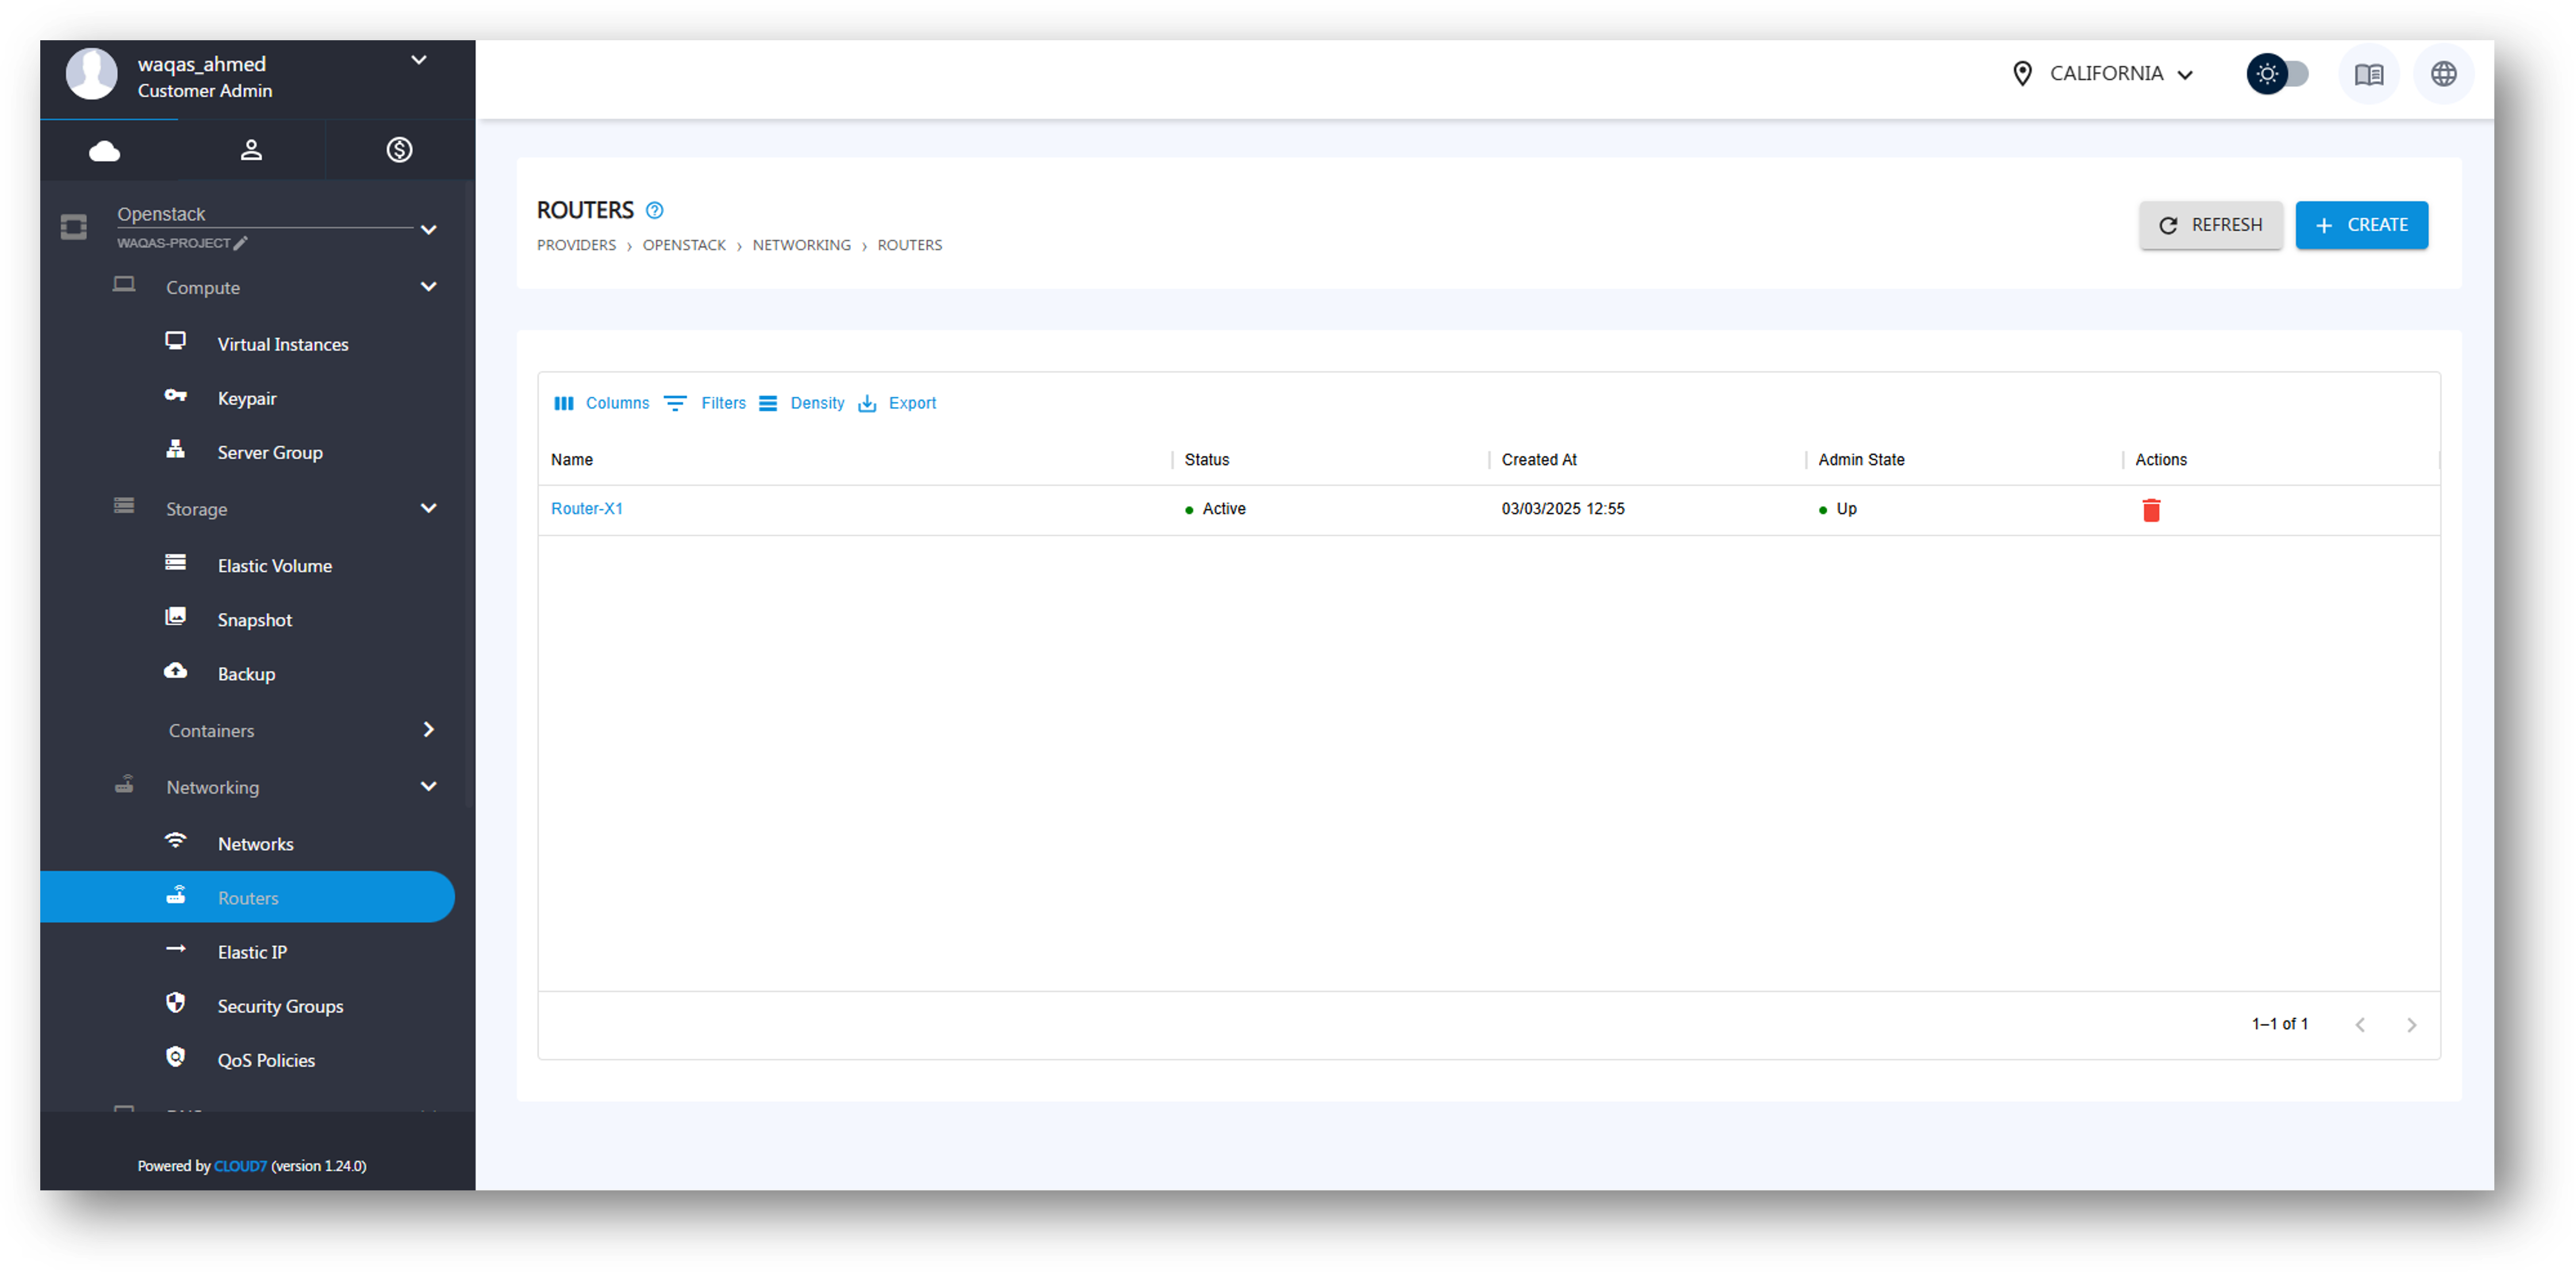
List Routers #
- Login to the Cloud7 customer portal.
- Navigate to Providers >> OpenStack >> Networking >> Routers.
- The Routers Listing Page displays all available routers with the following details:
- Name – The name assigned to the router.
- Status – The current state (e.g., Active, Down, or Error).
- Created At – The timestamp when the router was created.
- Admin State – Indicates whether the router is enabled or disabled.
- Actions – Options for managing the router.
Create Router #
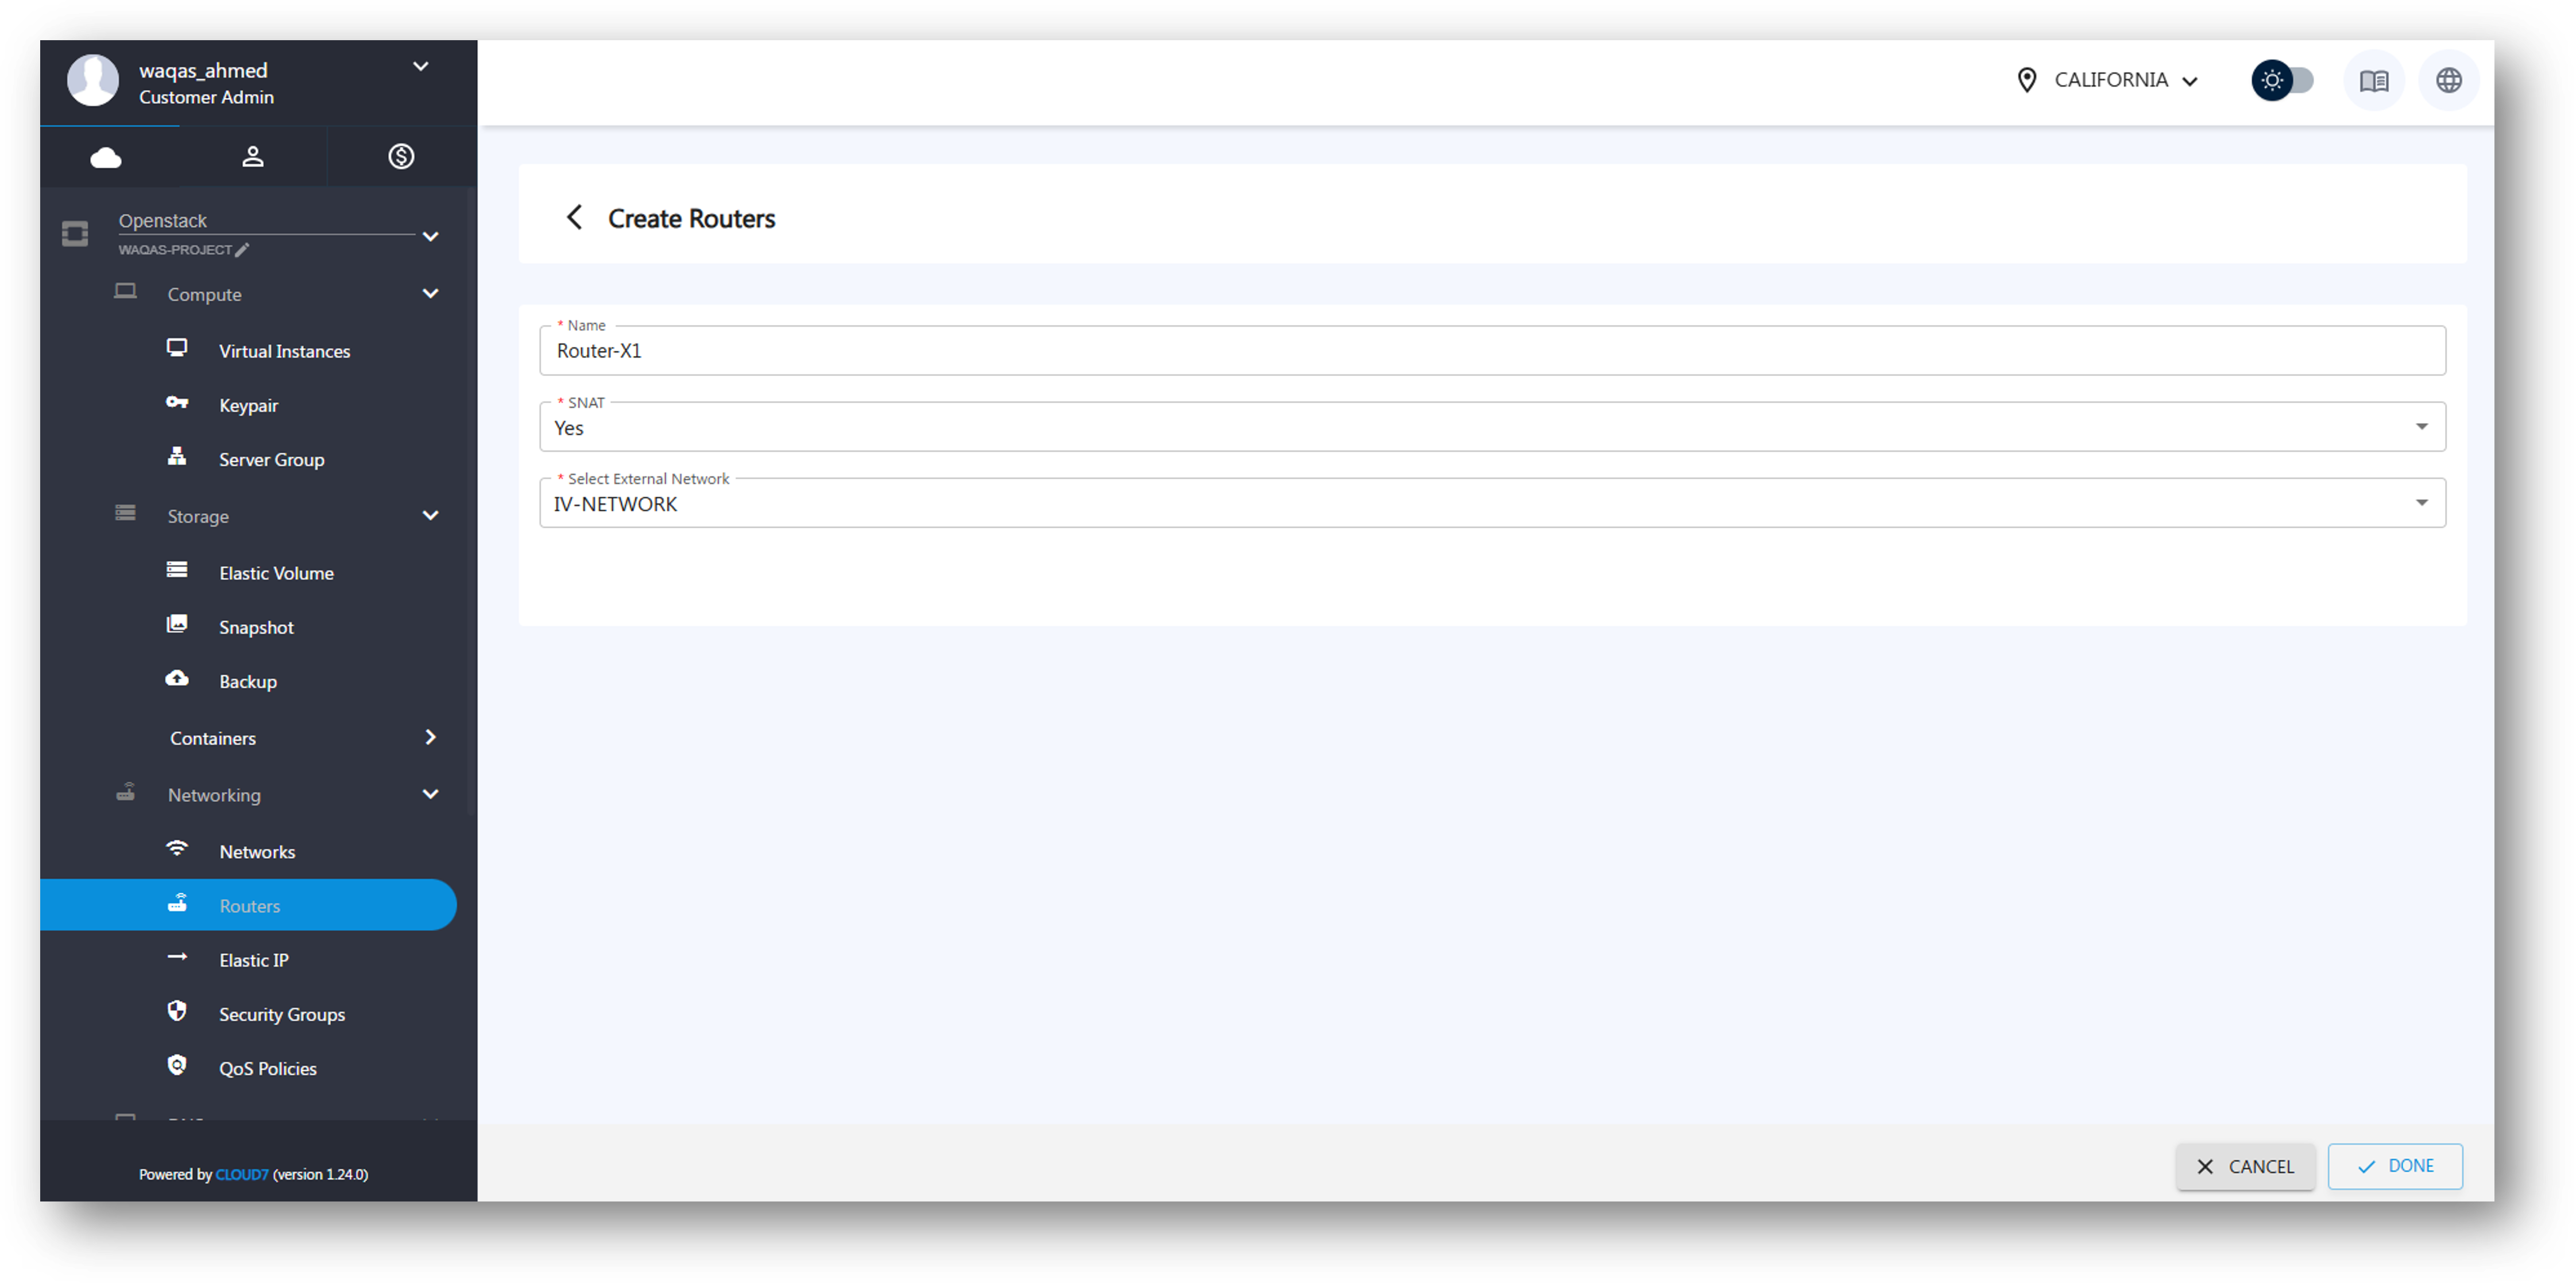
To create a new router, follow these steps:
-
On the Routers Listing Page, click the Create Router button.
-
Fill in the following details:
- Name – Enter a name for the router.
- SNAT (Source Network Address Translation) – Select Yes or No:
- Yes – Enables SNAT, allowing internal instances to communicate externally.
- No – Disables SNAT, useful for private networks or VPN-based configurations.
- Select External Network – Choose an external network from the drop-down list.
-
Click Create to finalize the router creation.
Edit Router #
- Navigate to Providers >> OpenStack >> Networking >> Routers.
- Click on the Actions menu beside the router.
- Select Edit to modify the router configuration.
- Update the required fields and save the changes.
Delete Router #
- Navigate to Providers >> OpenStack >> Networking >> Routers.
- Click on the Actions menu beside the router.
- Select Delete and confirm the deletion.

Viewing Router Details #
- On the Routers Listing Page, click on a Router Name to open the Router Details Page.
- This page displays:
- General Router Information (Name, Status, Admin State, etc.).
- A list of attached interfaces.
- A list of defined routes.
- Options to List, Create, and Delete Interfaces and Routes.
Manage Router Interfaces #
Router interfaces connect subnets to the router, enabling internal communication between network resources.
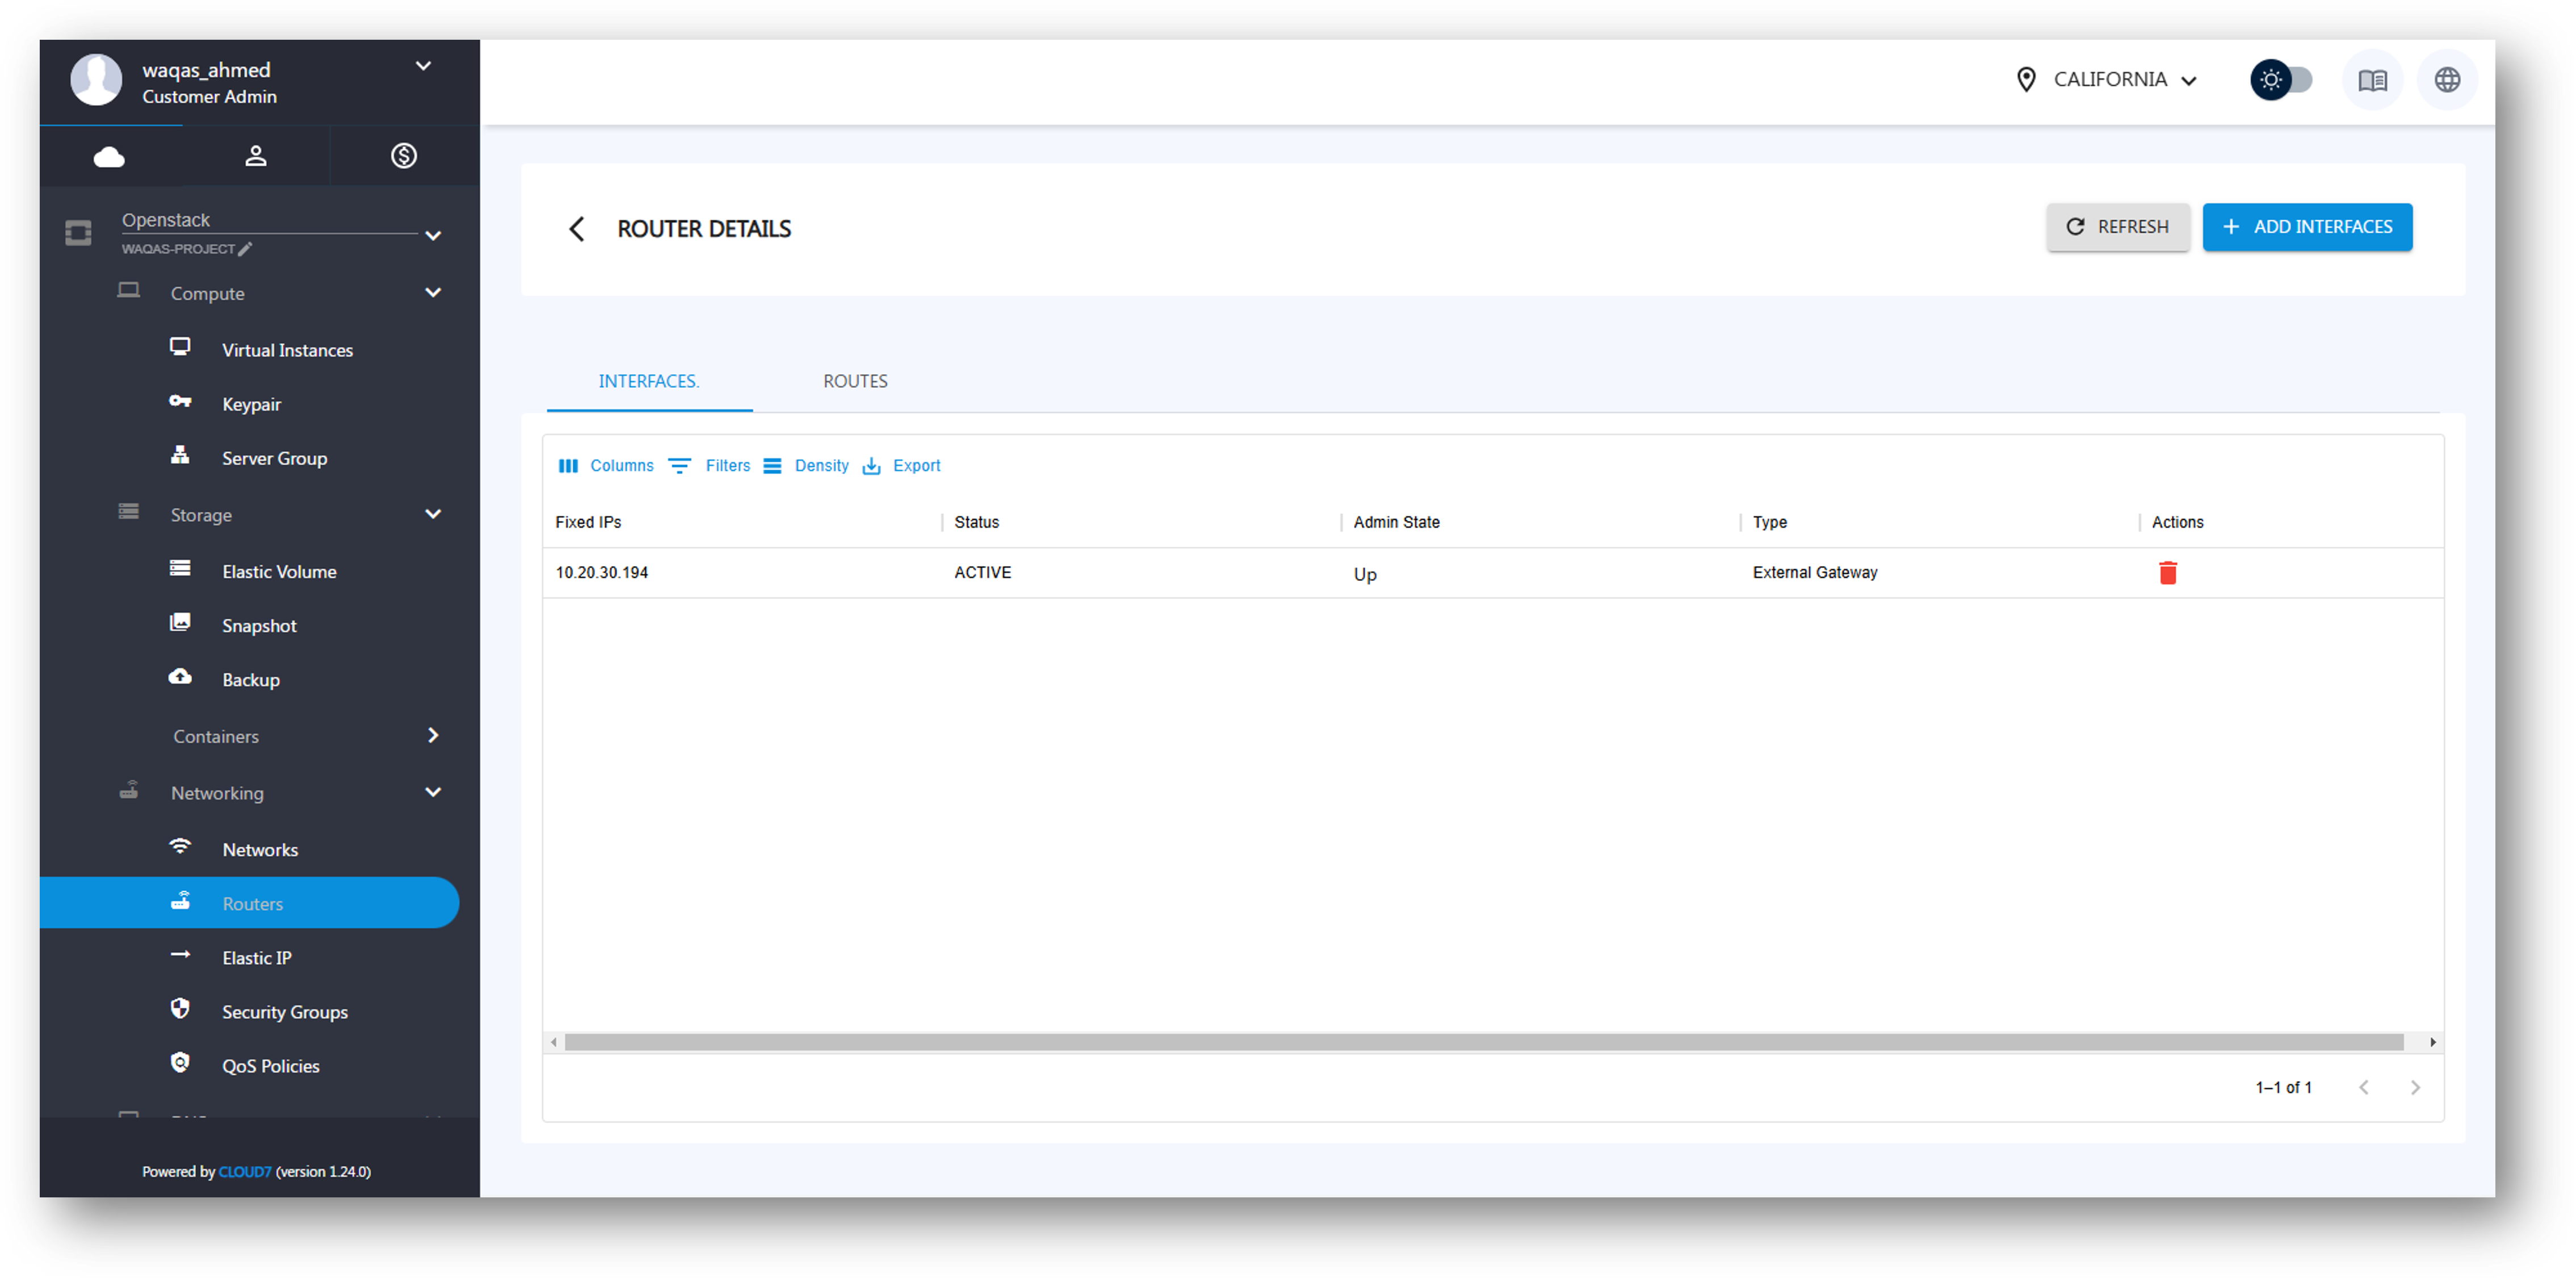
List Interfaces #
- Open the Router Details Page.
- Scroll to the Interfaces Section to view the list of connected interfaces.
Add Interface #
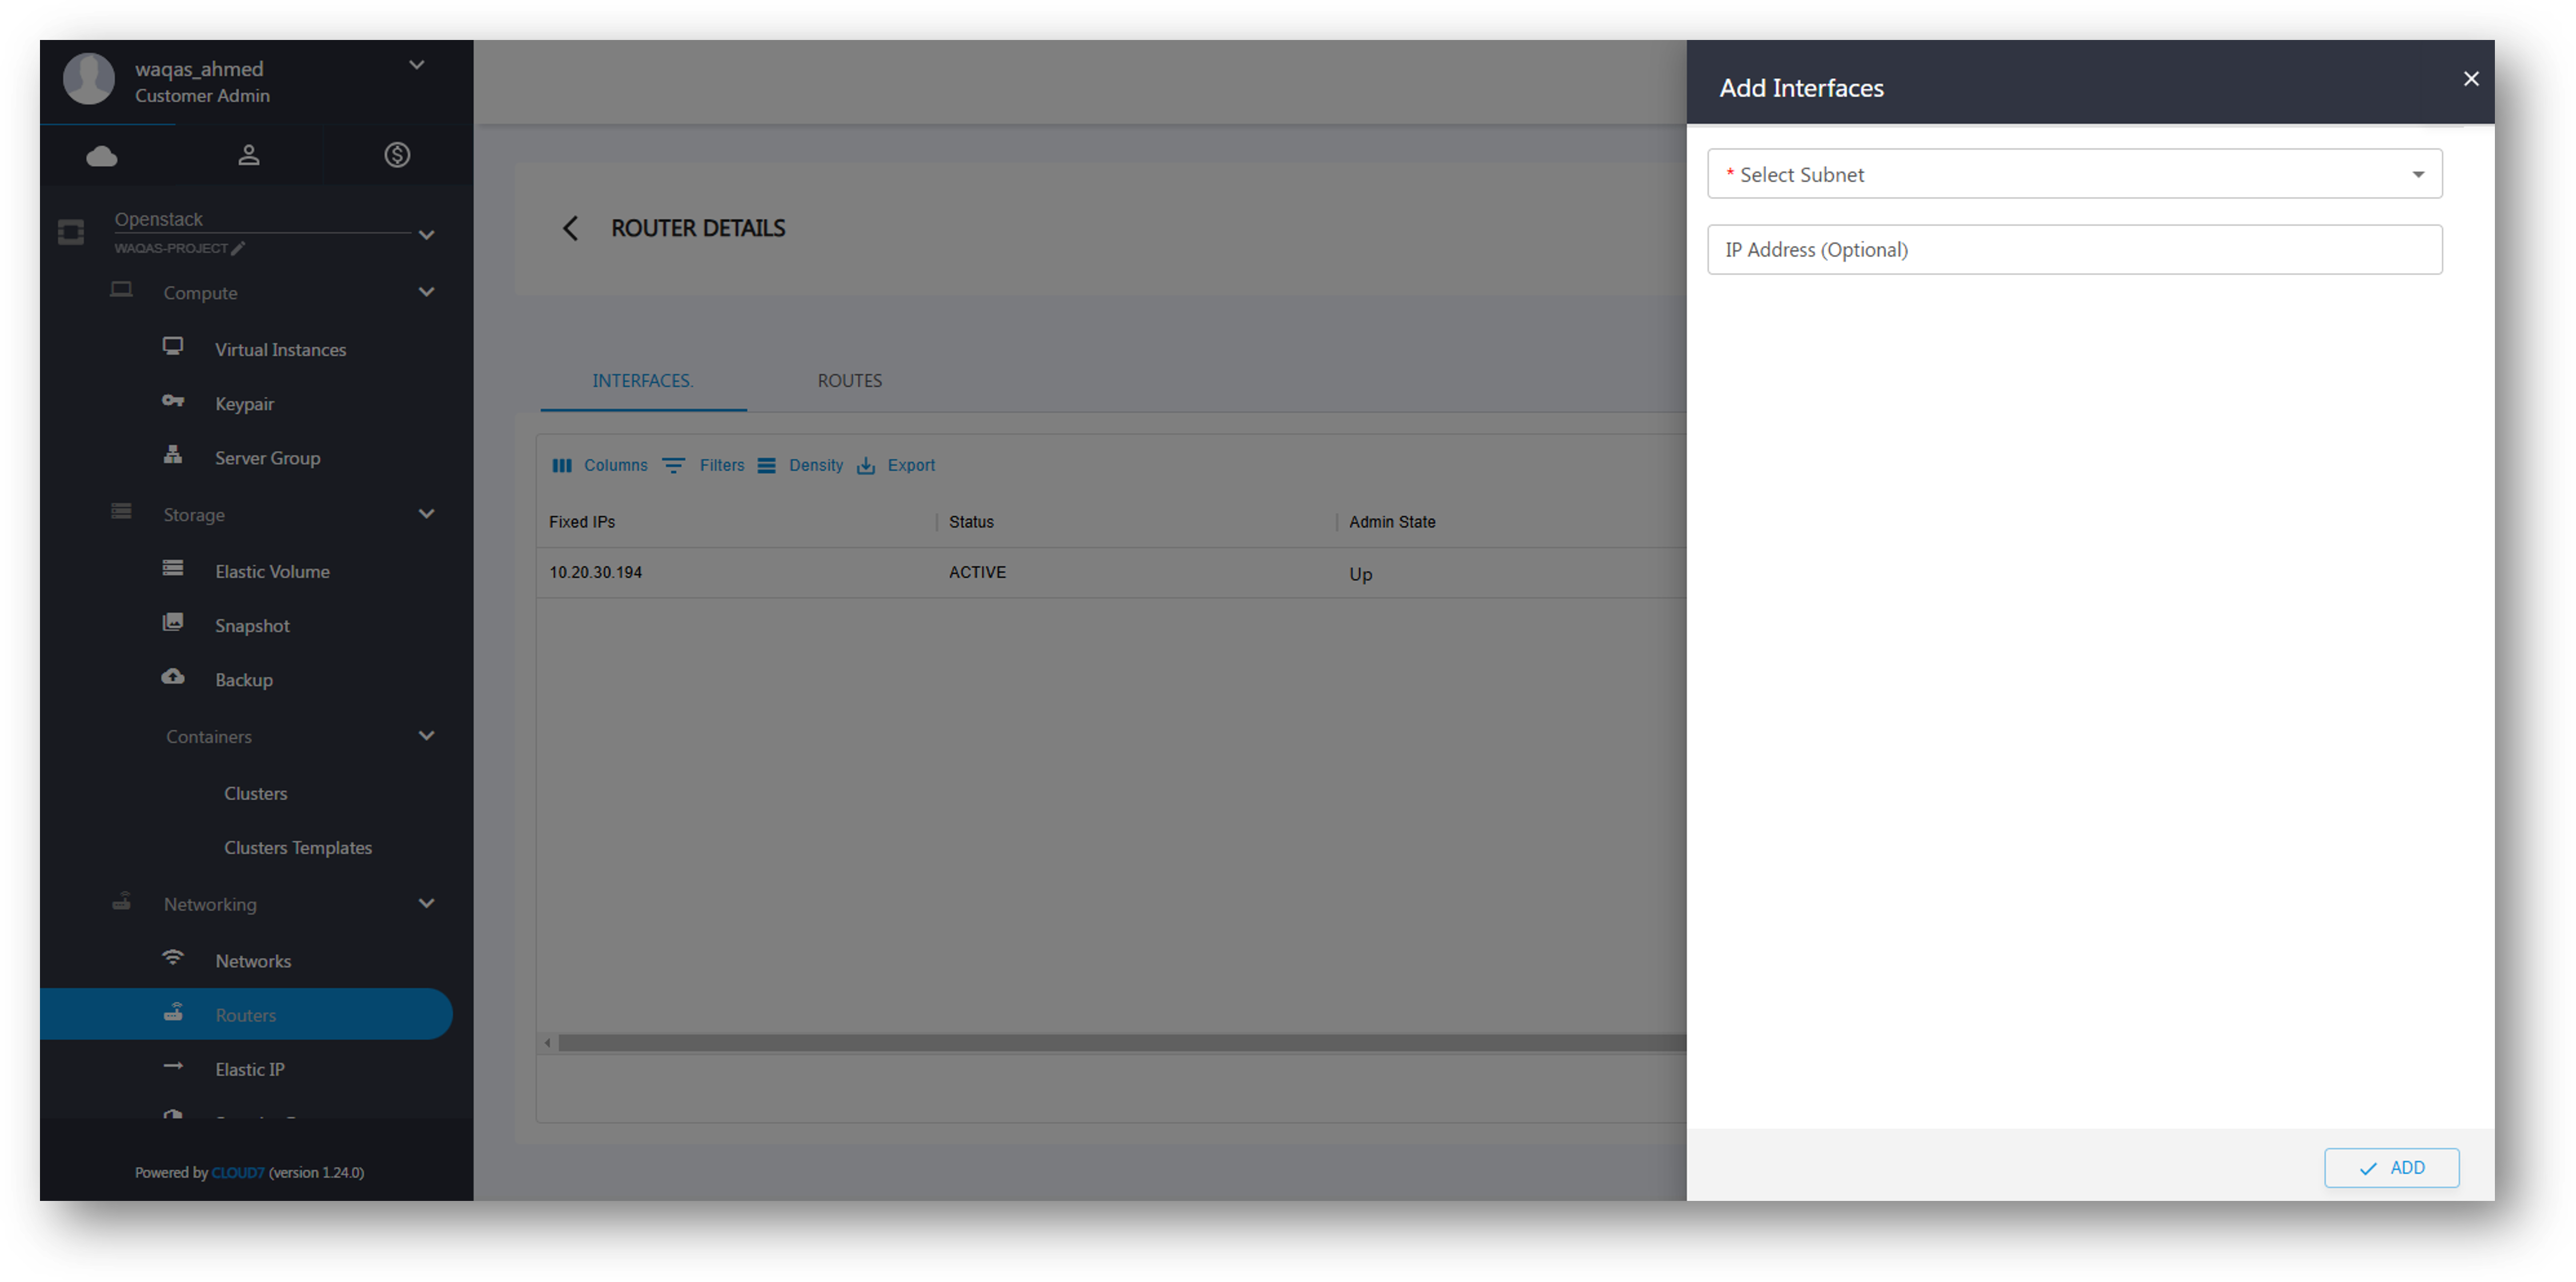
- On the Router Details Page, navigate to the Interfaces Section.
- Click Add Interface.
- A drawer opens with the following fields:
- Select Subnet – Choose a subnet from the available list.
- IP Address (Optional) – Assign a specific IP address to the interface.
- Click Add Interface to complete the process.
Delete Interface #
- Navigate to the Interfaces Section on the Router Details Page.
- Click Delete next to the interface you want to remove.
- Confirm the deletion.
Manage Router Routes #
Routes define custom traffic forwarding rules, allowing advanced network routing between different subnets and external networks.
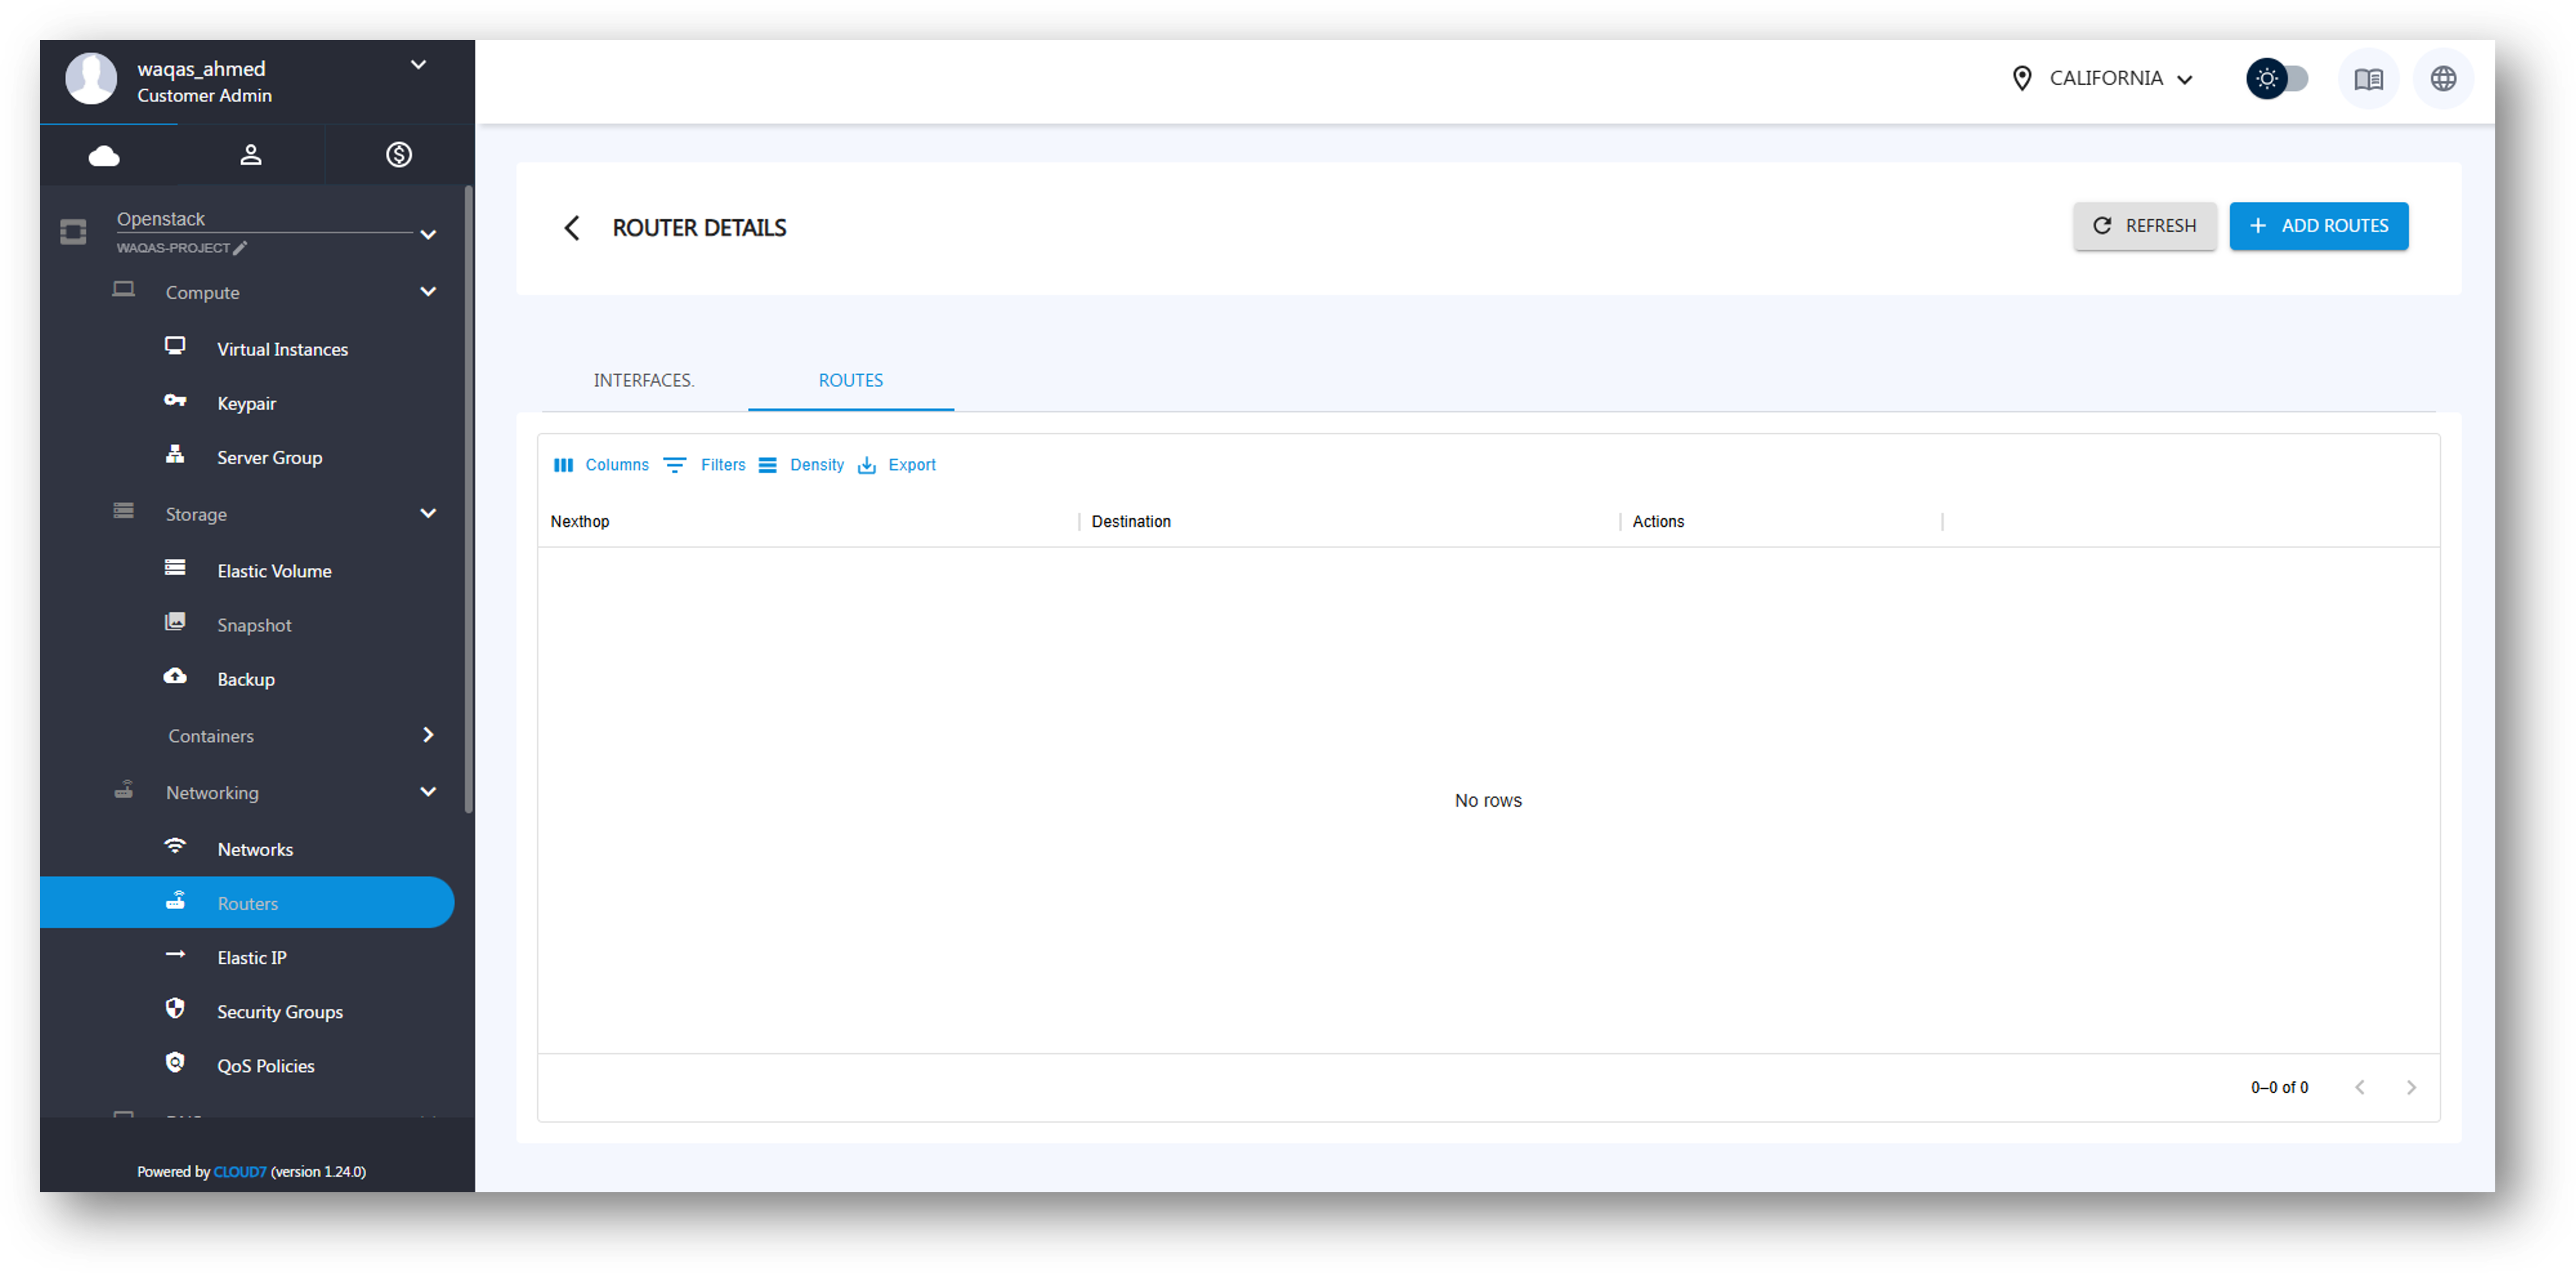
List Routes #
- Open the Router Details Page.
- Scroll to the Routes Section to view the list of defined routes.
Add Route #

- On the Router Details Page, navigate to the Routes Section.
- Click Add Route.
- A drawer opens with the following fields:
- CIDR – Enter the destination network in CIDR format (e.g., 192.168.2.0/24).
- Next Hop – Specify the next-hop IP address that will forward traffic to this destination.
- Click Add Route to finalize.
Delete Route #
- Navigate to the Routes Section on the Router Details Page.
- Click Delete next to the route you want to remove.
- Confirm the deletion.